iOS Setup
Push Notifications
Requires SDK 4.11.0
This guide walks you through setting up the Rover SDK in your app to enable push notifications.
Initial Setup
Enable Notifications Capability
The first step is to add the Push Notifications feature to your App ID and the Push Notifications entitlement to your app. This is done from within Xcode. Open your Xcode project or workspace and select your app from the Project navigator. Then select your app's target and the "Signing & Capabilities" tab. Then press the "+ Capability" button to add a new capability.
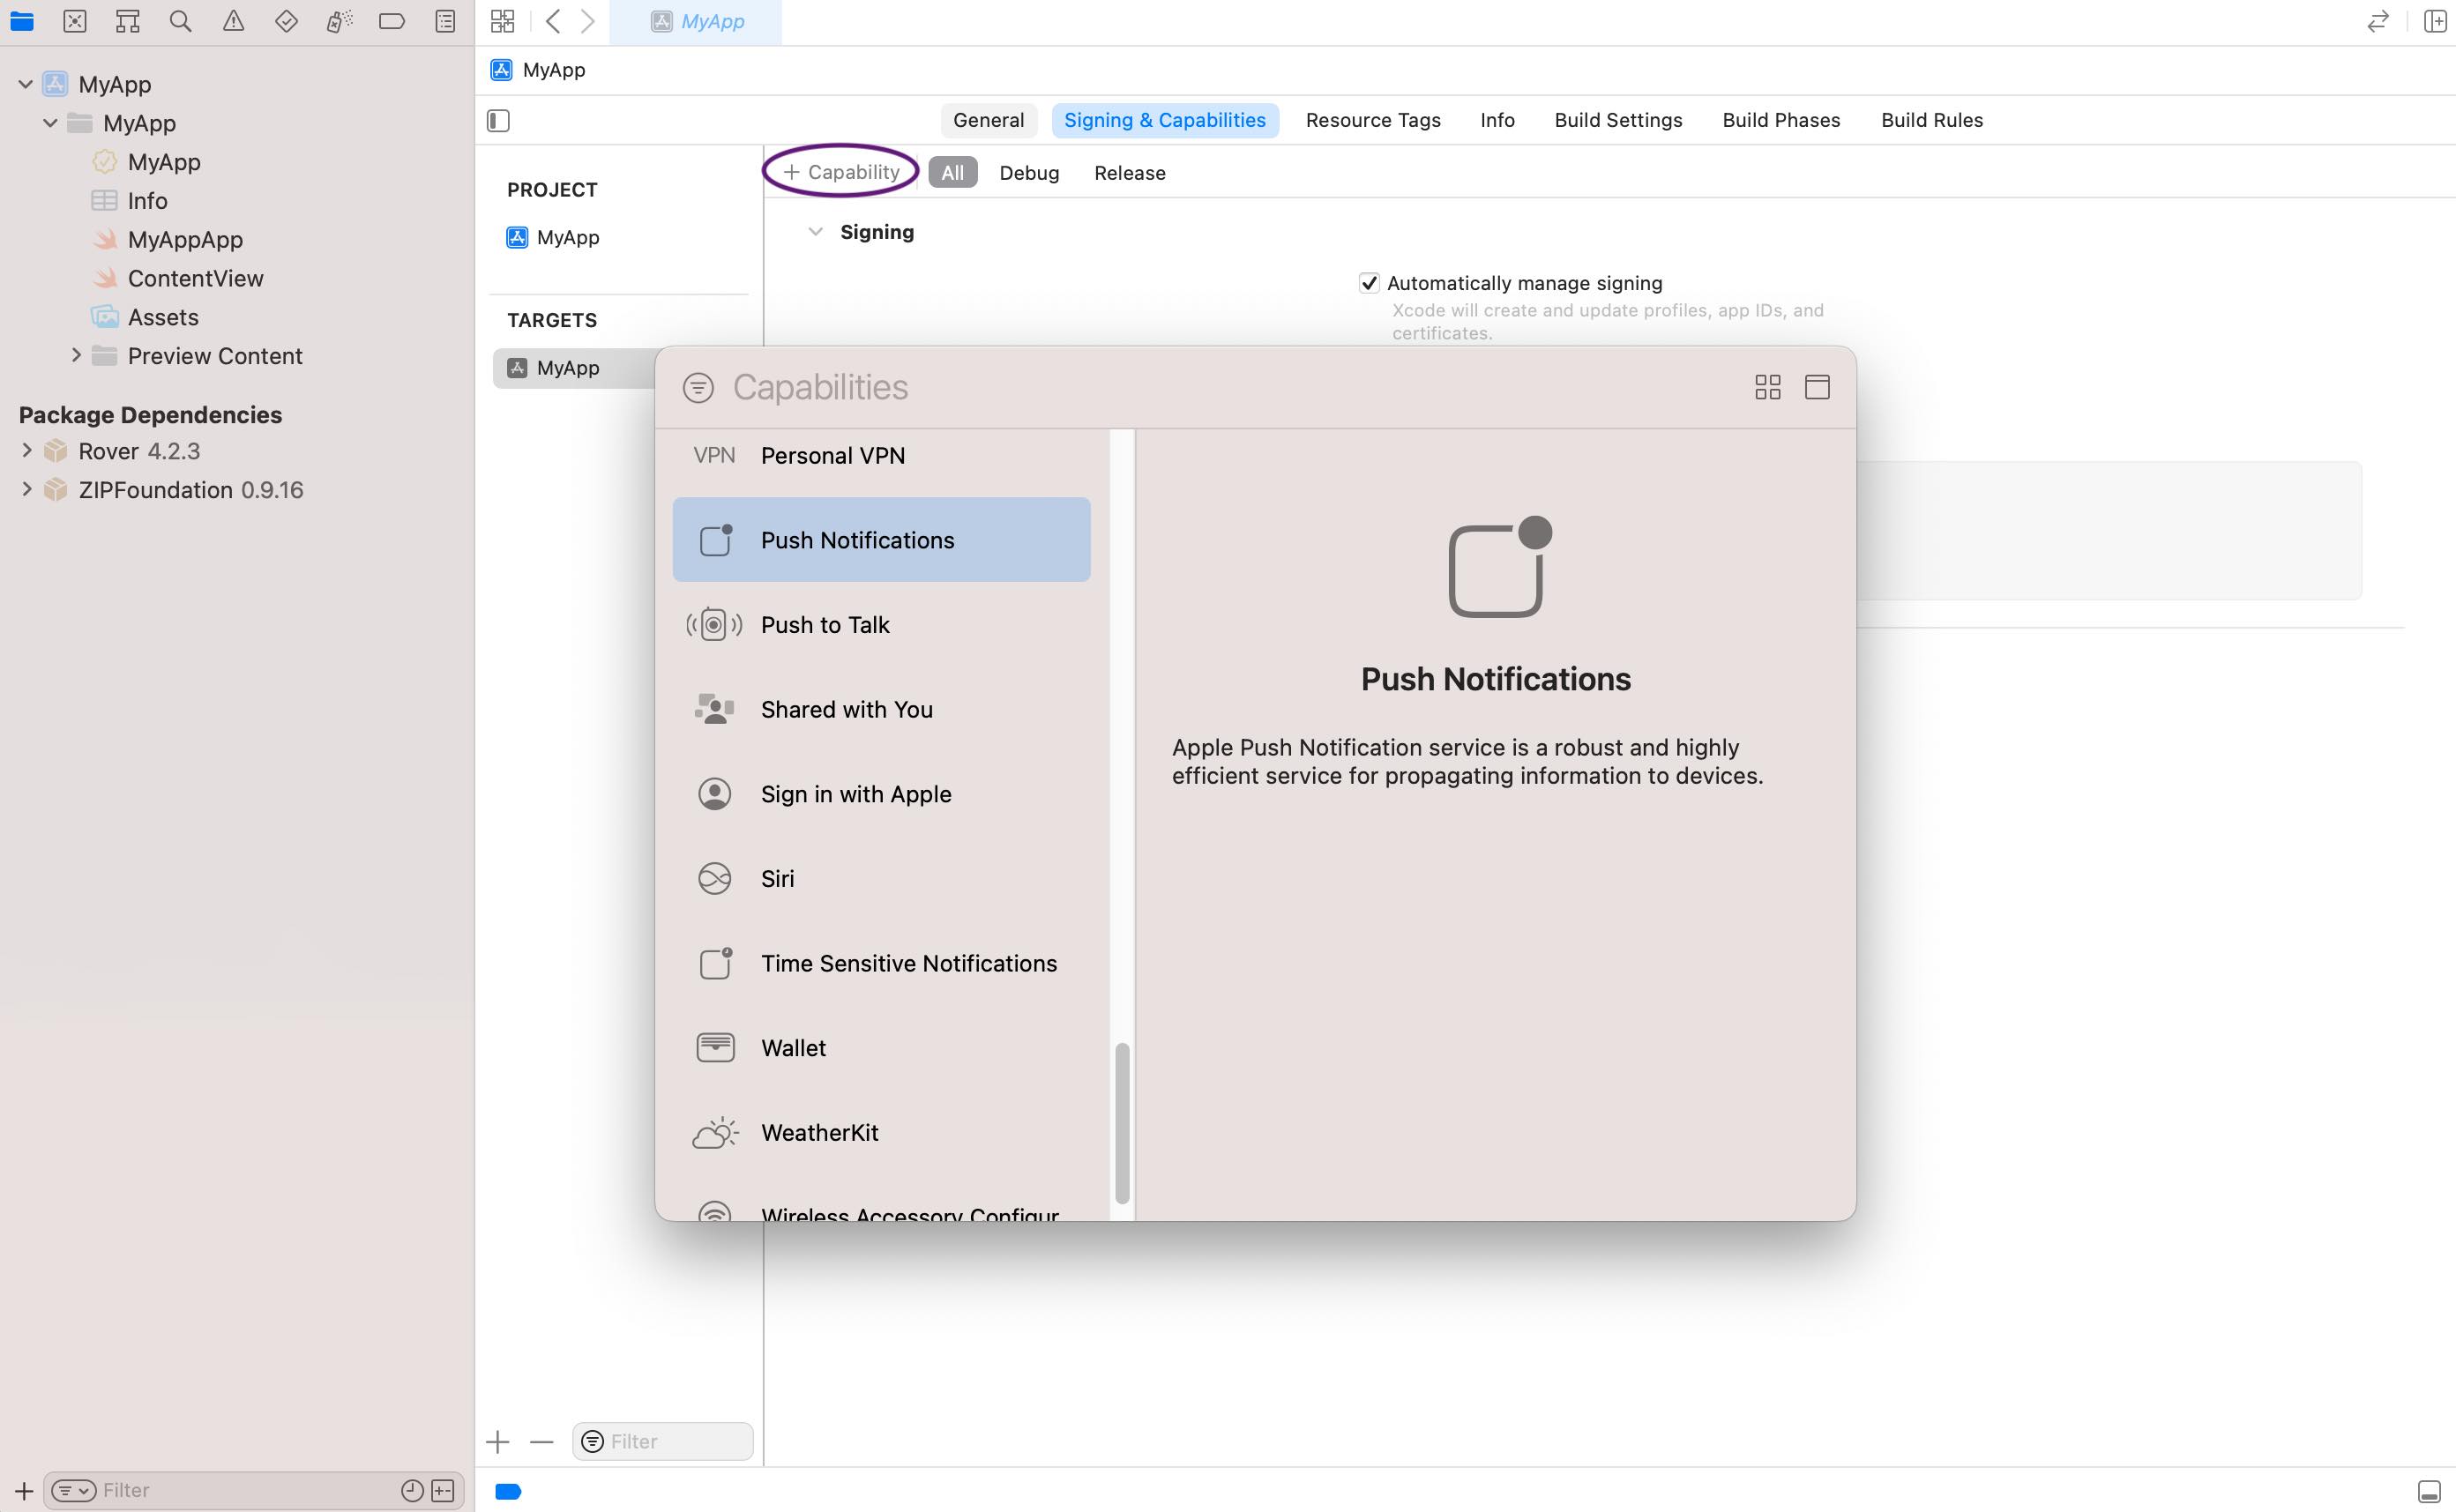
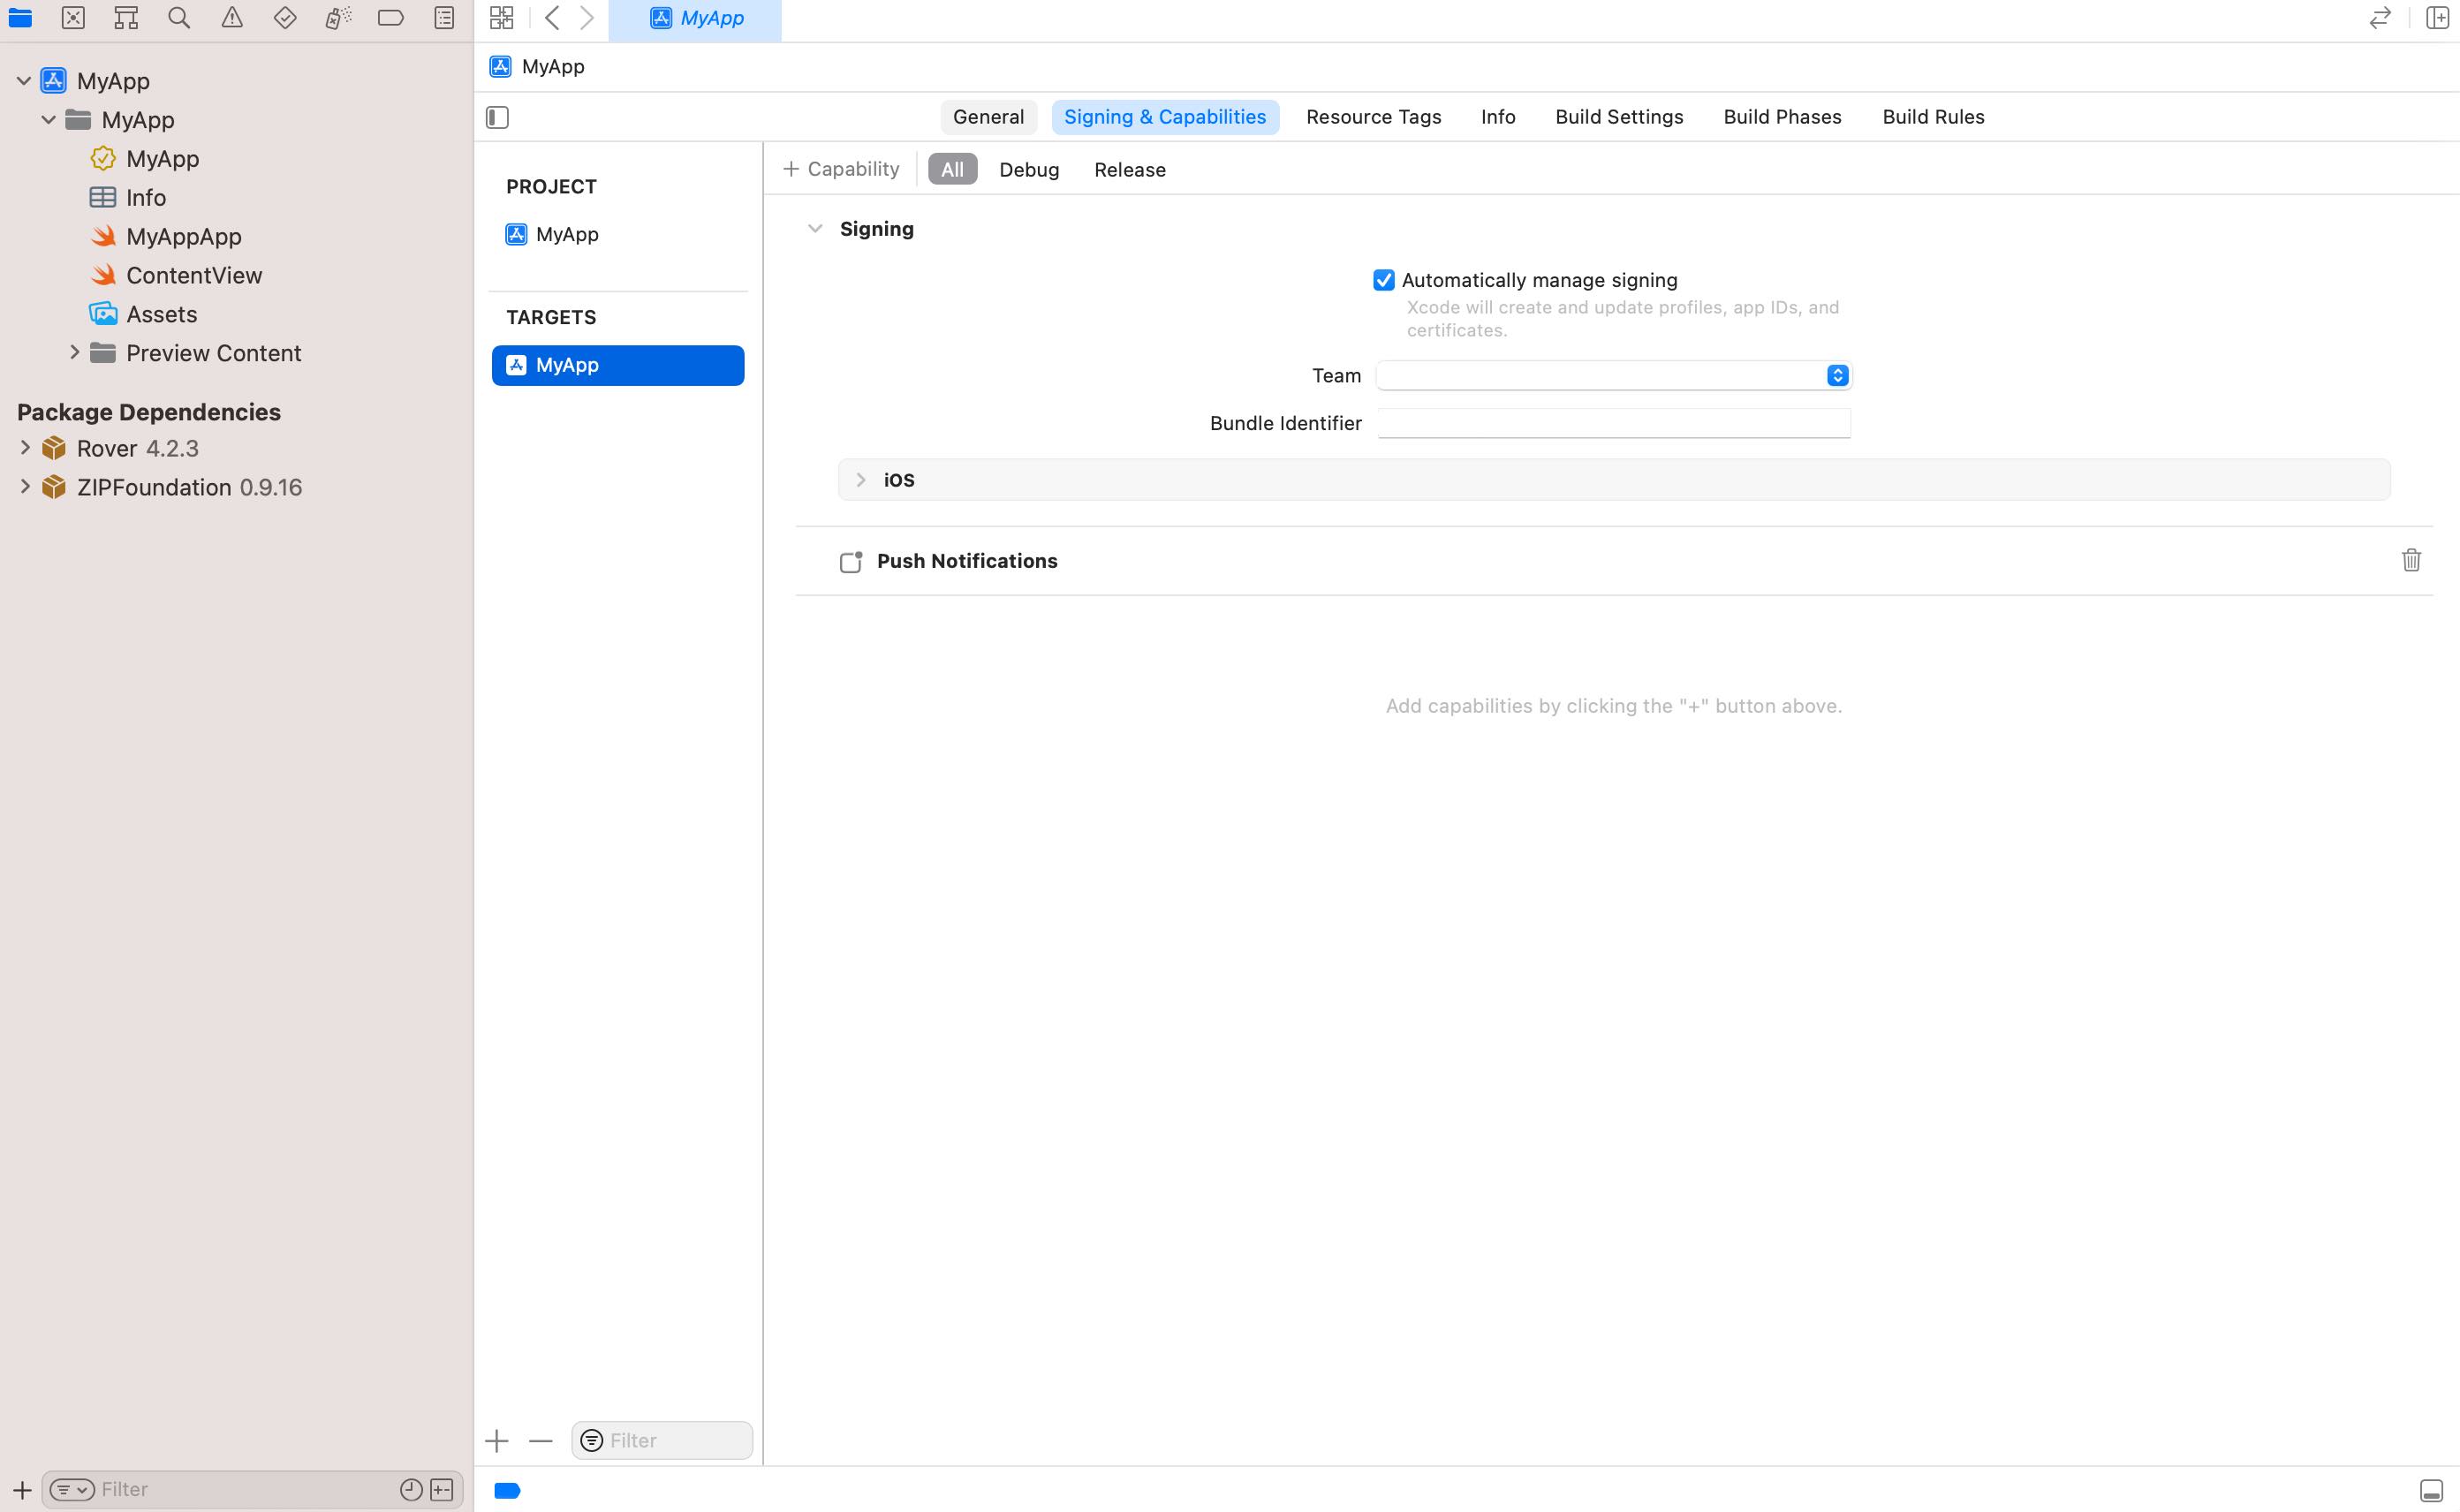
Then select "Push Notifications" from the dialog. This will add the capability. After a brief wait, you should see the push notification capability added.
Import the Rover Notifications API
To access the API detailed below, you must import the relevant Rover SDK modules:
import RoverFoundation
import RoverNotifications
Device Token
Before a user of your app can receive remote notifications, the device must register itself with the Apple Push Notification Service (APNs). After successful registration, a unique token is returned that can be used to identify the device to APNs. Rover uses this token to send remote notifications to your users through your app. In order to enable this functionality you must perform the steps necessary to register each device with APNs and pass the resulting token to the Rover SDK.
Register with APNs
The first step is to initiate the APNs registration process by calling the registerForRemoteNotifications() method on the application object from within your app delegate's application(_:didFinishLaunchingWithOptions:) method.
func application(_ application: UIApplication, didFinishLaunchingWithOptions launchOptions: [UIApplication.LaunchOptionsKey: Any]?) -> Bool {
    // ...
    // Register to receive remote notifications via Apple Push Notification service.
    application.registerForRemoteNotifications()
    return true
}
Be sure to receive updated tokens
It's imperative that your application call the registerForRemoteNotifications() every time your application launches. APNs will occasionally invalidate device tokens and if you do not call this method every time in your application(_:didFinishLaunchingWithOptions:) method, you will miss the opportunity to capture a new token for those devices.
Capture the Token
After succesfully registering with APNs your app delegate's application(_:didRegisterForRemoteNotificationsWithDeviceToken:) method will be called. The value of the deviceToken parameter is the token Rover needs to be able to send remote notifications to the device. To pass the token to the Rover SDK, call the Rover TokenManager's setToken(_:) method.
func application(_ application: UIApplication, didRegisterForRemoteNotificationsWithDeviceToken deviceToken: Data) {
    Rover.shared.tokenManager.setToken(deviceToken)
}
Requesting Authorization
After enabling notifications and capturing the device token, everything is in place for Rover to deliver remote notifications to your app. However, before your application can display an alert, badge your app's icon, or play a sound, it must request authorization from the user.
Request Authorization at Launch Time
The simplest approach is to request authorization in your app delegate's application(_:didFinishLaunchingWithOptions:) method. Get the shared UNUserNotificationCenter object and call its requestAuthorization(options:completionHandler:) method.
import UserNotifications

let center = UNUserNotificationCenter.current()

// Request permission to display alerts, badge your app's icon and play sounds.
center.requestAuthorization(options: [.alert, .badge, .sound]) { (granted, error) in

}
The first time your app makes this authorization request, the operating system will prompt the user for permission to display notifications. The user's response is saved and subsequent requests will not prompt the user again. This simplifies your code as you do not have to check first to see if the user has already given permission before making this call. In other words, there is no negative consequence to calling this method every time your app launches.
Deferring Authorization
As mentioned, the operating system saves the user's response to an authorization request and subsequent requests will not prompt the user again. While this simplifies your code, it also means you only have one attempt at getting permission from your user.
A common pattern when launching an app for the first time is to go through an "onboarding experience" and many apps integrate the notification authorization process into the onboarding. A best-practice has emerged where the user is presented with a screen explaining the benefits of authorizing notifications before the request has been made. This "pre-auth" screen usually asks the user if they would like to receive notifications and presents the user with two buttons: "Yes" and "Maybe later". The notification request is only made if user taps the "Yes" button. If they tap "Maybe later" the onboarding process continues without requesting authorization, giving your app the opportunity to ask again at another time.
Provisional Notifications
Apple supports a feature called Provisional Notifications. You can add the .provisional flag to your permissions request to remove the interstitial permission dialog and instead propose your notifications to your user in the iOS notification center where they can approve or deny them there.
To learn more watch Apple's WWDC 2018 video What’s New in User Notifications.
Handling Notifications
For your application to respond when a user taps a notification, or to process notifications that arrive when your app is running in the foreground, you assign a delegate object to the shared UNUserNotificationCenter. This must be done before your app finishes launching or you might miss incoming notifications. The most common approach is to use your existing app delegate.
Background Content-Available Push
When your app receives a silent push notification with content-available: 1, iOS calls your app delegate's application(_:didReceiveRemoteNotification:fetchCompletionHandler:) method. To handle Rover notifications received this way, implement this method in your app delegateand call Rover's corresponding handler.
/// This app delegate method is called when a `"content-available": 1` silent push is received.
func application(_ application: UIApplication, didReceiveRemoteNotification userInfo: [AnyHashable : Any], fetchCompletionHandler completionHandler: @escaping (UIBackgroundFetchResult) -> Void) {
    // Rover calls completionHandler for you and returns true if the notification was handled by Rover.
    if Rover.shared.didReceiveRemoteNotification(userInfo: userInfo, fetchCompletionHandler: completionHandler) {
        return
    }

    // non-Rover silent push received:
    completionHandler(.noData)
}
Assign a User Notification Center Delegate
The remaining notification delegate methods are part of UNUserNotificationCenterDelegate.
In this example, we'll take a common approach and extend your App Delegate to conform to it.
import UserNotifications

extension MyAppDelegate: UNUserNotificationCenterDelegate {
    // ...
}
Next assign your app as the delegate for the shared UNUserNotificationCenter from within your application(_:didFinishLaunchingWithOptions:) method.
func application(_ application: UIApplication, didFinishLaunchingWithOptions launchOptions: [UIApplication.LaunchOptionsKey: Any]?) -> Bool {
    // ...
    UNUserNotificationCenter.current().delegate = self
    return true
}
Responding to Taps
Notifications sent from Rover have an expected action to be taken when the user taps the notification. For example a notification might launch a Rover Experience when it is tapped, or present a website. The desired behavior is defined in the Campaigns app by the user who authors the notification campaign.
In order to execute the expected behavior you must implement the userNotificationCenter(_:didReceive:withCompletionHandler:) method in your UNUserNotificationCenter delegate and call Rover's corresponding handler.
extension MyAppDelegate: UNUserNotificationCenterDelegate {
    func userNotificationCenter(_ center: UNUserNotificationCenter, didReceive response: UNNotificationResponse, withCompletionHandler completionHandler: @escaping () -> Void) {
        // The user tapped a notification. Pass the response to Rover to handle the intended behavior.
        if Rover.shared.userNotificationCenterDidReceive(response: response, withCompletionHandler: completionHandler) {
            return
        }

        // If Rover didn't handle the notification and it returns false, then we need to call the completion handler ourselves.
        completionHandler()
    }
}
Foreground Notifications
If a notification is received when your app is in the foreground, the default behavior on iOS is to ignore it. To display notifications when your app is in the foreground and handle Rover notifications appropriately, implement the userNotificationCenter(_:willPresent:withCompletionHandler:) method in your UNUserNotificationCenter delegate and call Rover's corresponding handler.
extension MyAppDelegate: UNUserNotificationCenterDelegate {
    // Called when user receives a notification while the app is in the foreground.
    func userNotificationCenter(_ center: UNUserNotificationCenter, willPresent notification: UNNotification, withCompletionHandler completionHandler: @escaping (UNNotificationPresentationOptions) -> Void) {
        if Rover.shared.userNotificationCenterWillPresent(notification: notification, withCompletionHandler: completionHandler) {
            return
        }

        // Tell the operating system to display the notification the same way as if the app was in the background.
        completionHandler([.badge, .sound, .banner])
    }
}
Notification Extension
The Rover SDK relies on a UNNotificationServiceExtension for two features:
- Adding rich media (images, videos and audio clips) to notifications.
- Tracking "influenced opens".
If you wish to take advantage of either of these features you will need to add UNNotificationServiceExtension to your app.
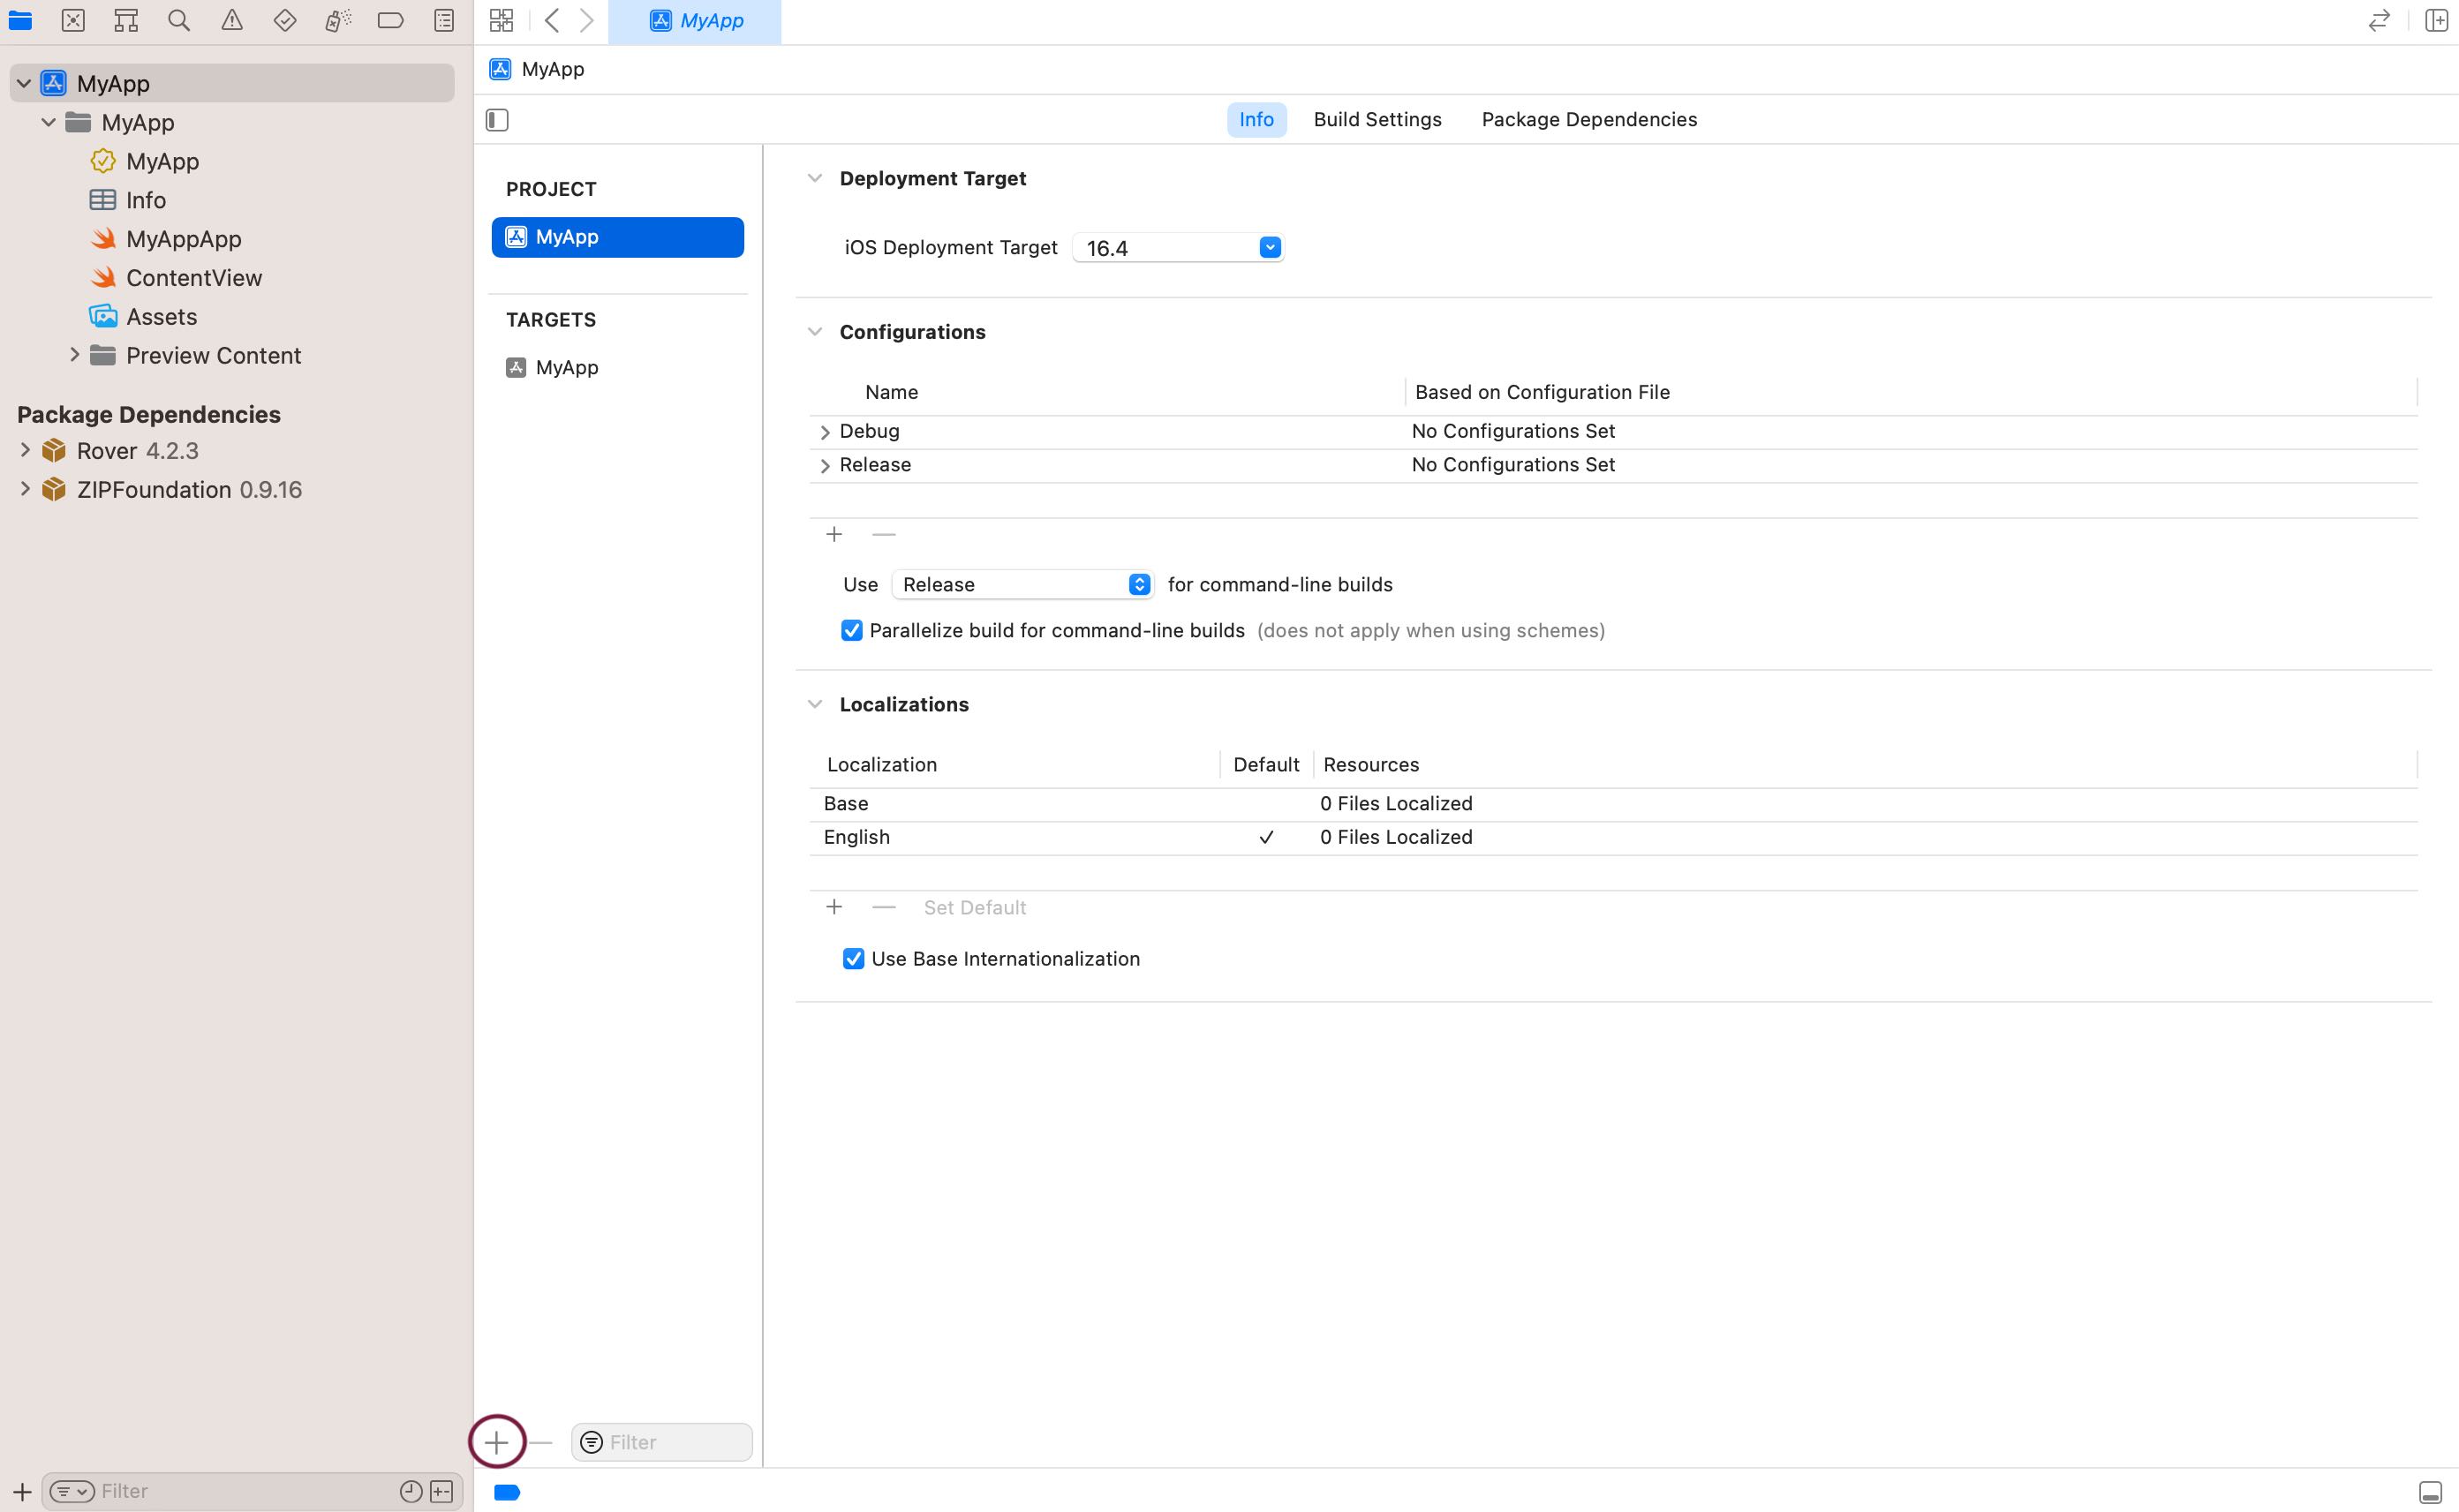
Select your project in the Xcode Project navigator then click the plus (+) icon at the bottom of the target list to add a new target.
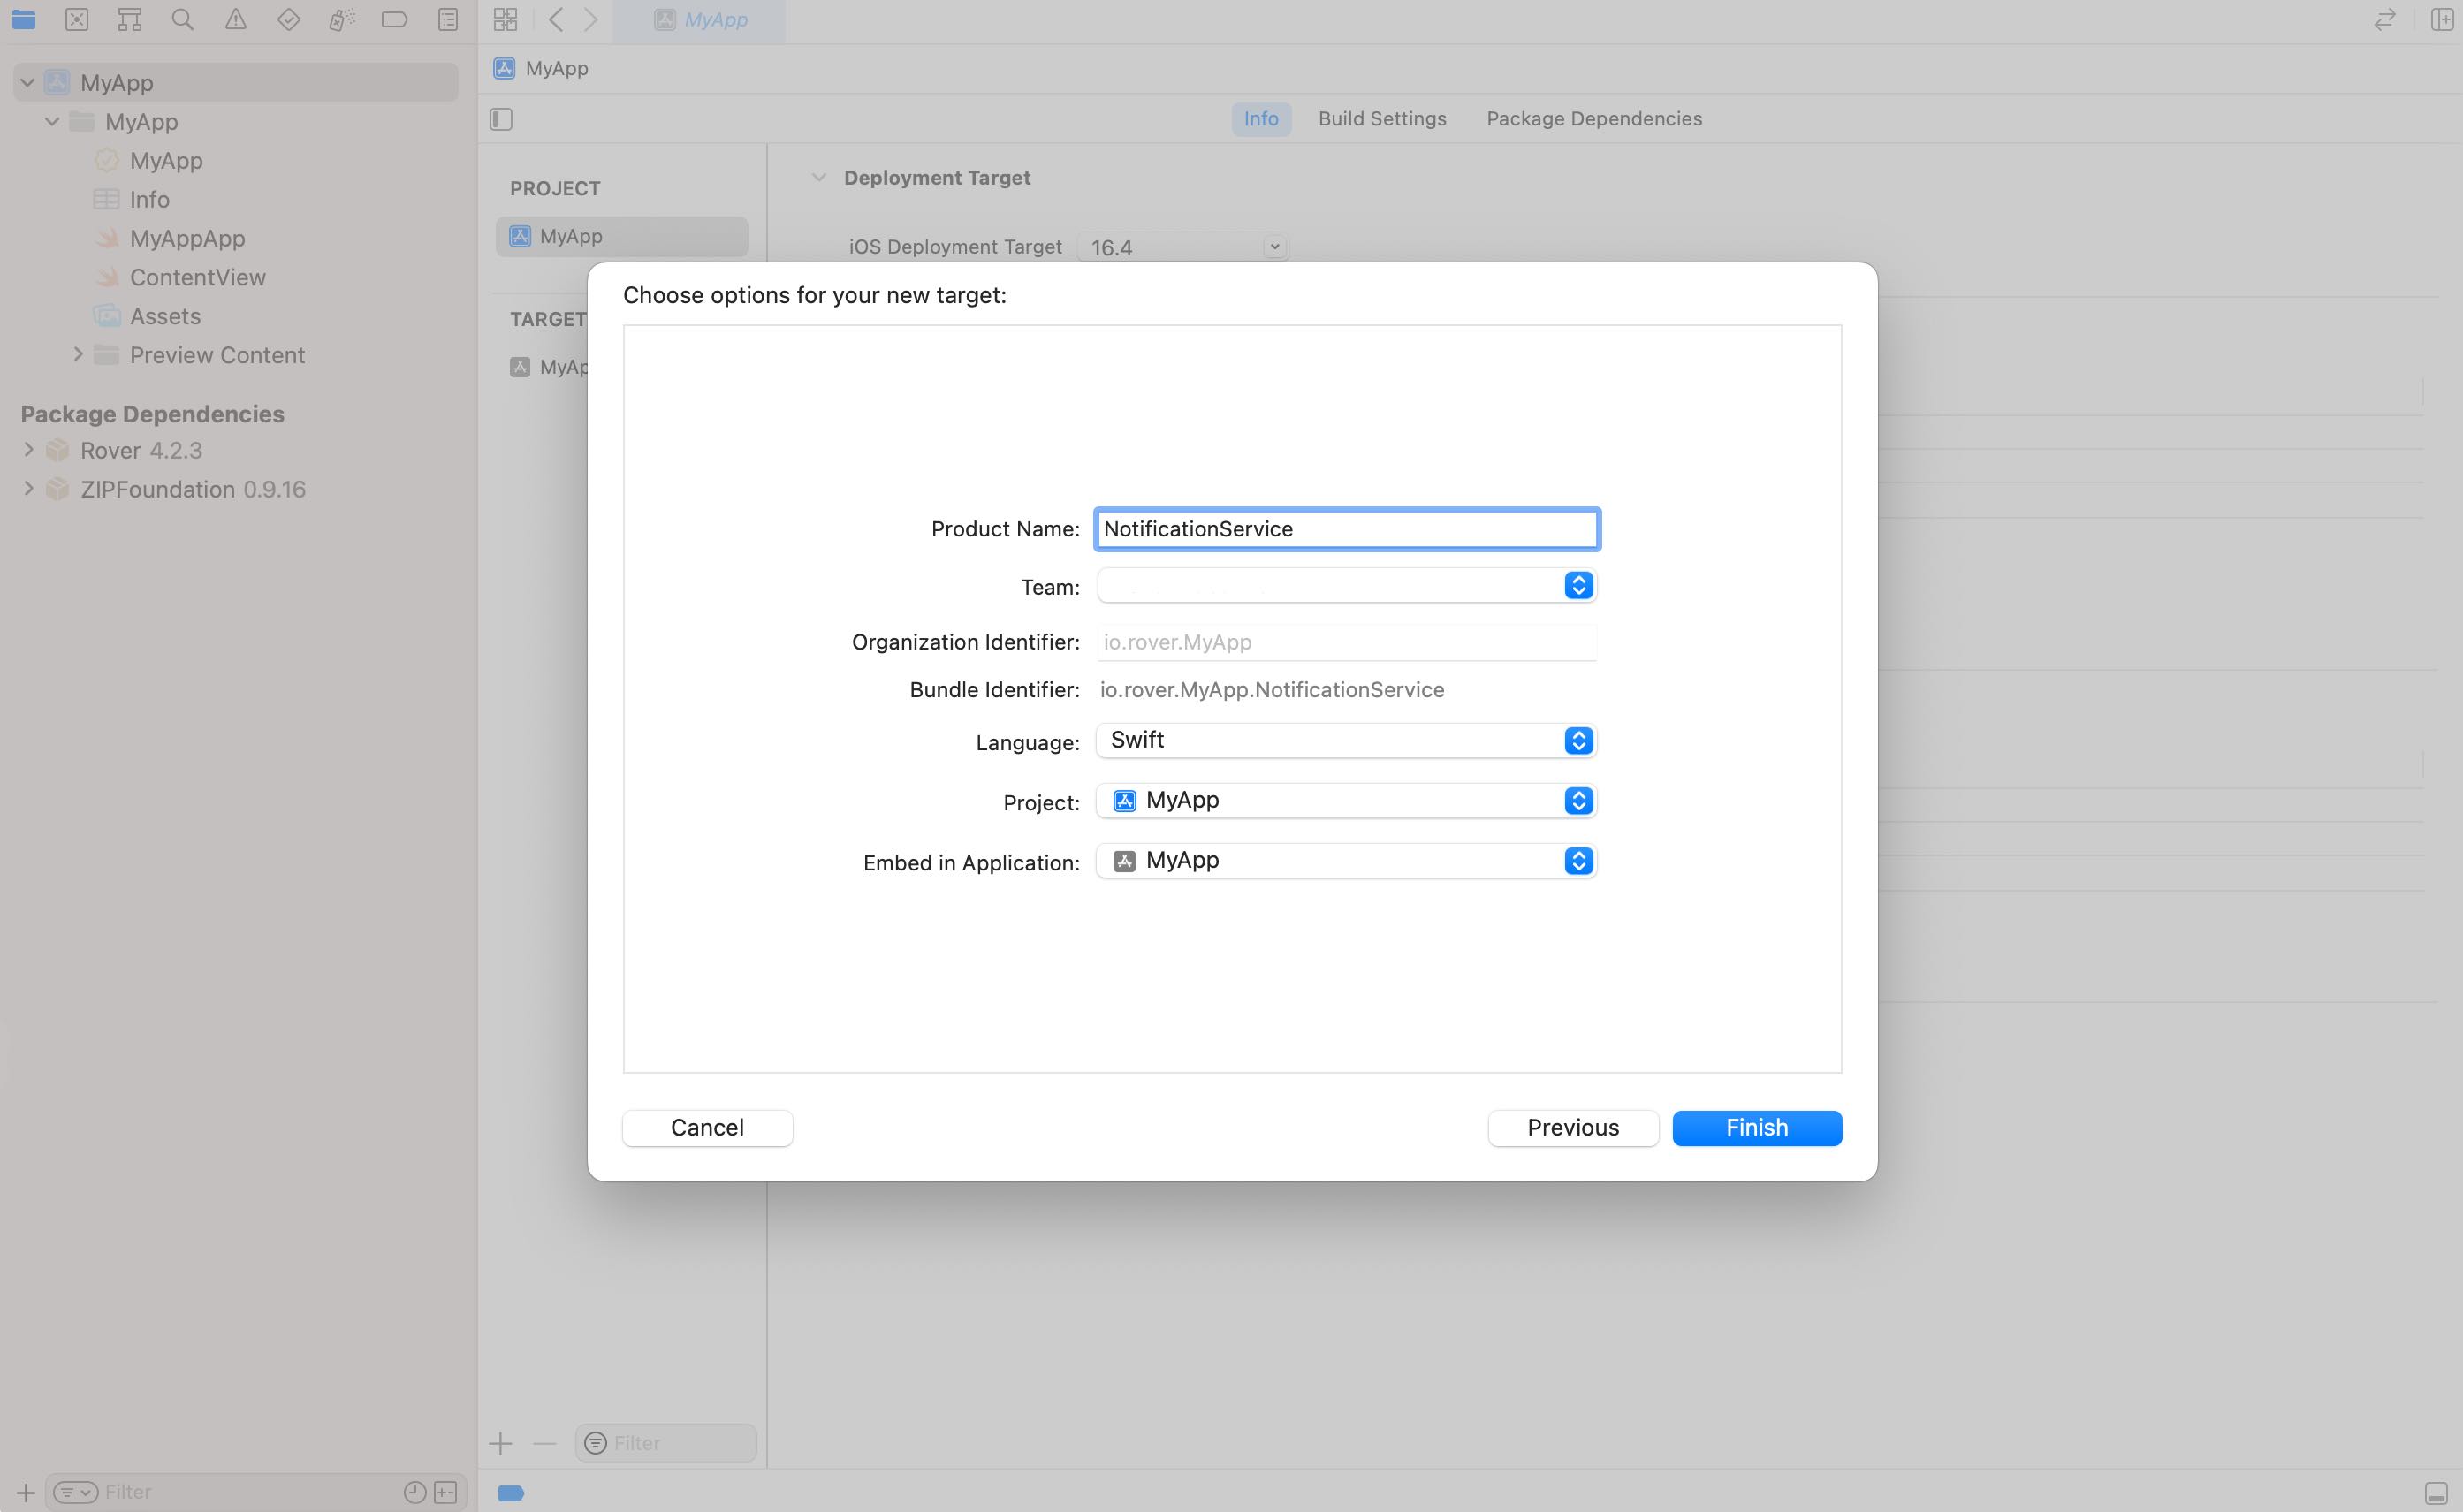
In the resulting modal type "notification" into the search field to find and select the Notification Service Extension (NSE) target type. Be sure to not accidentally select "Notification Content Extension", or any others that may appear. Then click Next.
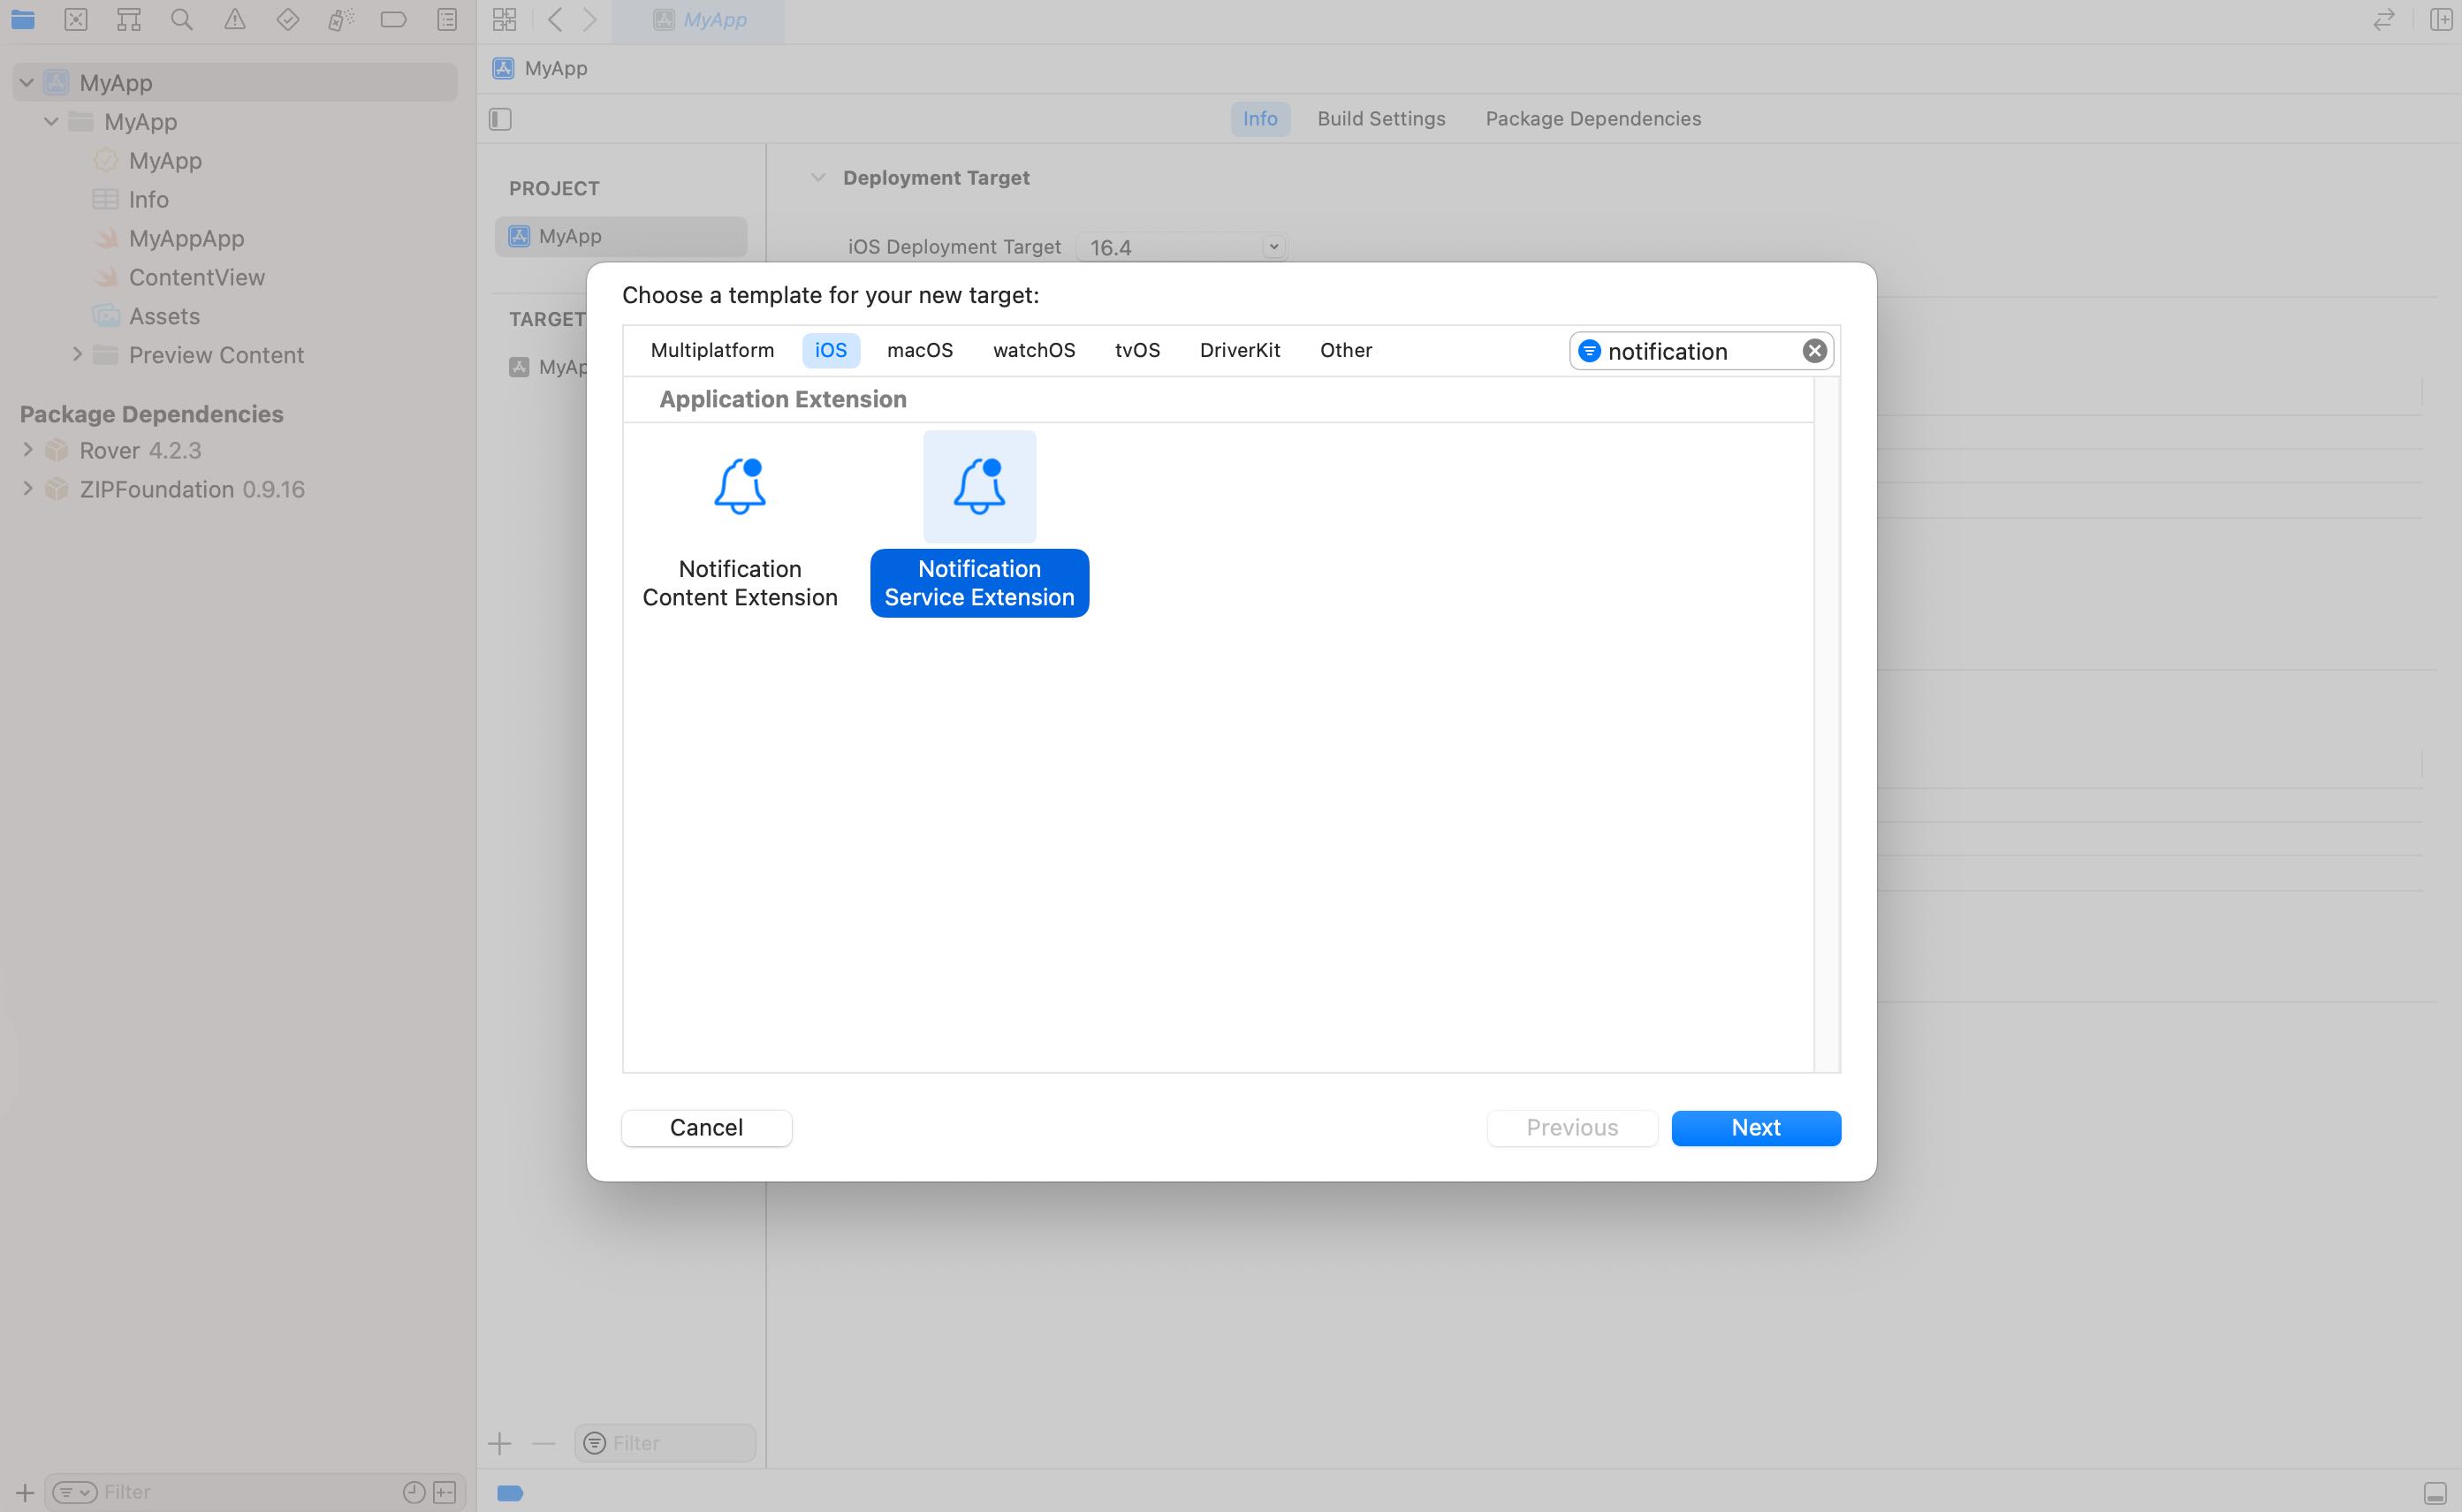
Name the new target NotificationService and click "Finish".
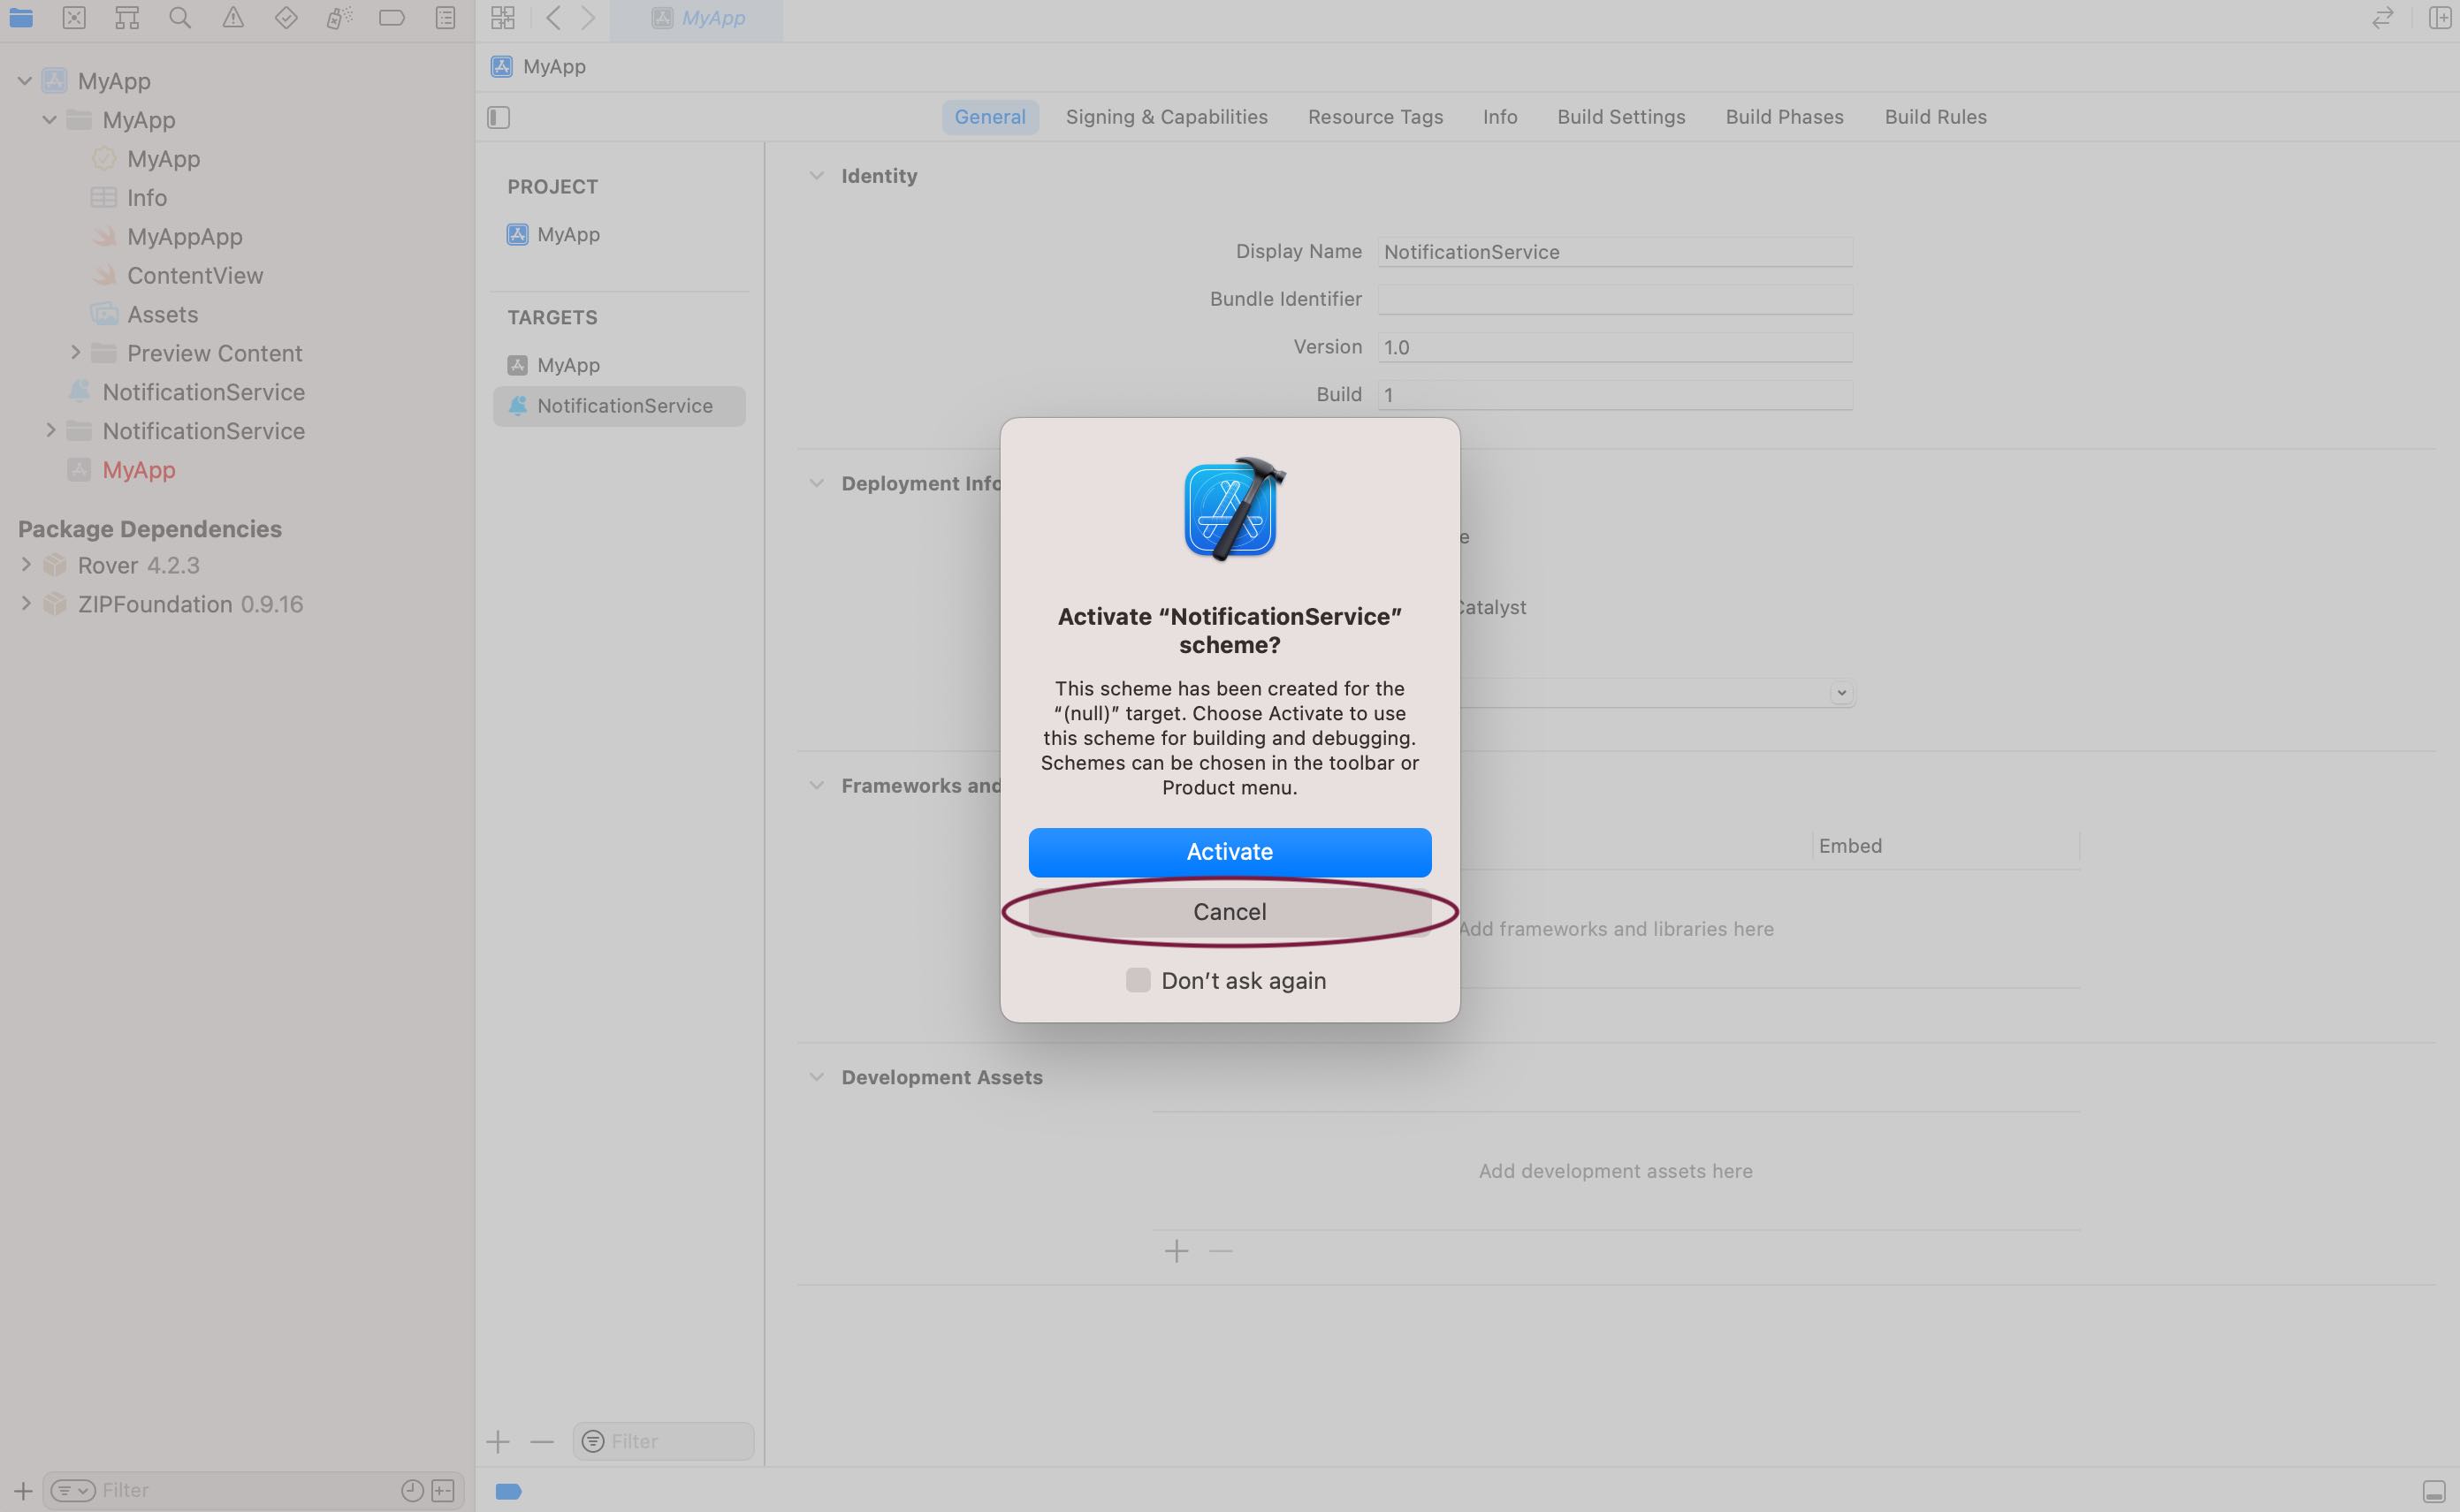
If you see a prompt asking you to activate the scheme click Cancel. This ensures Xcode will continue debugging your app instead of just the notification service extension.
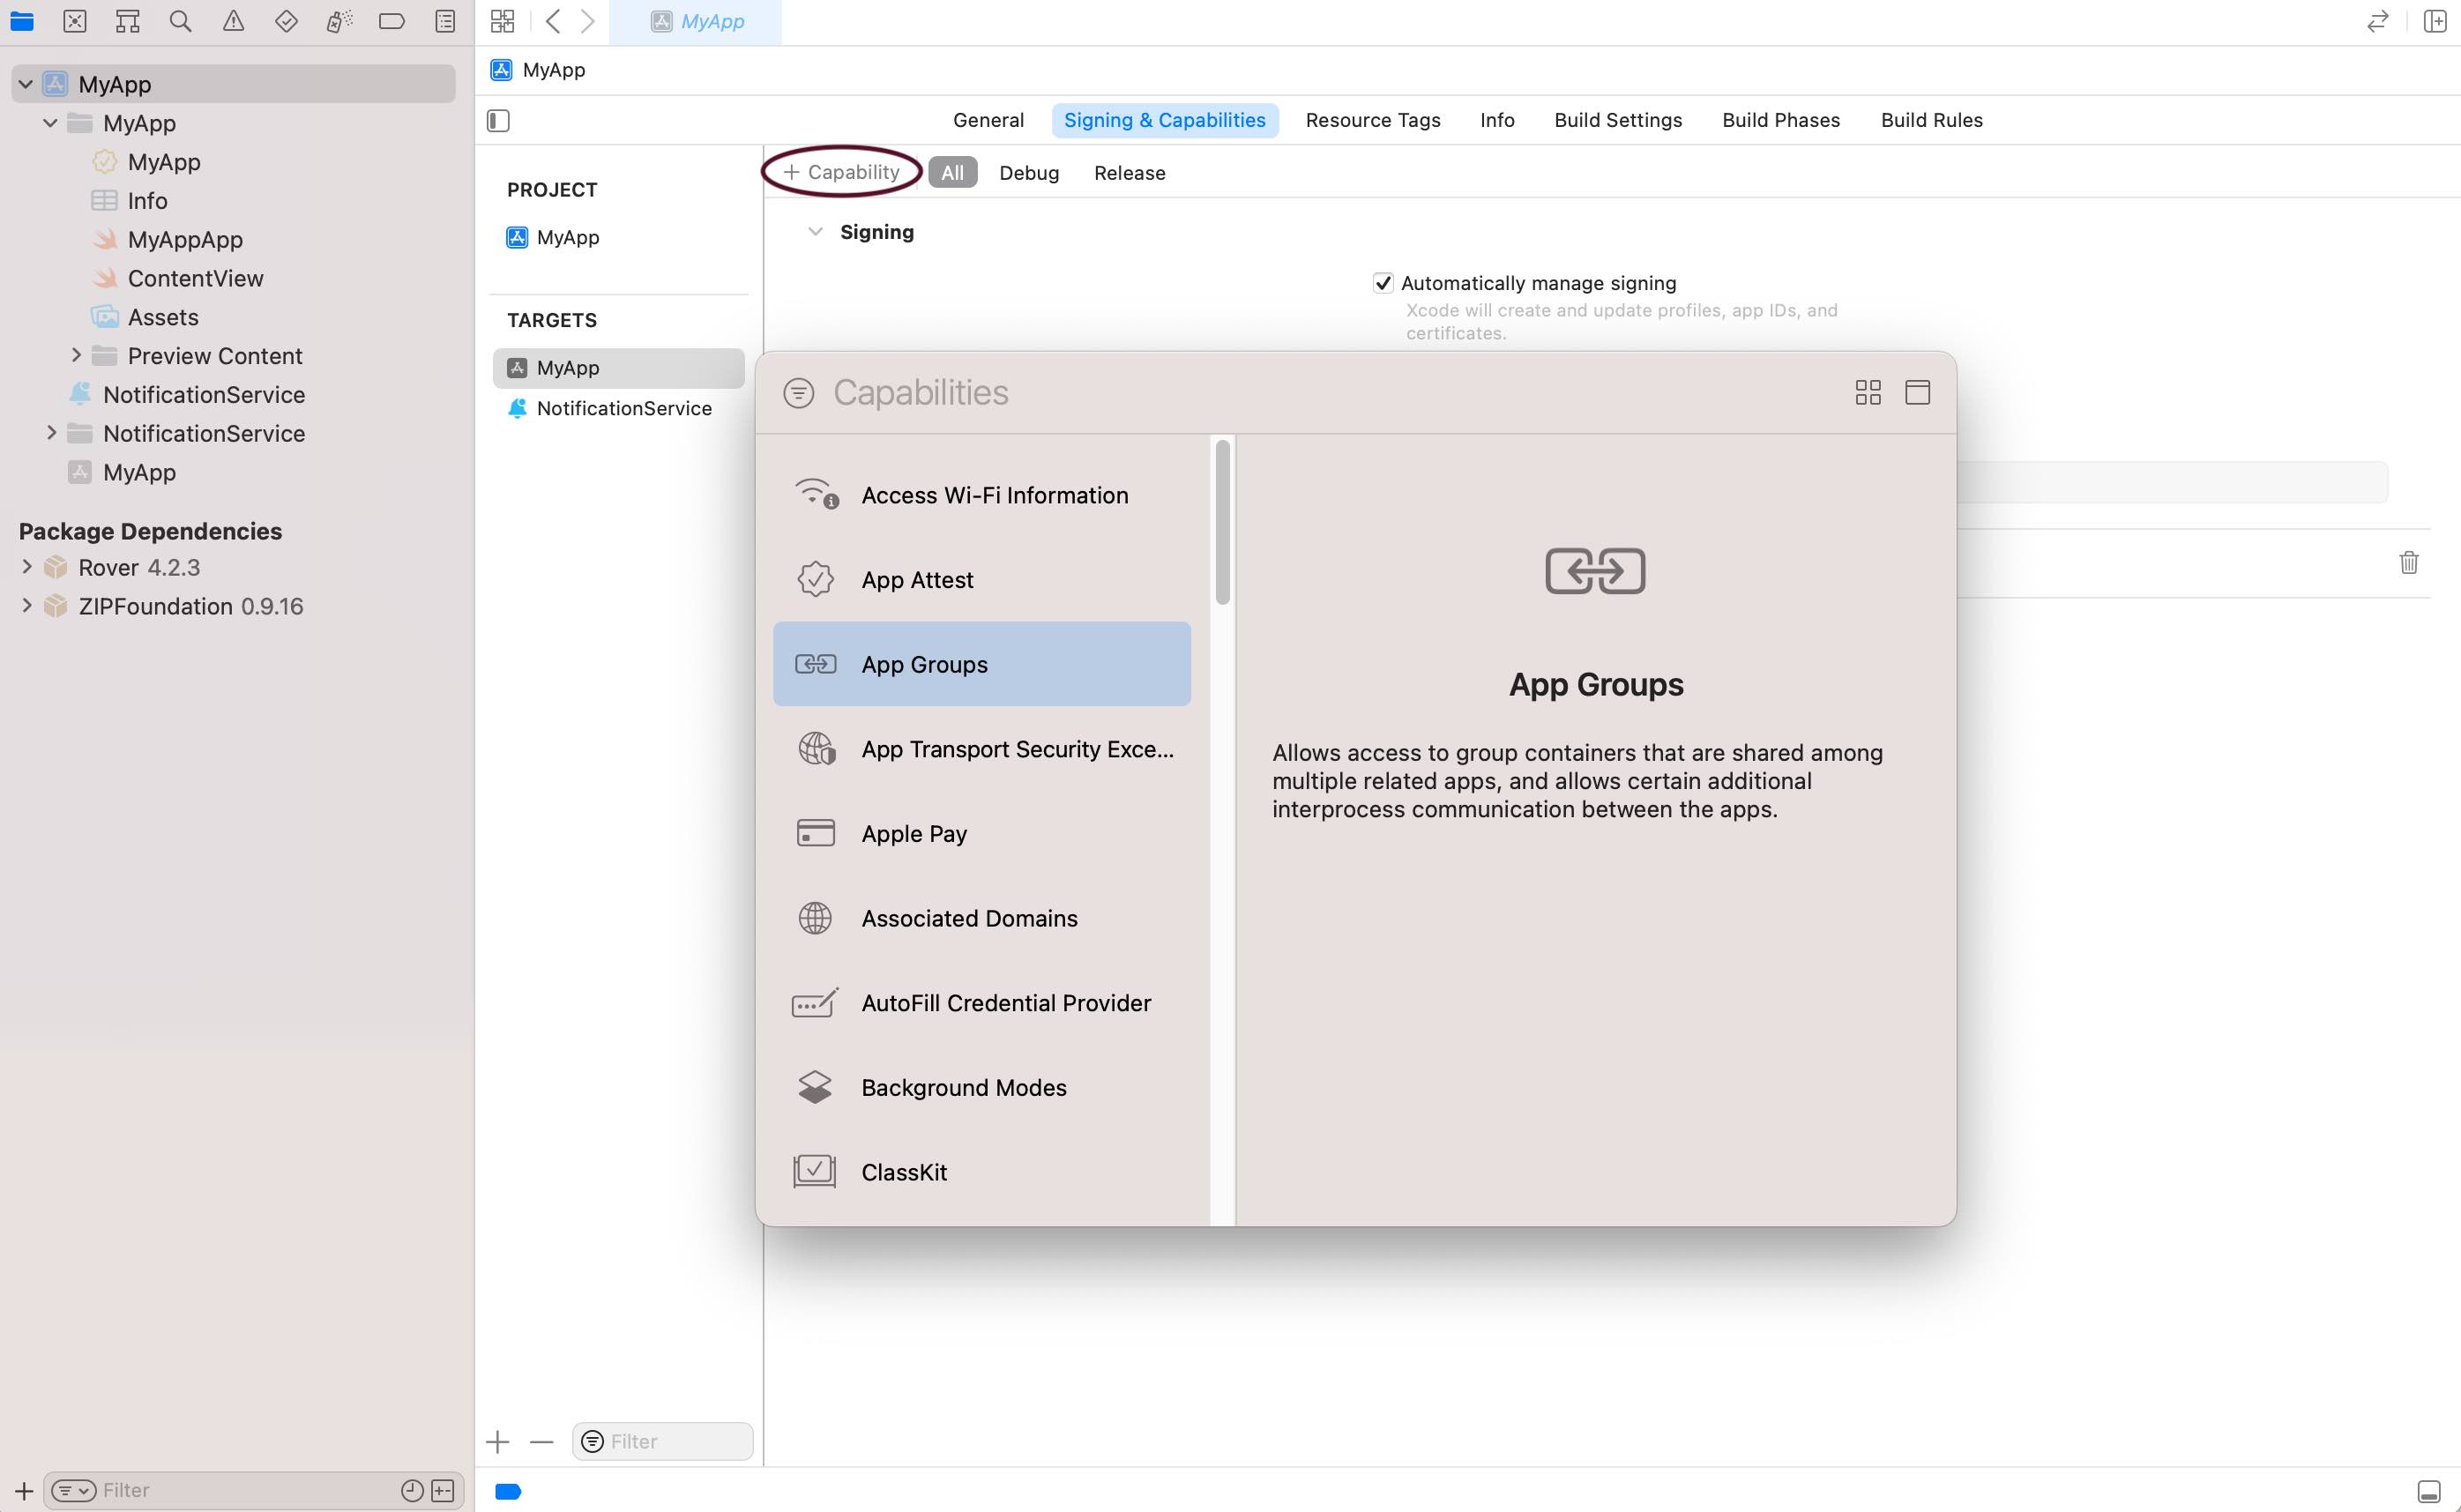
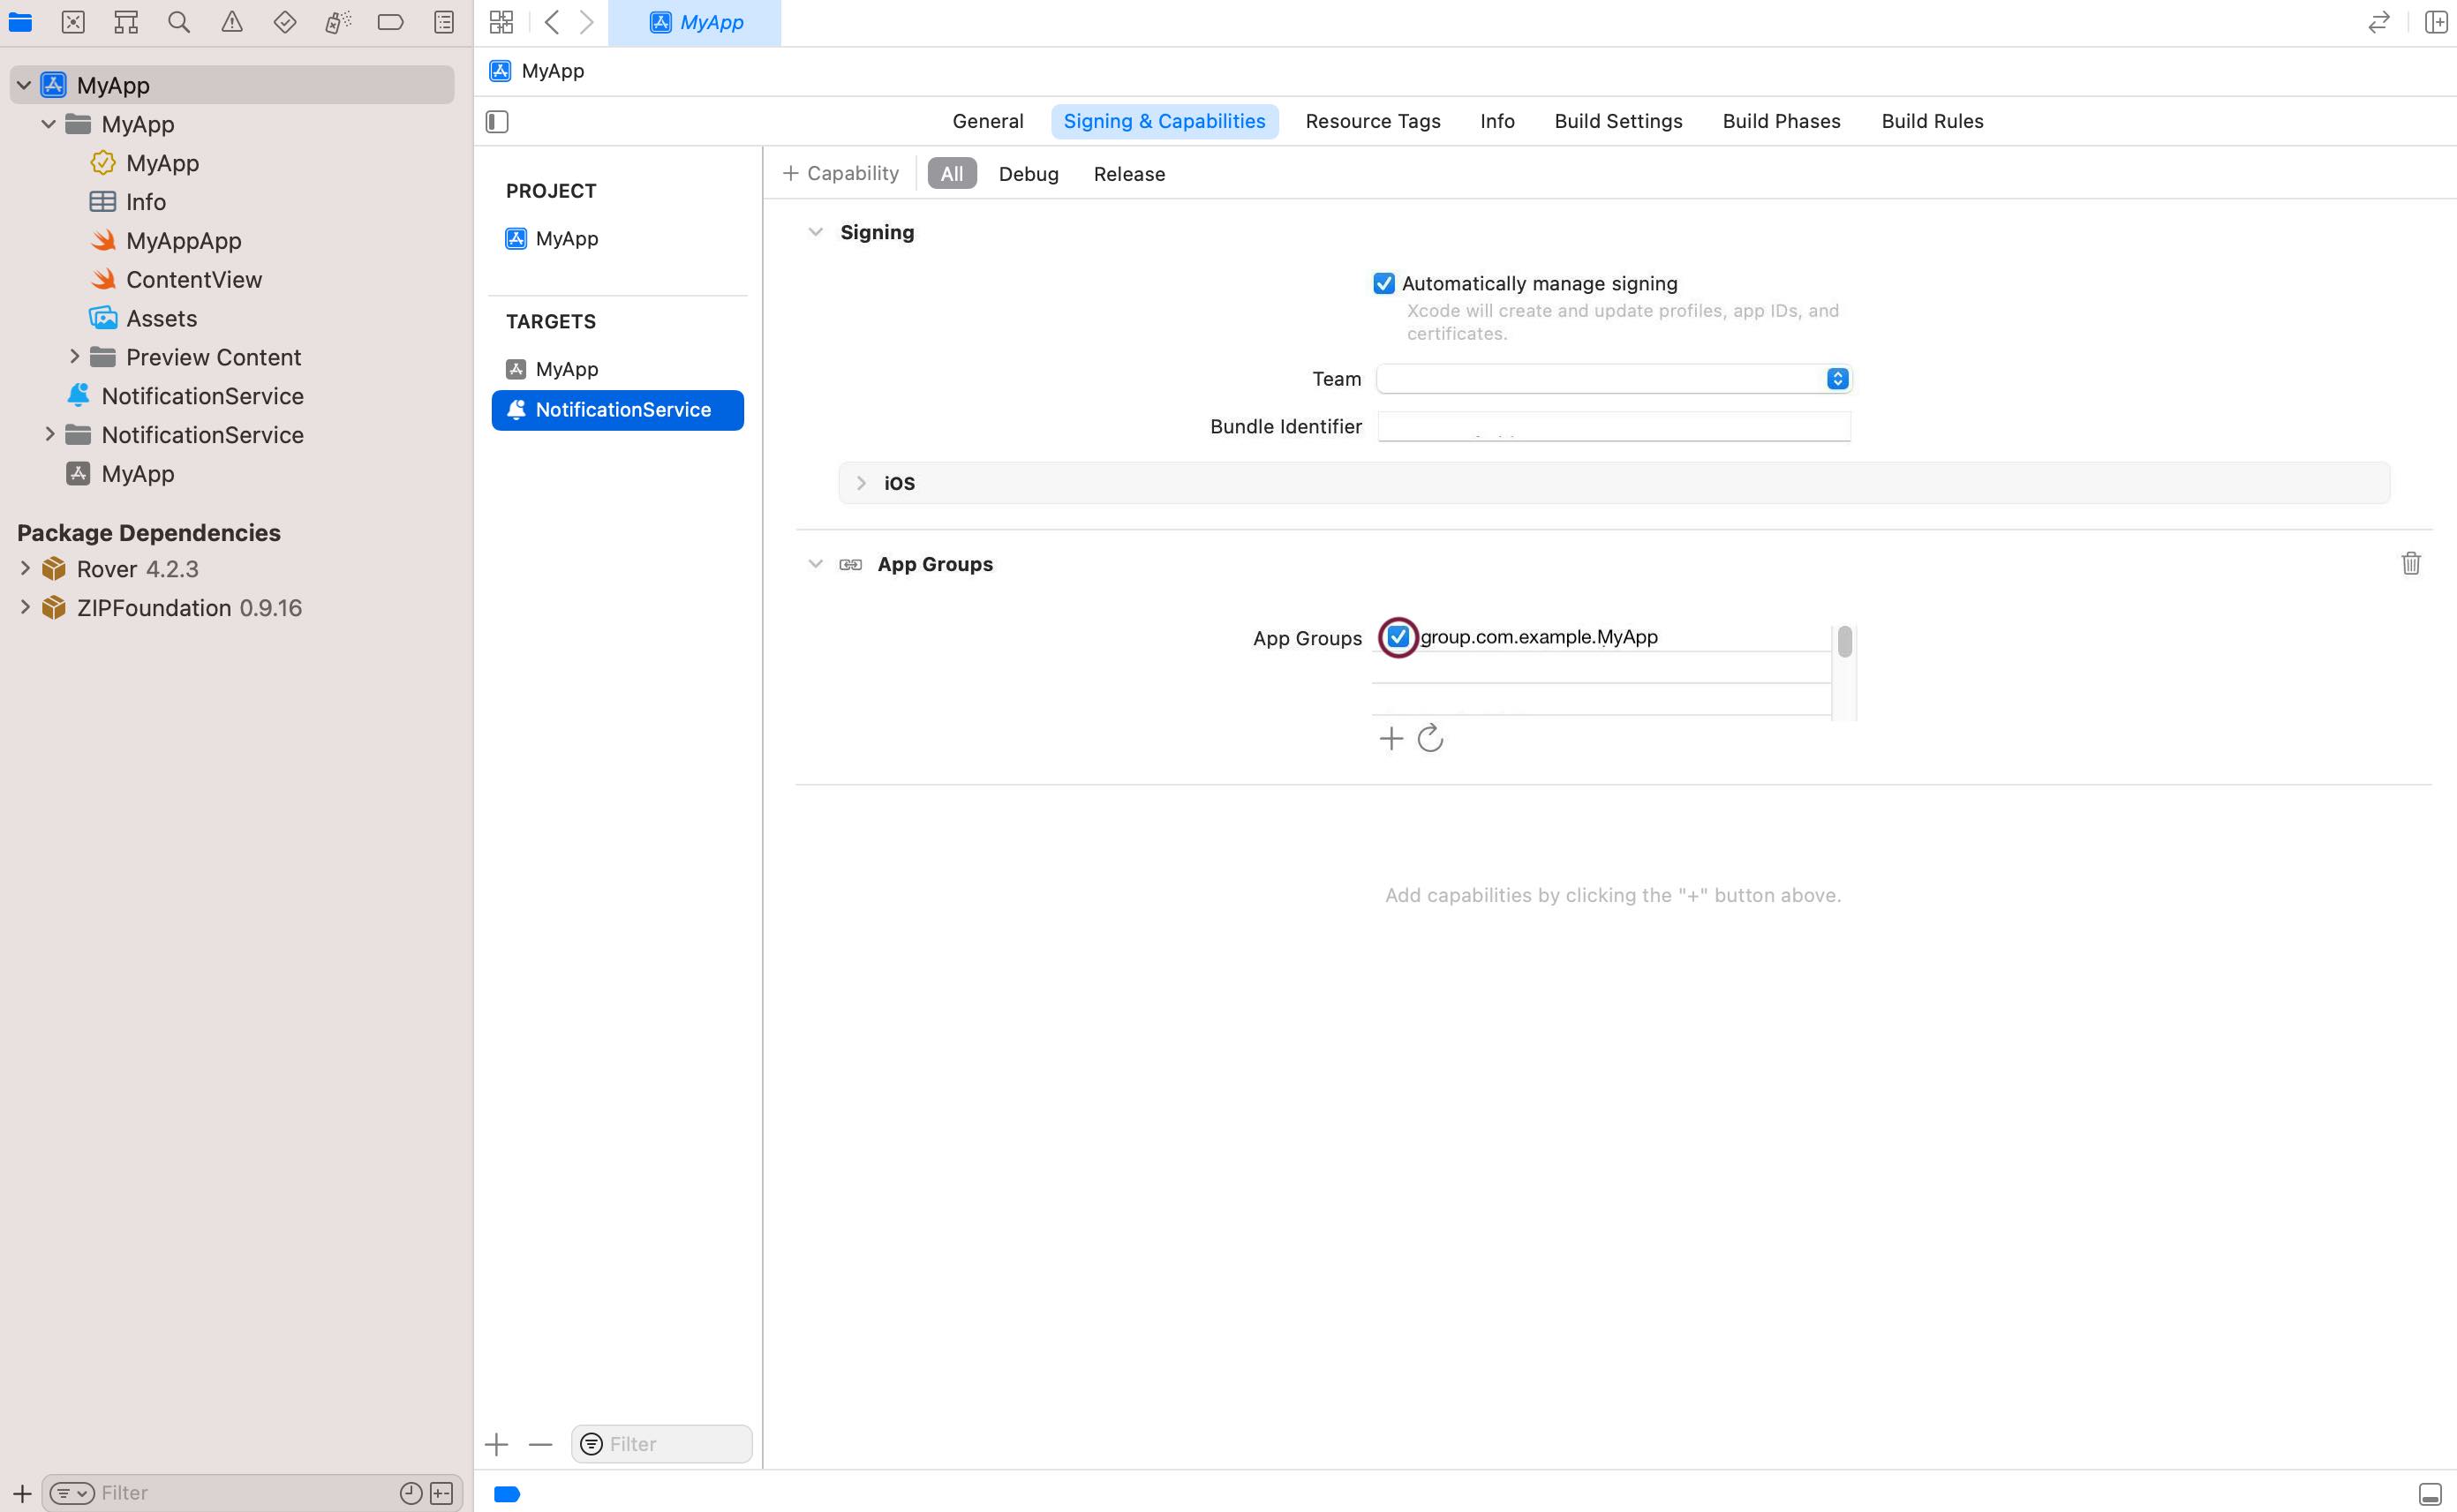
Select your app target (not your extension) from the list of targets, and open the "Signing & Capabilities" tab. Then press the "+ Capability" button to add a new capability. Select "App Groups" from the dialog.
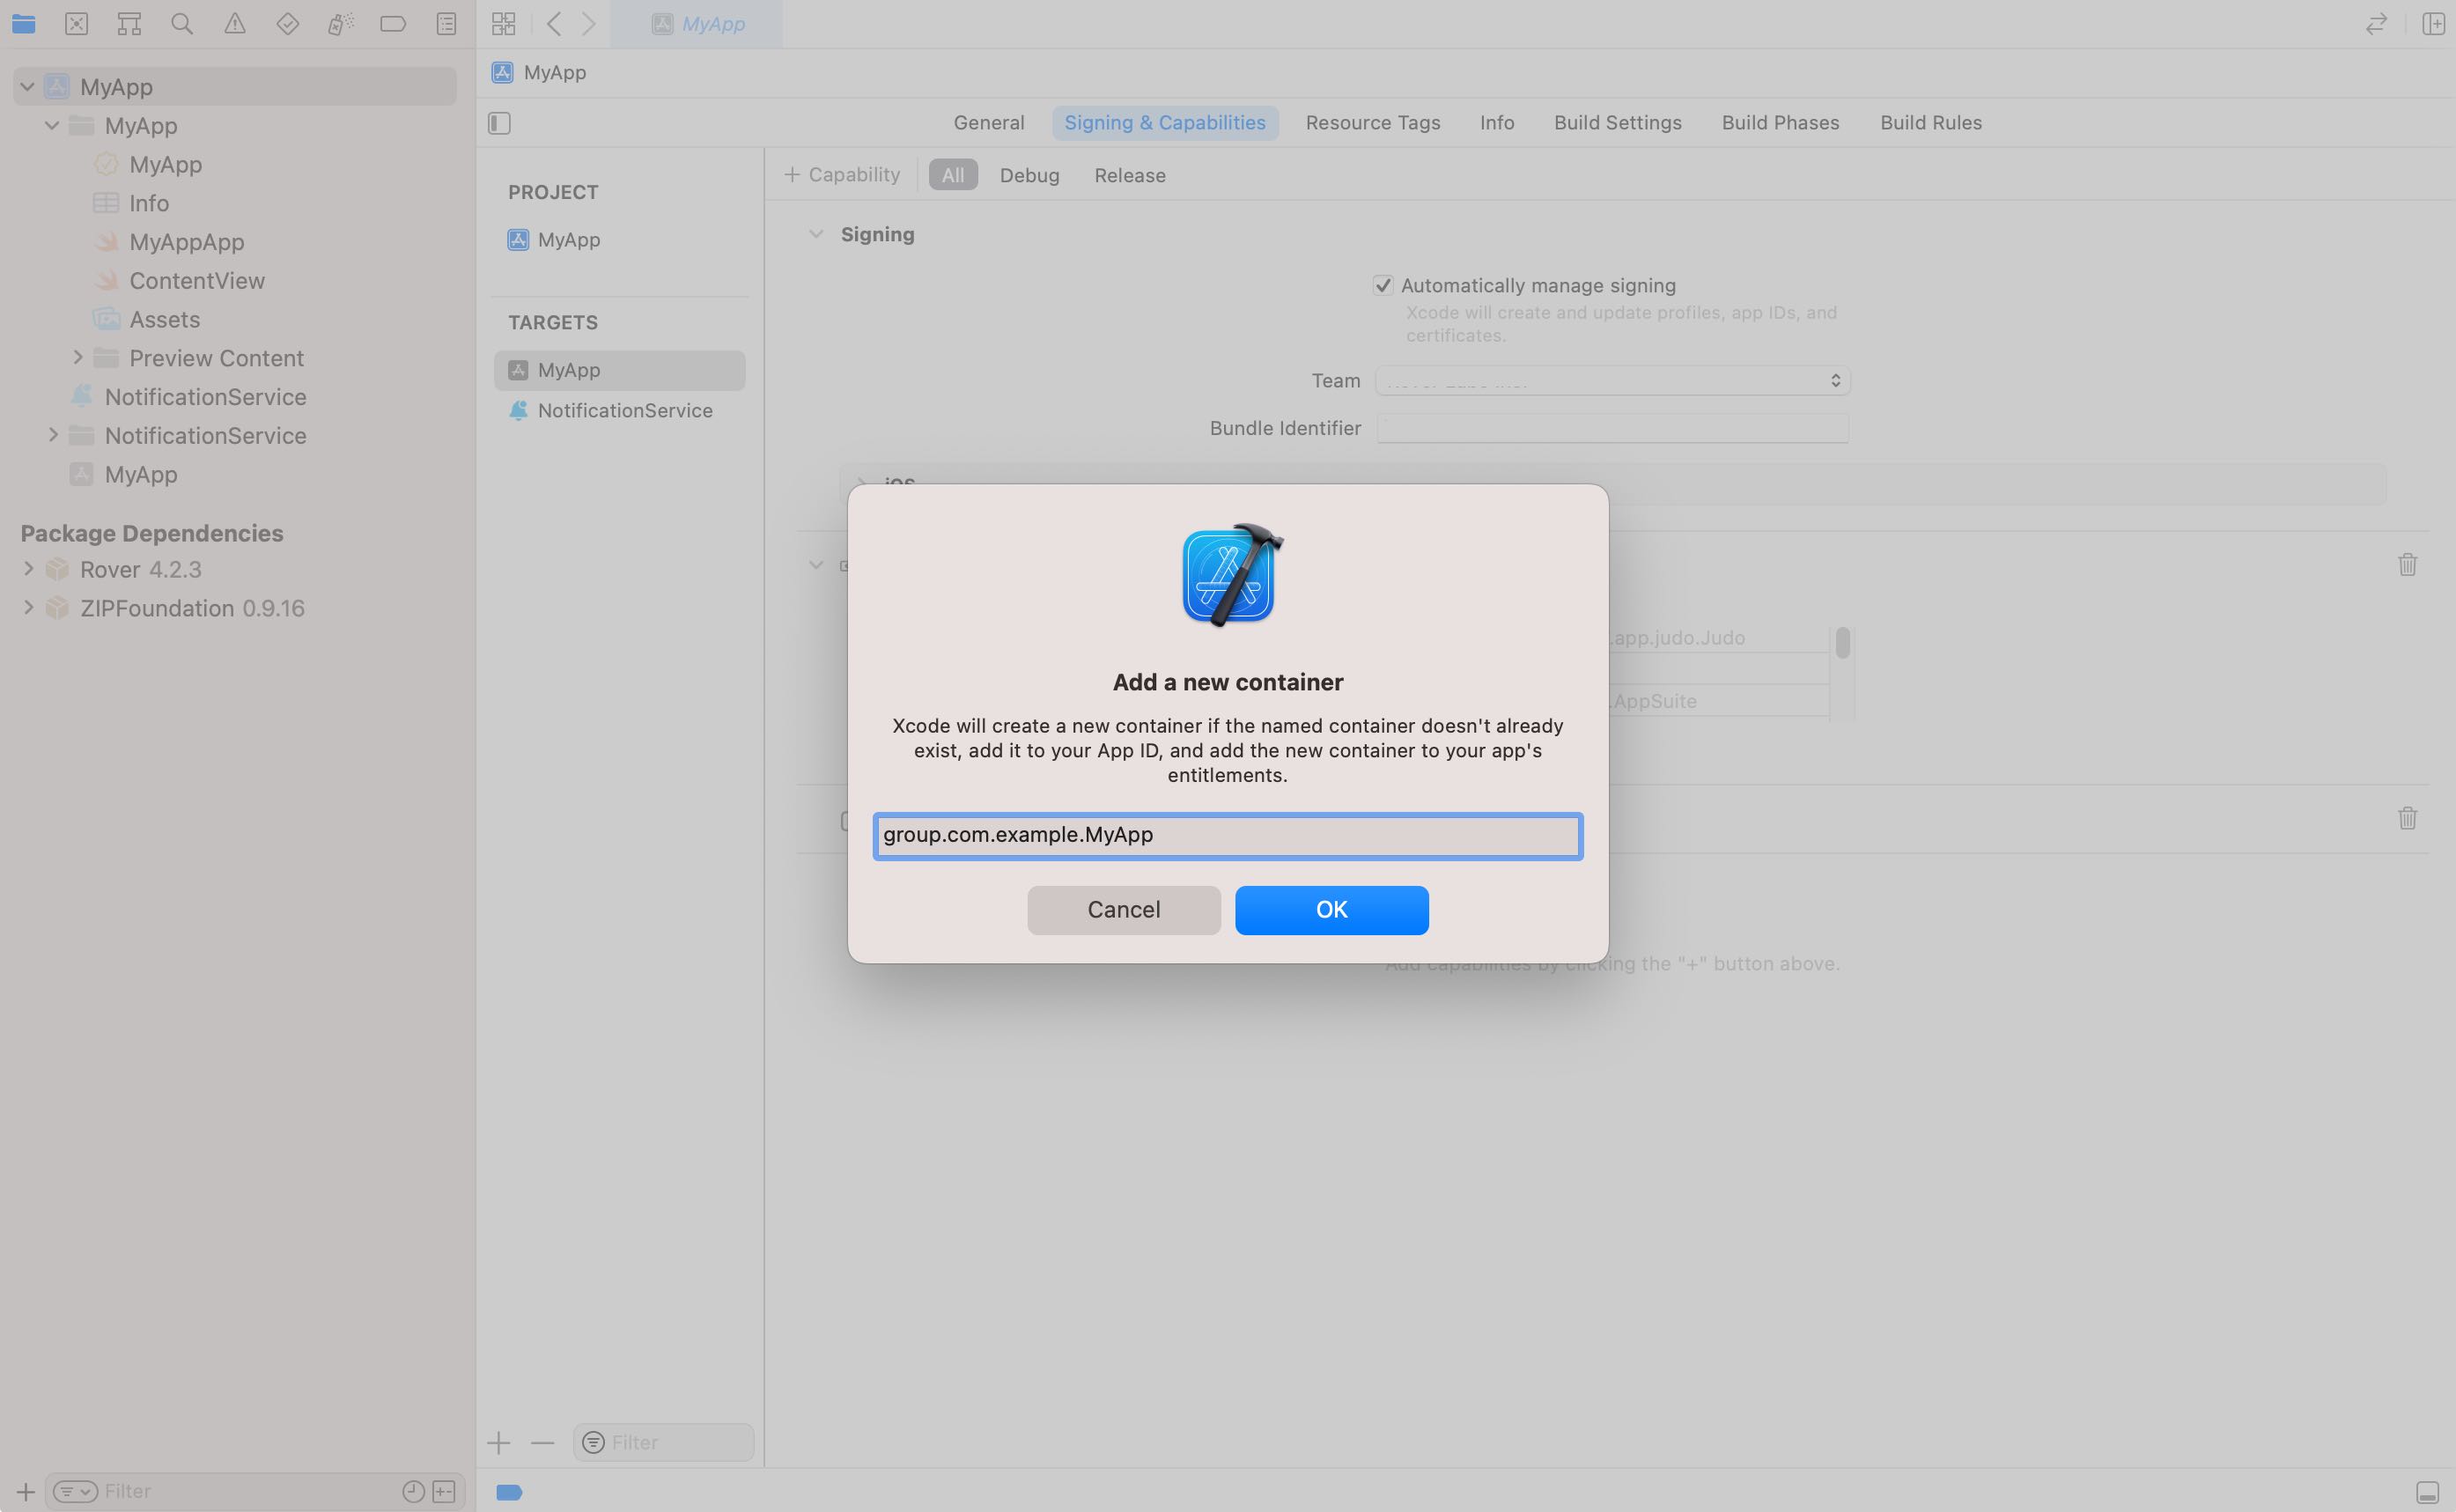
Name your app group by prepending "group." to your bundle identifier. E.g. "group.com.example.MyApp".
Finally select your extension target in the list of targets. You should see the same group you added to your app in the list of available App Groups. You may need to click the refresh icon for it to show up. Enable the app group for your extension.
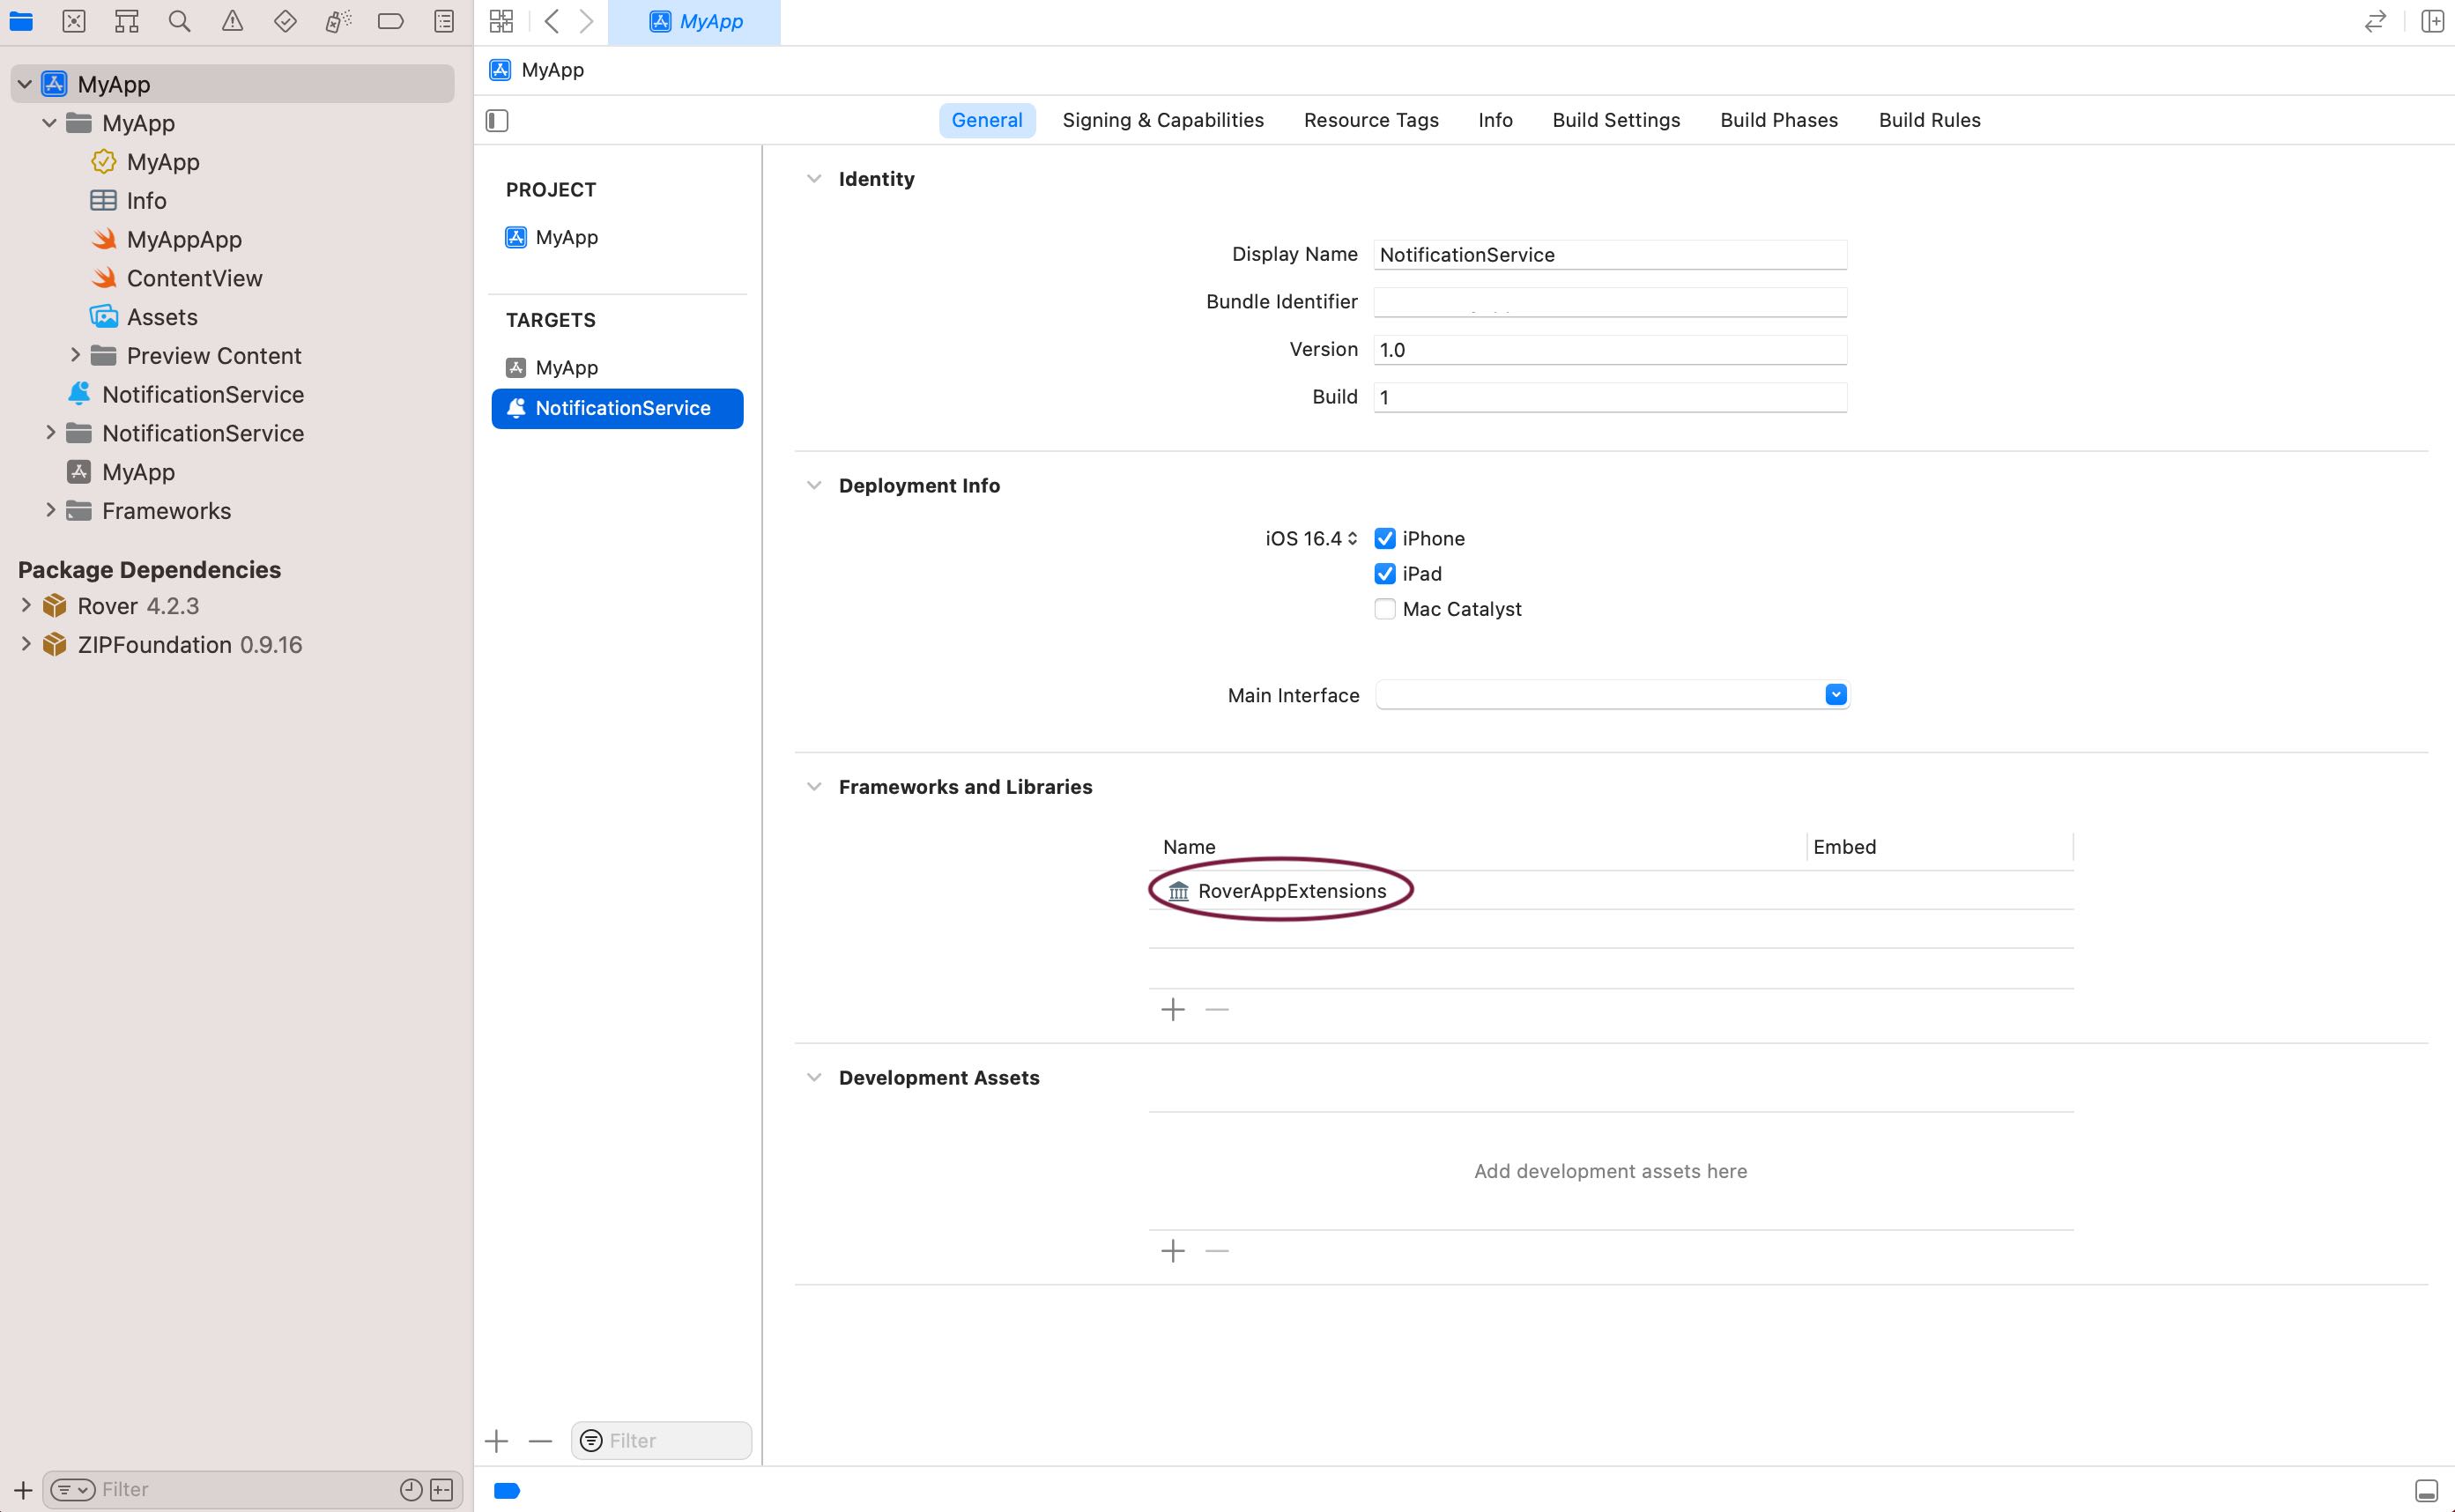
Link RoverAppExtensions Framework
In addition to the main Rover SDK there is a separate framework target called RoverAppExtensions. This framework contains only the app extension API and is therefore safe to use in your newly create extension.
Edit the Select the RoverAppExtensions package product in the list provided by the Rover SwiftPM package, and link it to your newly created Notification Service extension target.
NotificationExtensionHelper
When you created the new service target Xcode created a corresponding class named NotificationService with a sample implementation. Open the class and import RoverAppExtensions.
import RoverAppExtensions
Then replace the implementation of didReceive(_:withContentHandler:) method with the following, substituting YOUR_APP_GROUP with the name of your actual app group:
override func didReceive(_ request: UNNotificationRequest, withContentHandler contentHandler: @escaping (UNNotificationContent) -> Void) {
    self.contentHandler = contentHandler
    bestAttemptContent = (request.content.mutableCopy() as? UNMutableNotificationContent)

    if let bestAttemptContent = bestAttemptContent {
        NotificationExtensionHelper(appGroup: "YOUR_APP_GROUP")?.didReceive(request, withContent: bestAttemptContent)
        contentHandler(bestAttemptContent)
    }
}
Note: If you would like to get the count of unread Rover notifications currently stored on the device in your Notification Extension didReceive as above, the Rover NotificationExtensionHelper has it available in the unreadNotifications property.
The last step is to update your Rover initialization code to pass the NotificationAssembler the name of the app group you just created.
Rover.initialize(assemblers: [
    // ...
    NotificationsAssembler(appGroup: "group.io.rover.inbox")
])