iOS SDK
The Rover SDK is a Swift framework for connecting your app to the Rover Platform. The SDK is 100% open-source and available on GitHub.
Install the SDK
The easiest way to get Rover into your iOS project is to use CocoaPods. If you’ve never used CocoaPods before you can follow their Getting Started guide to get it setup on your machine. After you’ve installed CocoaPods the following steps will add the Rover SDK to your project.
- Run
pod initfrom your Xcode project directory to create a Podfile. - The Rover SDK is a dynamic framework written in Swift. Add
use_frameworks!to the top of your Podfile to enable framework and Swift support. -
Add the Rover pod within the main target of your Podfile:
use_frameworks! target 'My App' do pod 'Rover' end - Run
pod installfrom your Xcode project directory. CocoaPods should download and install the Rover library, and create a new Xcode workspace. Open up this workspace in Xcode.
Carthage
Rover also supports Carthage to package your dependencies as a framework. Include the following dependency in your Cartfile:
github "RoverPlatform/rover-ios"
Manual Installation
You can also get the library by downloading the latest version from Github and copying it into your project. Just copy all files from the Rover directory.
Initialization
The following instructions assume your app is written in Swift. The steps required are the same if your app is written in Objective-C. We will be providing an Objective-C version in the future. In the meantime if you are having trouble translating the Swift instructions or run into an issue please submit a GitHub issue for support.
To connect your app to the Rover cloud, you must first initialize it with your account token. You can find your account token on the main page of the Rover Settings App.
To initialize the Rover SDK, import Rover and call setup(applicationToken:) with your account token as its argument.
import Rover

Rover.setup(applicationToken: "YOUR_ACCOUNT_TOKEN");
In most cases, it makes sense to do this in your AppDelegate’s application(_:didFinishLaunchingWithOptions:) method.
Beacons and Geofences
Call the startMonitoring method to begin monitoring for beacons and geofences. You can do this immediately after initializing the Rover SDK or you may choose to do this at a later time.
Rover.startMonitoring()
When this method is called Rover will invoke the requestAlwaysAuthorization method of CoreLocation. The first time this method is called the operating system will prompt the user to give your app access to their location. This is required in order to detect beacons and geofences.
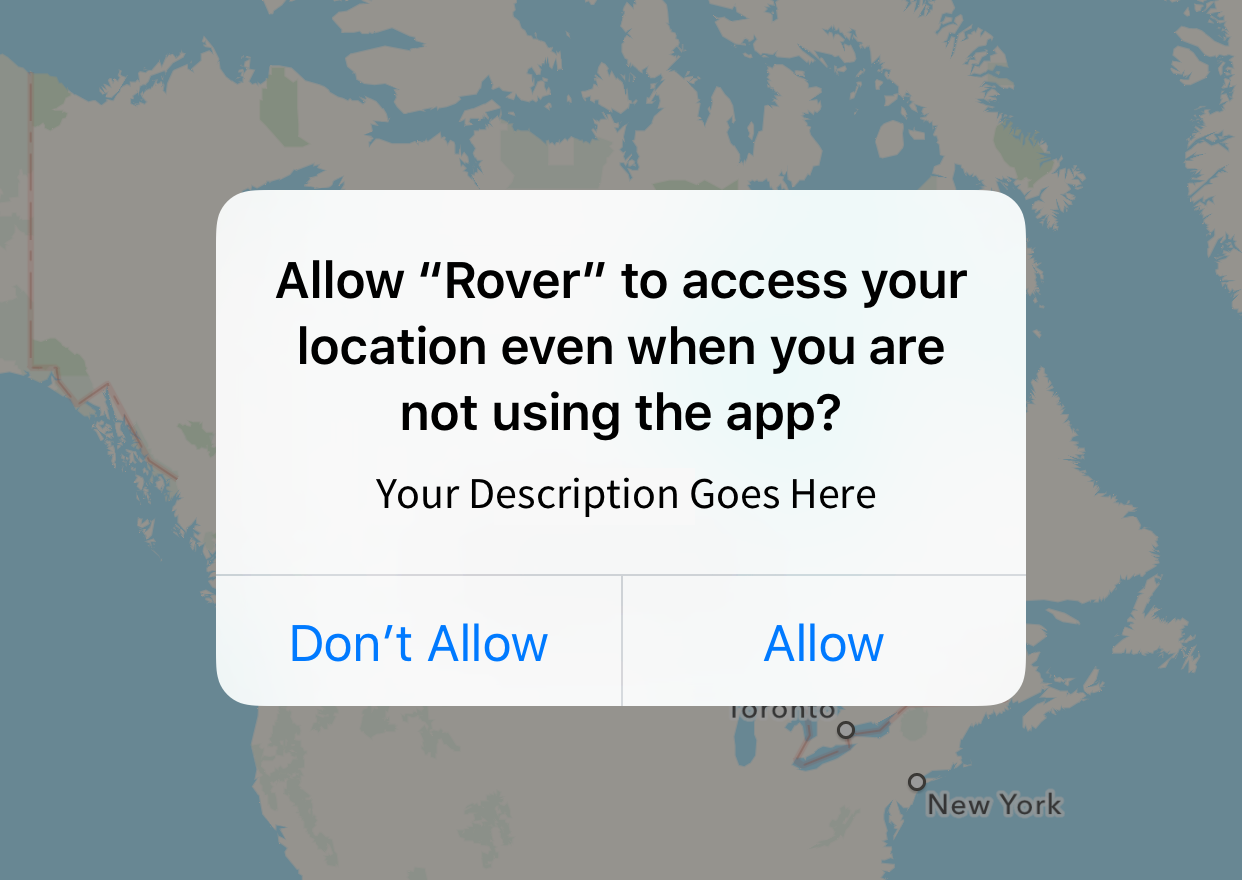
IMPORTANT
The user prompt contains the text from the NSLocationAlwaysUsageDescription key in your app’s Info.plist file, and the presence of that key is required when calling this method. If you don’t set this key, the prompt will not be displayed and your app will not be granted access to your users’ location.
<key>NSLocationAlwaysUsageDescription</key>
<string>Your Description Goes Here</string>
Controlling The Prompt
Often you will want more control over when your users are presented with the location permission prompt. For example, you may wish to display a screen explaining all the benefits of allowing your app to track their location. In this case you can delay the startMonitoring call until you are ready for the prompt to be displayed.
You can also call the requestAlwaysAuthorization method yourself. If the user has given permission prior to the Rover.startMonitoring call the prompt will not be displayed again.
requestAlwaysAuthorization vs requestWhenInUseAuthorization
Detecting beacons and geofences while your app is in the background requires requestAlwaysAuthorization. If your app has previously been granted requestWhenInUseAuthorization you will need to guide your users to your apps settings page where they can select the Always permission under location access.
Proximity Events
Rover uses the observer pattern to notify the developer of proximity events. The Rover.addObserver(_:) method accepts a object that conforms to the RoverObserver protocol as its argument. Any object in your application that conforms to this protocal can observe proximity events.
Here’s an example of a UIViewController that adds itself as an observer and implements proximity callbacks.
class ViewController: UIViewController, RoverObserver {
  override func viewDidLoad() {
    super.viewDidLoad()

    Rover.addObserver(self)
  }

  deinit {
    Rover.removeObserver(self)
  }

  // MARK: RoverObserver

  func didEnterBeaconRegion(config config: BeaconConfiguration, place: Place?) {

  }

  func didExitBeaconRegion(config config: BeaconConfiguration, place: Place?) {

  }

  func didEnterGeofence(place place: Place) {

  }

  func didExitGeofence(place place: Place) {

  }
}
IMPORTANT Notice that the example removes itself as an observer in the deinit method. This is required in order for the class to properly deallocate itself. Any call to Rover.addObserver(_:) must be balanced with a corresponding call to Rover.removeObserver(_:).
Beacons and Places
Using the Rover Proximity App you can add beacons and places you would like the Rover SDK to monitor for. When Rover detects that the user has entered or exited a beacon or place the appropriate observer method will be called with the corresponding BeaconConfiguration and/or Place objects.
You can use these observer callbacks in your app to (for example) adapt your app’s user interface when the user is in a specific place.
Messages
Using the Rover Messages App you can create messages that are delivered to your users when a proximity event is triggered or on a specific date and time. You can attach push notifications to your messages that will be delivered along with your messages. Additionally you can attach content to your messages. The content can be a landing page authored in the Rover Messages App or it can simply link to a website. A message can also trigger functionality within your app through a deep link and can have custom data attached.
Notifications
In order to have notification working, Rover needs your apps APNS certificates. Use this guide to upload your certificate to Rover.
Obtaining a Push Token
Call the Rover.registerForNotifications method to enable your app to deliver notifications. Similar to the Rover.startMonitoring method this will also trigger an alert asking for permission the first time it is called. You can call this as part of your initialization logic or you may wish to call this at a later time.
Rover.registerForNotifications()
After the alert is displayed and the user accepts notifications, your AppDelegate will receive a call to the application(_:didRegisterForRemoteNotificationsWithDeviceToken:) method. Implement this method and pass the device token to Rover:
func application(_ application: UIApplication, didRegisterForRemoteNotificationsWithDeviceToken deviceToken: Data) {
	Rover.didRegisterForRemoteNotification(deviceToken: deviceToken)
}
Responding to Notification Swipes/Taps
iOS 10 introduced the UserNotifications framework which simplifies the way notification swipes and taps are handled in your app. Because this is not available to users of your app that are not yet running iOS 10, we have to handle notifications in two separate ways.
At the top of your AppDelegate import the UserNotifications framework:
import UserNotifications
Extend your AppDelegate to implement the UNUserNotificationCenterDelegate protocol:
extension AppDelegate: UNUserNotificationCenterDelegate {

    func userNotificationCenter(_ center: UNUserNotificationCenter, didReceive response: UNNotificationResponse, withCompletionHandler completionHandler: @escaping () -> Void) {
        if let message = Rover.decodeMessage(fromNotification: response.notification) {
            Rover.readMessage(message)
            Rover.followAction(message: message)
        }
	completionHandler()
    }
}
The above method is called when the user swipes a notification from the lock screen or taps a notification from another screen. This default behaviour immediately marks a message as read and opens the message (displays the Experience or Landing Page). You can customize this method’s behaviour to suit your needs.
In order to tell Rover that you will handle notification behaviour through the UserNotification framework (for users running iOS 10) you must extend your AppDelegate to implement the RoverObserver protocol and implement the shouldOpenMessage(_:) method:
extension AppDelegate: RoverObserver {

    func shouldOpenMessage(_ message: Message) -> Bool {
        if #available(iOS 10.0, *) {
            return false
        }

        return true
    }
}
In your application(_:didFinishLaunchingWithOptions:) method you need to set your AppDelegate to the delegate property of the shared UNUserNotificationCenter object:
if #available(iOS 10.0, *) {
	UNUserNotificationCenter.current().delegate = self
}
Also in your application(_:didFinishLaunchingWithOptions:) method you need to add your AppDelegate as a RoverObserver:
Rover.addObserver(self)
That takes care of iOS 10. For users running less than 10 there is one more step. Prior to iOS 10 swipes and taps were handled through the following methods called on your AppDelegate. For iOS 10 we’ll be handling the swipes/taps through the UserNotifications framework outlined above so a conditional check is needed:
func application(_ application: UIApplication, didReceiveRemoteNotification userInfo: [AnyHashable : Any]) {
	if #available(iOS 10.0, *) {
		return
	}

	let _ = Rover.didReceiveRemoteNotification(userInfo, fetchCompletionHandler: nil)
}

func application(_ application: UIApplication, didReceiveRemoteNotification userInfo: [AnyHashable : Any], fetchCompletionHandler completionHandler: @escaping (UIBackgroundFetchResult) -> Void) {
	if #available(iOS 10.0, *) {
		return
	}

	let _ = Rover.didReceiveRemoteNotification(userInfo, fetchCompletionHandler: completionHandler)
}
Message Observers
NOTE: The following methods are only useful for users running iOS 9. For users using iOS 10 and above you can customize the behaviour in the implementation of your UNUserNotificationCenterDelegate.
Rover implements callbacks you can implement in your RoverObservers to handle the receiving and opening of messages.
Receiving Messages
Messages are delivered from the Rover server to your app. A message is received by your app if it is delivered while your app is in the foreground or if your app opens as a result of the user swiping a message’s notification. This functionality mirrors the behaviour of the UIApplicationDidReceiveRemoteNotification method.
In both of these cases the didReceiveMessage callback will be invoked on your Rover observers.
didReceiveMessage(message: Message)
Opening Messages
After a message is received the Rover SDK can automatically open the message. The behaviour for opening a message depends on the content type of the message. Landing pages and websites will be presented modally in a special view controller that includes a close button to automatically dismiss itself. Messages with a content type of deep link will call the UIApplication.openURL method. Messages with a content type of custom will not trigger any behaviour. For all messages, regardless of content type, the act of opening the message will track a event on the Rover cloud.
Before Rover opens the message it will call the shouldOpenMessage callback on your observers. If all of your observers return true, Rover will open the message. If one or more of your observers return false, Rover will not open the message. If none of your observers implement this method Rover will determine whether the message should be opened. The default behaviour is to open the message only if the message was received from a notification swipe and not if the message was recieved while your app is in the foreground.
shouldOpenMessage(message: Message) -> Bool
Customizing the Default Behaviour
In some cases you may want to handle opening messages yourself. To do this you should implement the shouldOpenMessage method in one of your observers and return false. You should also implement the didReceiveMessage method and implement your custom behaviour.
shouldOpenMessage(message: Message) {
  return false
}

didReceiveMessage(message: Message) {
  // Implement custom behaviour
}
Checking for Swipes
Your custom implementation will likely differ depending on whether the message was received while your app is in the foreground or as a result of the user swiping the message’s notification. The following example shows how you can make this distinction.
didReceiveMessage(message: Message) {
  if UIApplication.sharedApplication().applicationState == .Active {
    // Message received will app is in the foreground
  } else {
    // Message received as a result of swiping the notification
  }
}
The Screen View Controller
If the message contains a landing page you probably want to instantiate a view controller for it. The landingPage property of a Message object is of type Screen. You can use the Rover.viewController method which takes a Message object and returns a ScreenViewController.
didReceiveMessage(message: Message) {
  if message.action == .LandingPage {
    let screenViewController = Rover.viewController(message: message) as? RVScreenViewController
  }
}
There is a little magic happening behind the scenes that makes this method especially valuable.
Often you will have a Message object with its content type set to .LandingPage but the message.landingPage property is null. This is because the SDK has received the message but has not yet loaded the landing page. A typical landing page amounts for 5-6 Kb and is loaded on demand to optimize bandwidth effeciency.
The Rover.viewController method accepts a Message object and returns a ScreenViewController that knows how to load its contents.
The Experience View Controller
Much like the ScreenViewController, the ExperienceViewController is used for messages containing an experience. You may continue using the Rover.viewController method for these messages with the one caveat that ExperienceViewControllers are a subclass of UINavigationController and therefore must always be presented modally.
You can also launch an experience using it’s identifier. To do so simply instantiate an ExperienceViewController using its designated initializer passing in the experience id.
let viewController = ExperienceViewController(identifier: "123456789")
present(viewController, animated: true, completion: nil)
The Modal View Controller
Rover provides another view controller called ModalViewController which is useful for opening messages. The ModalViewController wraps another view controller, adding a titlebar with a close button that will automatically dismiss itself. This can be useful when presenting a landing page or website after the user swipes a message’s notification.
didReceiveMessage(message: Message) {
  if message.action == .Website {
    let url = message.url
    let safariViewController = SFSafariViewController(URL: url)
    let modalViewController = ModalViewController(safariViewController)
    this.presentViewController(modalViewController, true)
  }
}
Accessing Custom Properties
Messages authored in the Rover Messages App can have custom properties attached to them. You can access those properties on the message object in the didReceiveMessage method.
didReceiveMessage(message: Message) {
  // message.properties
}
Inbox
Most applications provide means for users to recall messages. You can use the didDeliverMessage(_:) callback on a RoverObserver to map and add Rover messages to your application’s inbox as they are delivered. You may also rely solely on Rover for a simple implementation of such inbox if your application doesn’t already have one:
Rover.reloadInbox { messages in
  // store messages array in memory
  // reload tableview
}
Note that the reloadInbox method will only return messages that have been marked to be saved in the Rover Messages app.
See the InboxViewController for a quick implementation of both strategies.
Tracking Message Open Events
The Rover SDK will automatically track message open events on notificaiton swipes. However if you have implemented an Inbox style view controller where users can relaunch message content, you will need to user the following method to accurately track message open events.
Rover.trackMessageOpenEvent(message: Message)
Customer Identity
By default the Rover platform will assign a unique identifier to each customer who installs your application. However you may choose to assign your own identifiers. This is particularly useful for mapping data from the Rover Analytics app or if a customer is using your application on multiple platforms. To accomodate this Rover saves customer info to device storage so that it persists across sessions. The following snippet demonstrates assigning your own customer identifier:
let customer = Rover.customer
customer.identifier = "1234abcdef"
customer.save()
Traits API
Version 1.5.0 of the Rover SDK added a new method of identifying the current user. The Rover.identify(traits:) method accepts a Traits object to set the properties on the customer. In addition to setting the customer properties, the Rover.identify method will also trigger a device-update event to ensure the customer properties are persisted to the server immediately.
The Traits object can be accessed like a dictionary or using convenience methods.
// Dictionary

Rover.identify(traits: [
    "identifier": "marieavgeropoulos",
    "first-name": "Maire",
    "last-name": "Avgeropoulos",
    "email": "marie.avgeropoulos@example.com",
    "gender": Traits.Gender.female,
    "age": 30,
    "phone-number": "555-555-5555",
    "tags": ["actress"],
    "foo": "bar"
])

// Convenience methods

var traits = Traits()
traits.set(identifier: "marieavgeropoulos")
traits.set(firstName: "Marie")
traits.set(lastName: "Avgeropoulos")
traits.set(email: "marie.avgeropoulos@example.com")
traits.set(gender: .female)
traits.set(age: 30)
traits.set(phoneNumber: "555-555-5555")
traits.set(tags: ["actress", "model"])
traits.set(customValue: "bar", forKey: "foo")

Rover.identify(traits: traits)
Additionaly there is a Rover.clearCustomer method which clears all customer properties and issues a device-update event to ensure the current user is immediately returned to an anonymous state.
Universal Links
Version 1.6.0 of the Rover SDK added support for Universal Links. Every Rover Experience has a URL associated with it that can be obtained through the Experiences browser app. These URLs will launch a web-based version of the Experience in the browser. You can optionally associate Rover Experience URLs with your app and have those URLs launch your app directly instead of opening the URL in the browser. For more details on how Univeral Links work see Apple’s documentation.
Site Association
Every Rover account has a unique domain associated with it that is used for Experience URLs. E.g. my-awesome-app.rvr.co. For Universal Links to work you must establish a relationship between your app and your Rover domain. This is done in two parts:
- A site association file must be available at your Rover domain that renders a JSON object describing the types of URLs your app responds to.
- You must add an entitlement to your app that specifies that your app can open URLs associated with your Rover domain.
Rover will automatically generate a site association file for you based on credentials entered in the Rover Settings app. Setting up your site association file is described on our wiki. You should make sure this is configured properly before continuing.
The process for adding an associated domains entitlement is described in Preparing Your App to Handle Universal Links on Apple’s Developer portal. You’ll need to add your Rover domain to the list of associated domains in the entitlement. You can find your Rover domain by checking any of your Experience URLs.
For example, given the Experience URL https://my-awesome-app.rvr.co/lNTwfg you would need to add applinks:my-awesome-app.rvr.co to your list of associated domains.
Handling Universal Links
In order for your app to respond to Rover Experience URLs you need to adopt the following UIApplicationDelegate methods and pass the UserActivity or URL to the corresponding Rover method.
func application(_ application: UIApplication, continue userActivity: NSUserActivity, restorationHandler: @escaping ([Any]?) -> Void) -> Bool {
    return Rover.continueUserActivity(userActivity)
}

func application(_ application: UIApplication, open url: URL, sourceApplication: String?, annotation: Any) -> Bool {
    return Rover.open(url: url)
}

func application(_ app: UIApplication, open url: URL, options: [UIApplicationOpenURLOptionsKey : Any] = [:]) -> Bool {
    return Rover.open(url: url)
}
With this in place Rover can automatically launch your app and render an experience directly from a URL.