Installation and Initialization
The Rover SDK is a collection of Cocoa Touch Frameworks written in Swift. Instead of a single monolithic framework, the Rover SDK takes a modular approach, allowing you to include only the functionality relevant to your application. The SDK is 100% open-source and available on GitHub.
Install the SDK
The recommended way to install the Rover SDK is via Cocoapods.
The Rover Podspec breaks each of the Rover frameworks out into a separate Subspec.
The simplest approach is to specify Rover as a dependency of your app’s target which will add the core modules–Experiences, Notifications, Location and Debug–to your project.
target 'MyAppTarget' do
  pod 'Rover', '~> 2.3.0'
end
If you don’t want to include all the core modules or you want to include any of the other modules (e.g. Bluetooth or Ticketmaster) you will need to specify the set of subspecs explicitly.
Includes all Rover modules.
target 'MyAppTarget' do
    pod 'Rover/Core',          '~> 2.3.0'
    pod 'Rover/Bluetooth',     '~> 2.3.0'
    pod 'Rover/Ticketmaster'   '~> 2.3.0'
end
Include only Experiences and Location:
target 'MyAppTarget' do
    pod 'Rover/Experiences',   '~> 2.3.0'
    pod 'Rover/Location',      '~> 2.3.0'
end
There are various reasons why you may not want to include all the Rover frameworks in your project. For example, you may wish to omit the RoverBluetooth module to avoid your application having a dependency on CoreBluetooth.
Each of the modules—including their dependent system frameworks— is described in the Modules section.
Cocoapods will compile all the subspecs you’ve included into a single framework named RoverKit. This means anywhere you want to use functionality from the Rover SDK you only need a single important statement, regardless of the module the functionality is defined in.
import RoverKit
Carthage
CocoaPods is the simplest approach to installing the Rover SDK but you can also use Carthage.
Add the following entry to your Cartfile:
github "RoverPlatform/rover-ios" ~> 2.3.0
When you run carthage update it will compile all the Rover modules into individual frameworks and place them in your Carthage/Build directory but you do not have to add them all to your project. You can still select the specific frameworks that are relevant to your application and add them to your project via the standard Carthage procedure.
Because Carthage compiles individual frameworks you need to import the proper Rover module depending on the functionality you need. For example, to access the Rover NotificationHandler you need to import RoverNotifications.
An example of importing all Rover modules would look like the following:
import RoverFoundation
import RoverData
import RoverUI
import RoverExperiences
import RoverNotifications
import RoverLocation
import RoverDebug
Initialization
The shared Rover instance is initialized with a set of assemblers. Each assembler has its own parameters but the only one that is required is the accountToken parameter on the DataAssembler.
You can learn more about assemblers and their parameters in the Modules section.
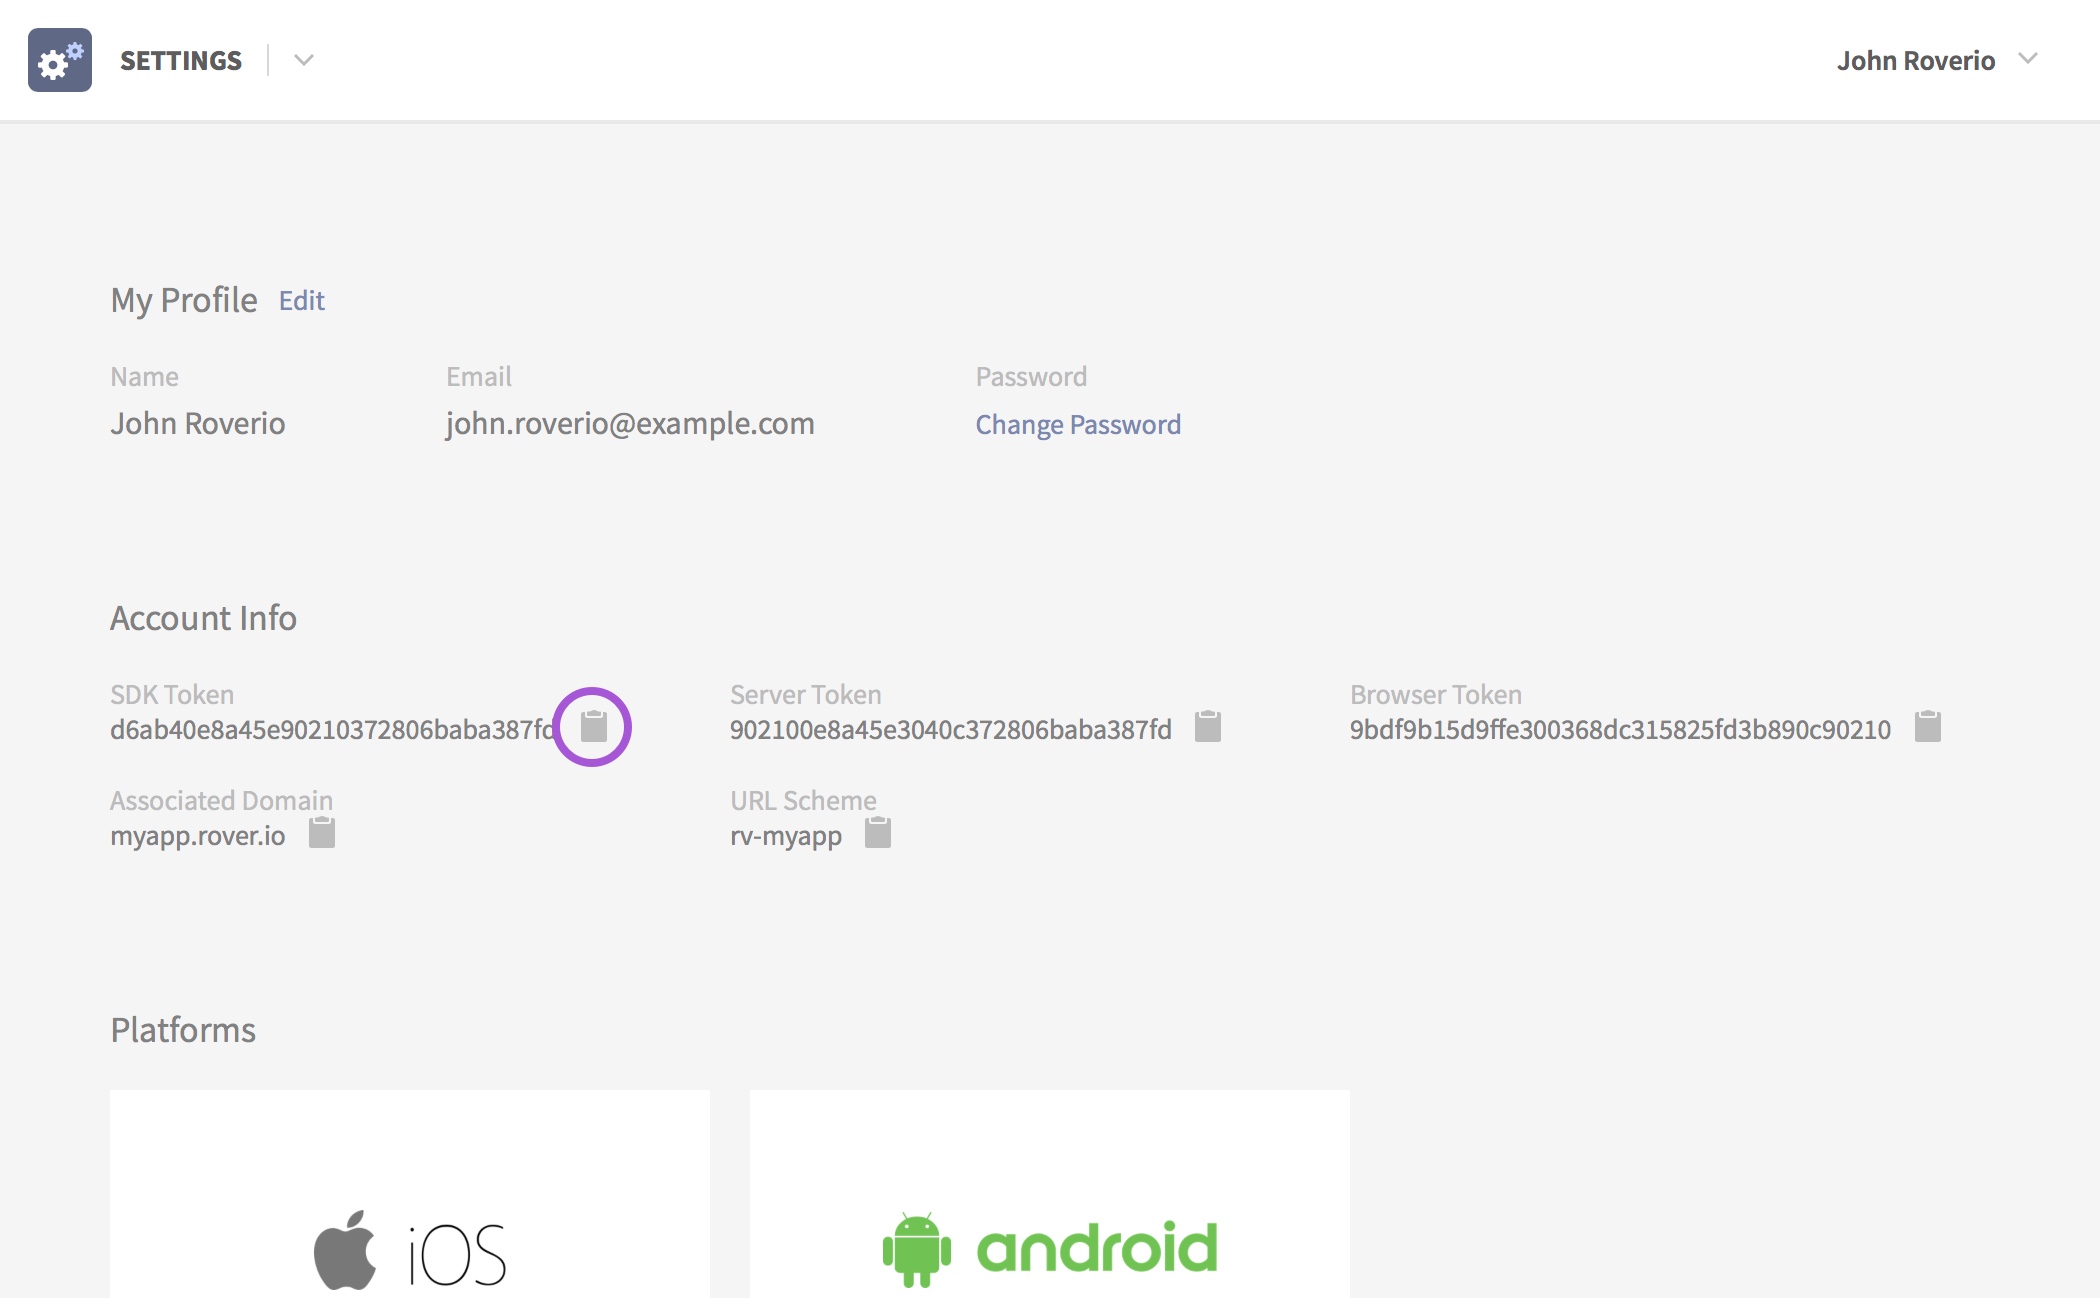
You can find your accountToken token in the Rover Settings app. Find the token labelled “SDK Token” and click the icon next to it to copy it to your clipboard.
From within your application(_:didFinishLaunchingWithOptions:) method call the Rover.initialize(assemblers:) method passing in the assemblers for each of the Rover modules you want to use. Replace YOUR_SDK_TOKEN in the below code sample with the token you copied from the Rover Settings app.
func application(_ application: UIApplication, didFinishLaunchingWithOptions launchOptions: [UIApplication.LaunchOptionsKey: Any]?) -> Bool {
    // ...
    // Initialize Rover with all modules
    Rover.initialize(assemblers: [
        FoundationAssembler(),
        DataAssembler(accountToken: "YOUR_SDK_TOKEN"),
        UIAssembler(),
        ExperiencesAssembler(),
        NotificationsAssembler(),
        LocationAssembler(),
        DebugAssembler()
    ])
    return true
}