Universal Links
Universal Links is a feature of iOS that allows seamless linking of content that can be accessed through both a browser and within your app. Rover supports Universal Links for presenting Experiences.
An example of a universal Experience URL might look like https://myapp.rover.io/my-great-experience
Initialize Rover
Similar to the URL scheme used by Deep Links, each Rover account has a unique domain that is used to construct Rover universal links. You can find the domain assigned to your Rover account in the Rover Settings app next to the URL scheme.
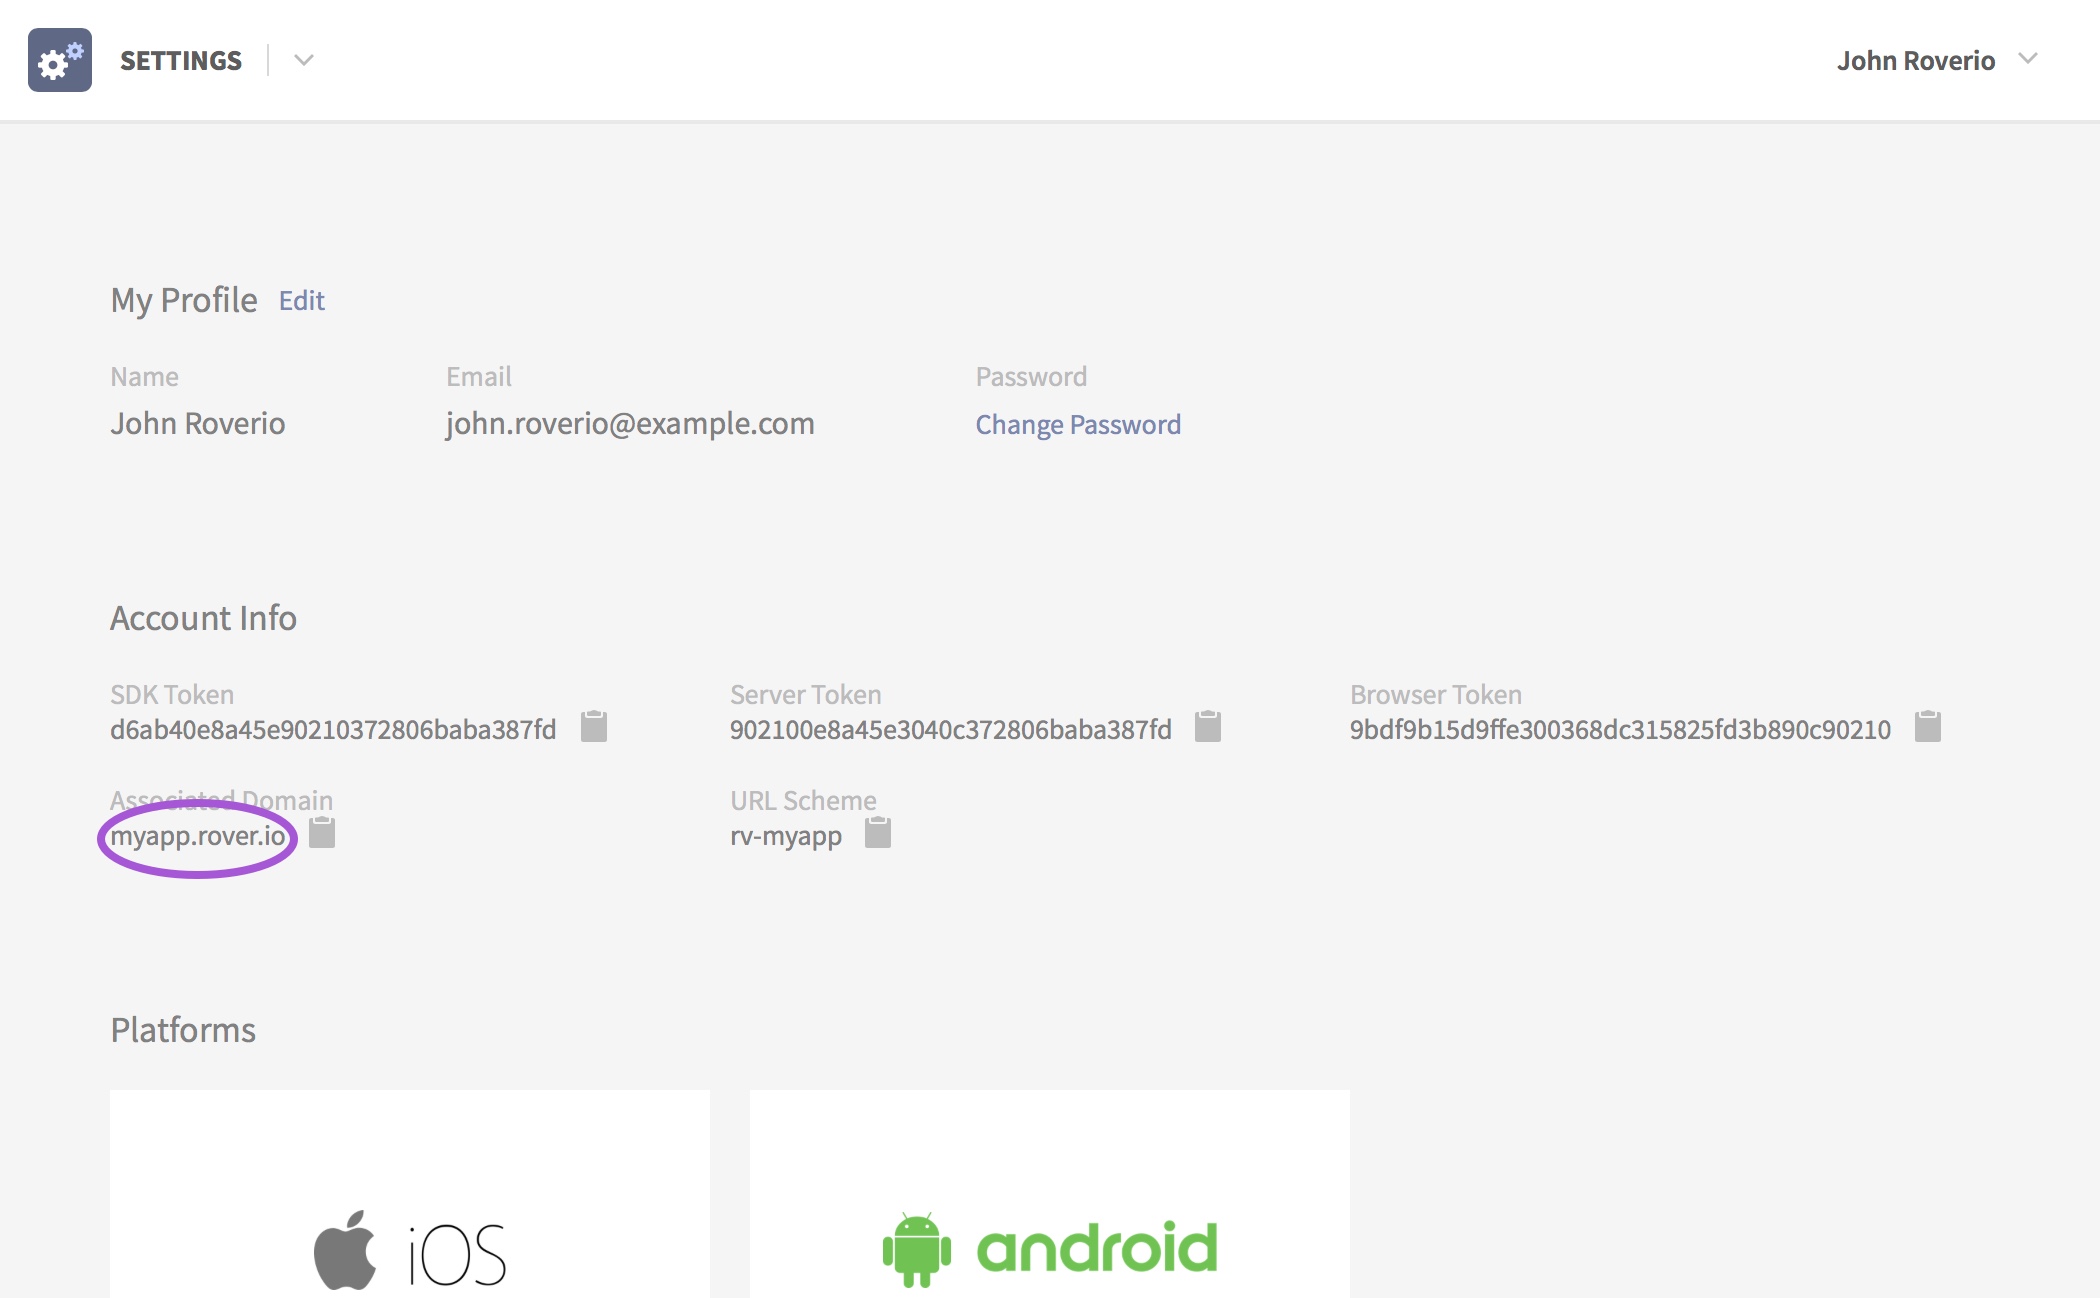
Also similar to Deep Links, the Rover SDK needs to know the domain associated with your account. When you initialize Rover, set the associatedDomains property of the UIAssembler to include the domain found in the Settings app.
Rover.initialize(assemblers: [
    FoundationAssembler(),
    DataAssembler(accountToken: "YOUR_SDK_TOKEN"),
    UIAssembler(associatedDomains: ["myapp.rover.io"], urlSchemes: ["rv-myapp"]),
    ExperiencesAssembler(),
    NotificationsAssembler(),
    LocationAssembler(),
    DebugAssembler()
])
Prepare Your App
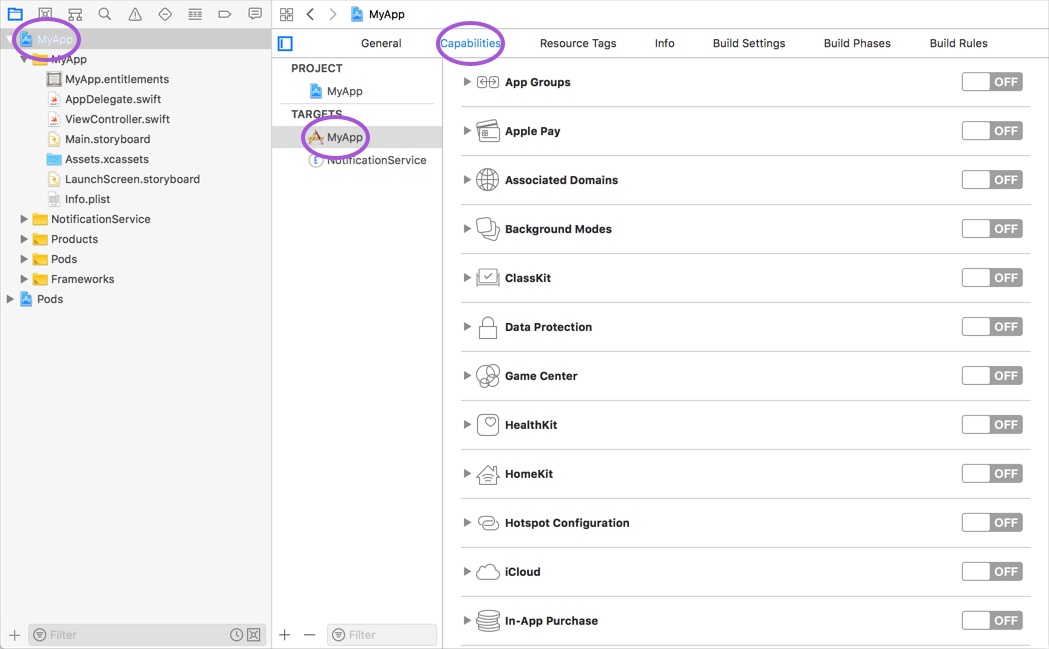
In order for the domain assigned to your Rover account to be associated with your app, you need to add the Associated Domains feature to your App ID and add your Rover domain to the list of associated domains in the entitlement. This can be done directly from within Xcode. Open your Xcode project or workspace and select your app from the Project Navigator. Then select your app’s target and the “Capabilities” tab.
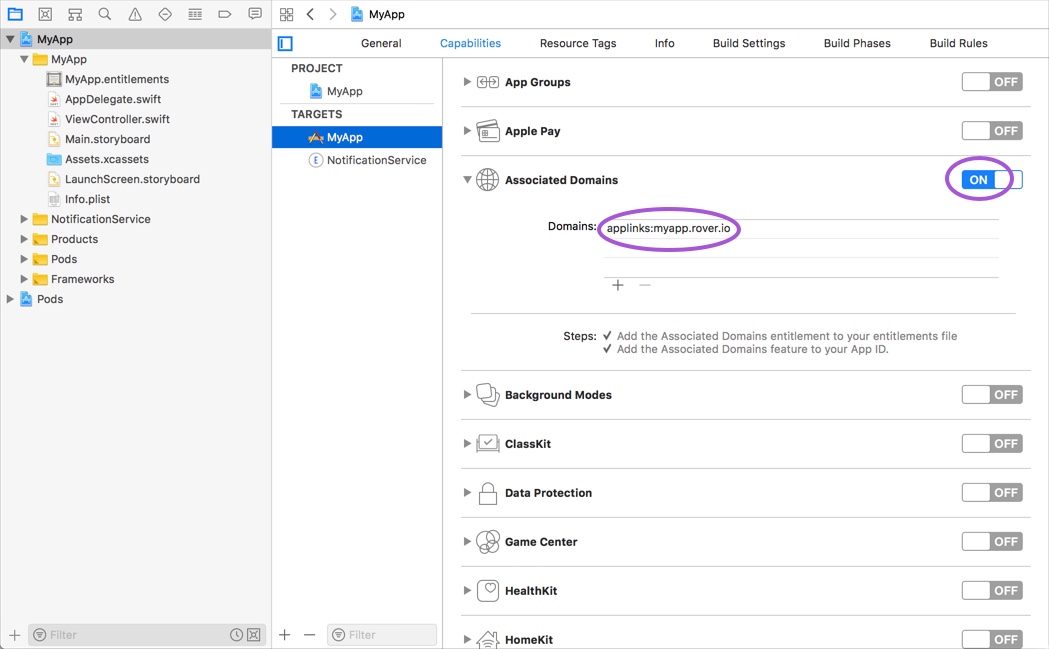
Third from the top you will find the Associated Domains capability. Enable it and add your Rover domain prefixed with applinks: to the list of associated domains.
Site Association
Before iOS will open URLs with an associated domain, it needs to verify permssion from the domain owner. It does by checking for the presence of a special file named apple-app-site-association uploaded to the domain’s web server. Rover will create this file for you and serve it at your associated domain but you need to provide your App ID Prefix and App Store ID which is used in the file’s contents.
To learn more about site association read the Support Universal Links guide on Apple's Developer Center.
App ID Prefix
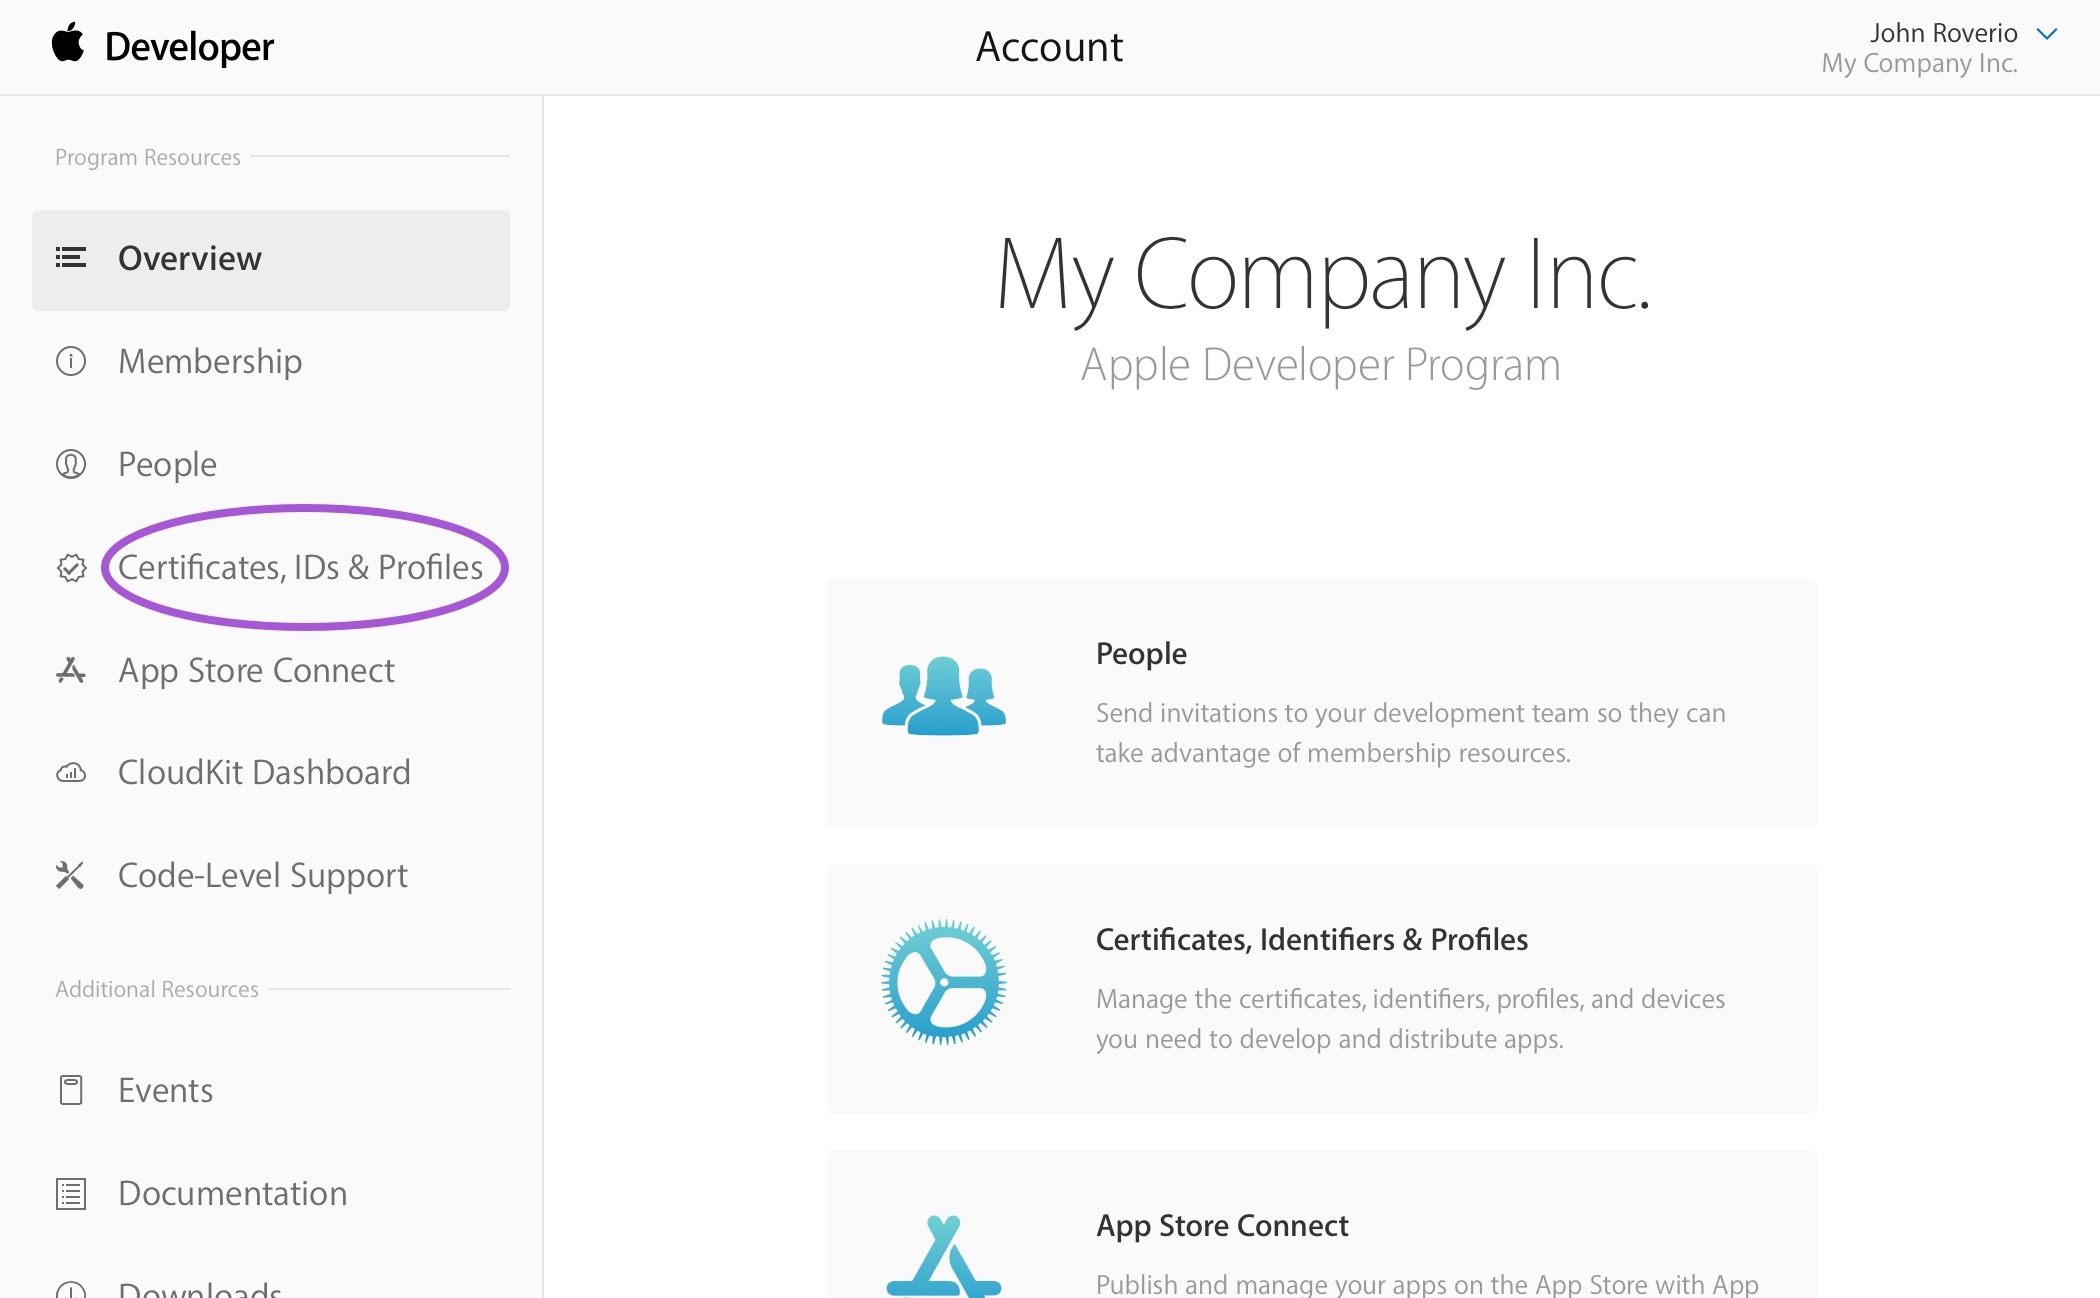
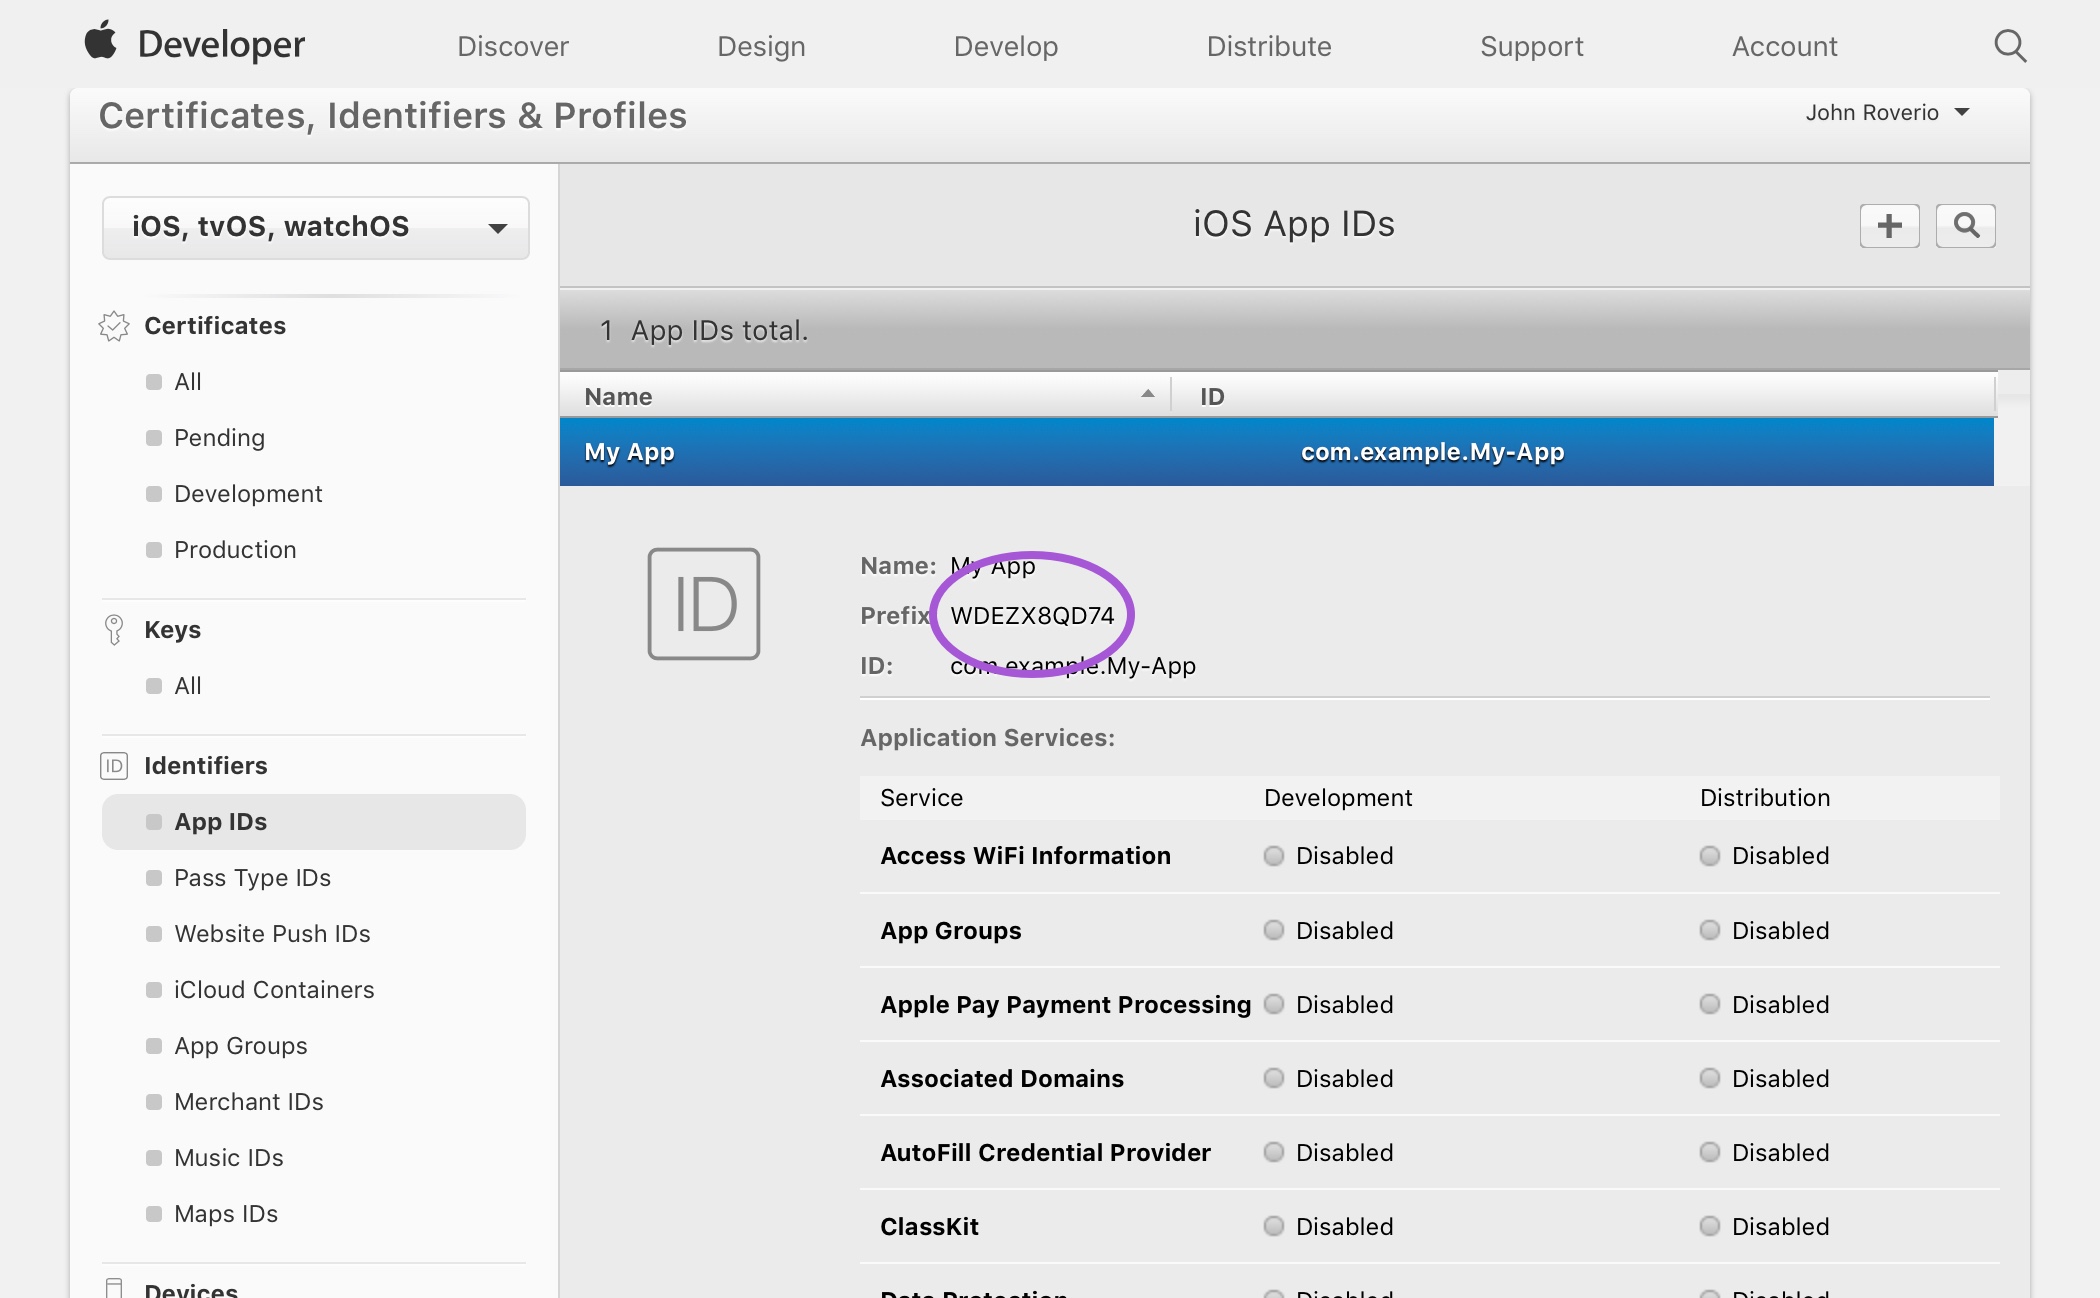
To find your App ID Prefix, sign-in to the Apple Developer Centre and click on “Certificates, Identifiers & Profiles”.
Click on “App IDs” in the sidebar, and find your App ID in the list.

Click on your App ID and you will see a value labelled “Prefix”.
App Store ID
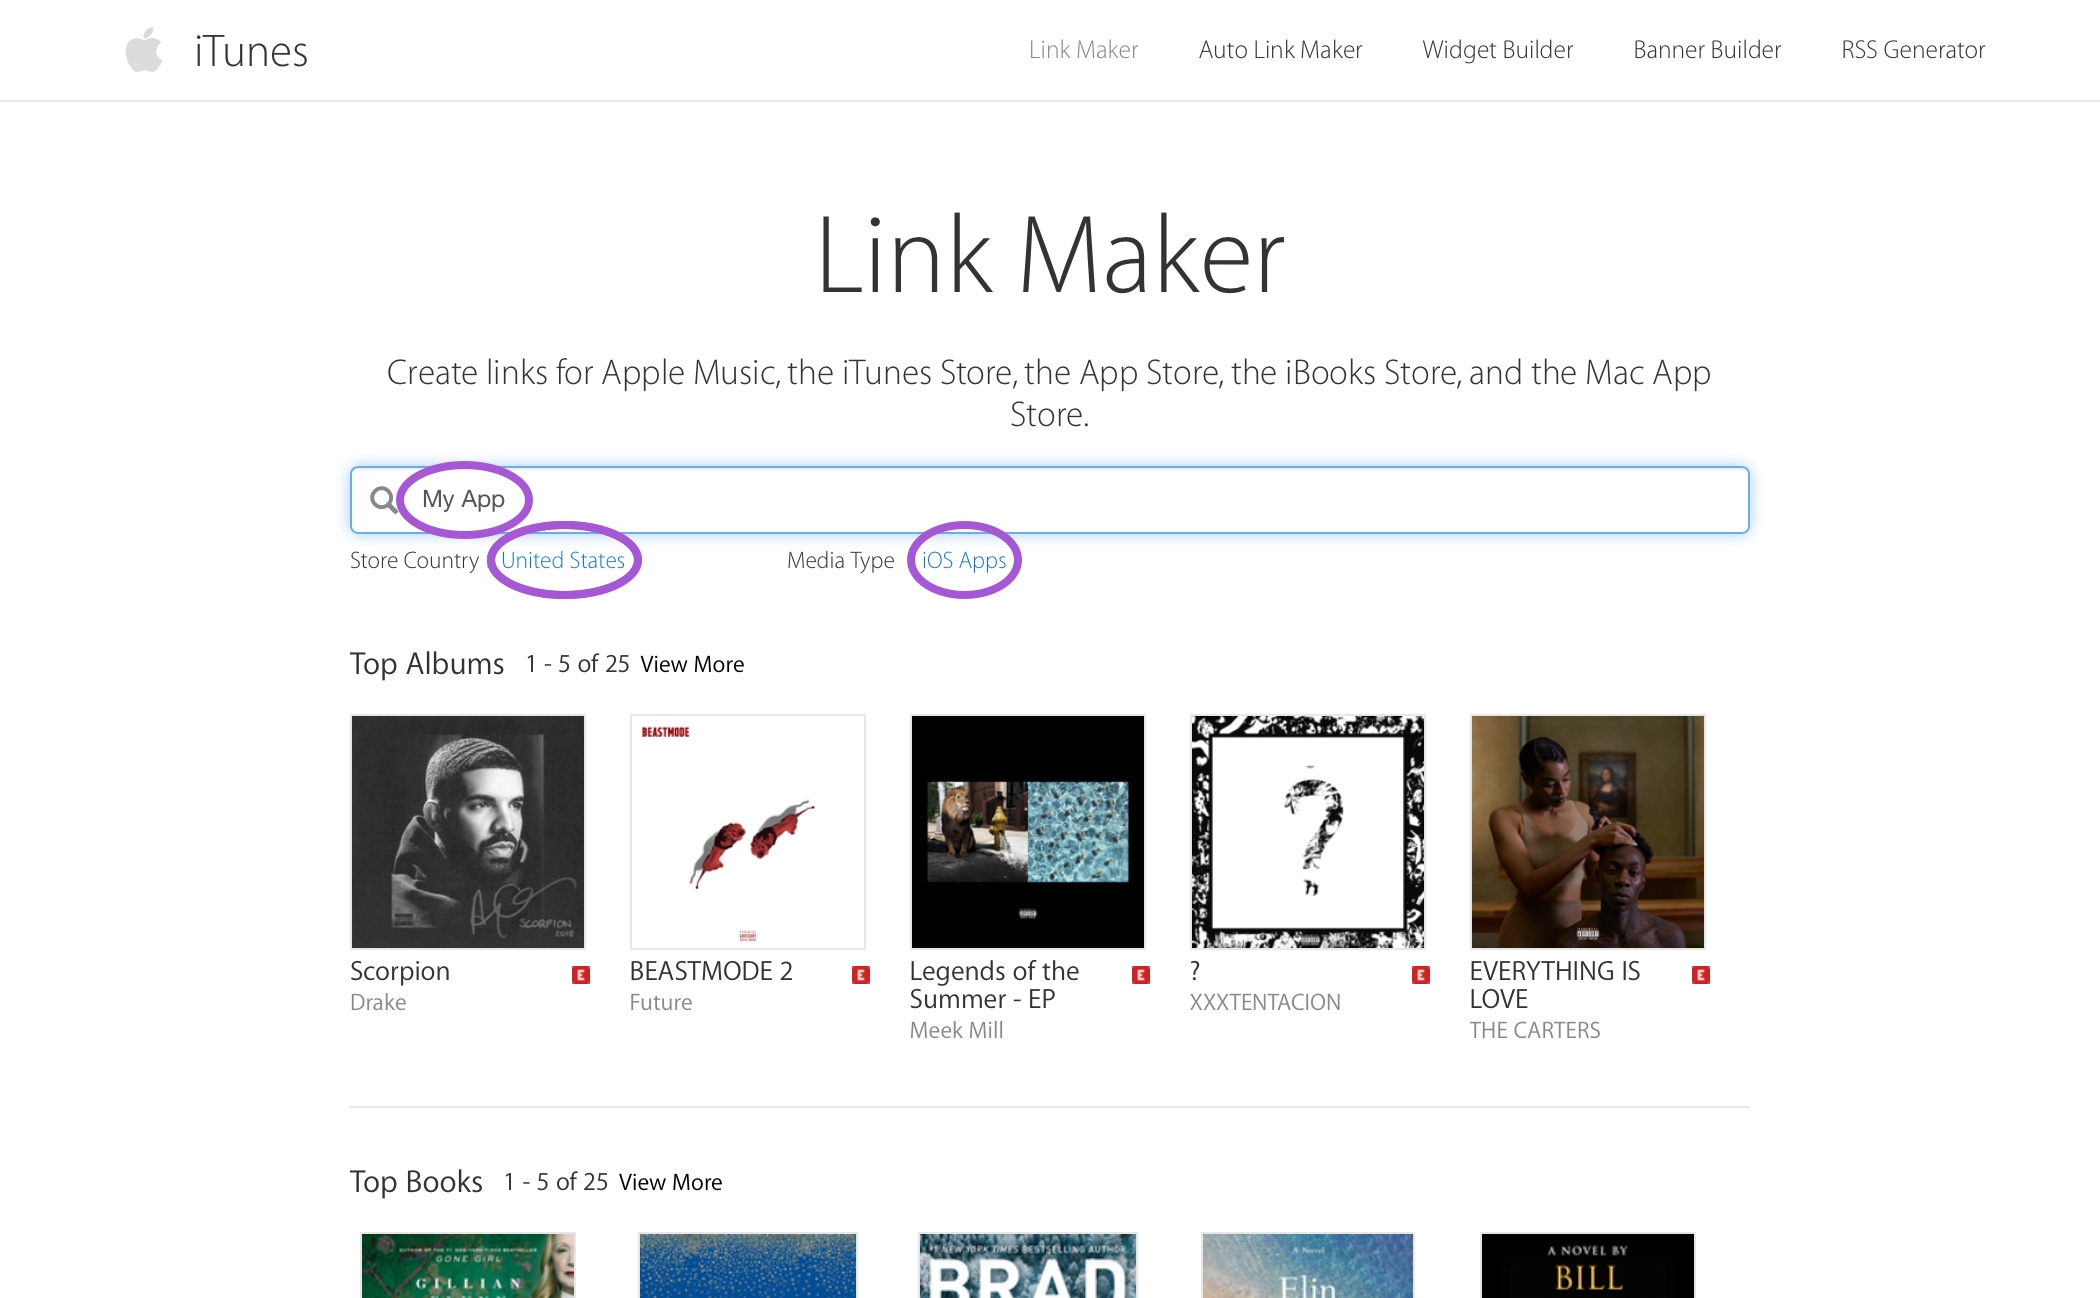
To find your App Store ID visit the iTunes Link Maker. Select the appropriate country and change the media type to “iOS Apps”. Now type the name of your app in the search field and submit.
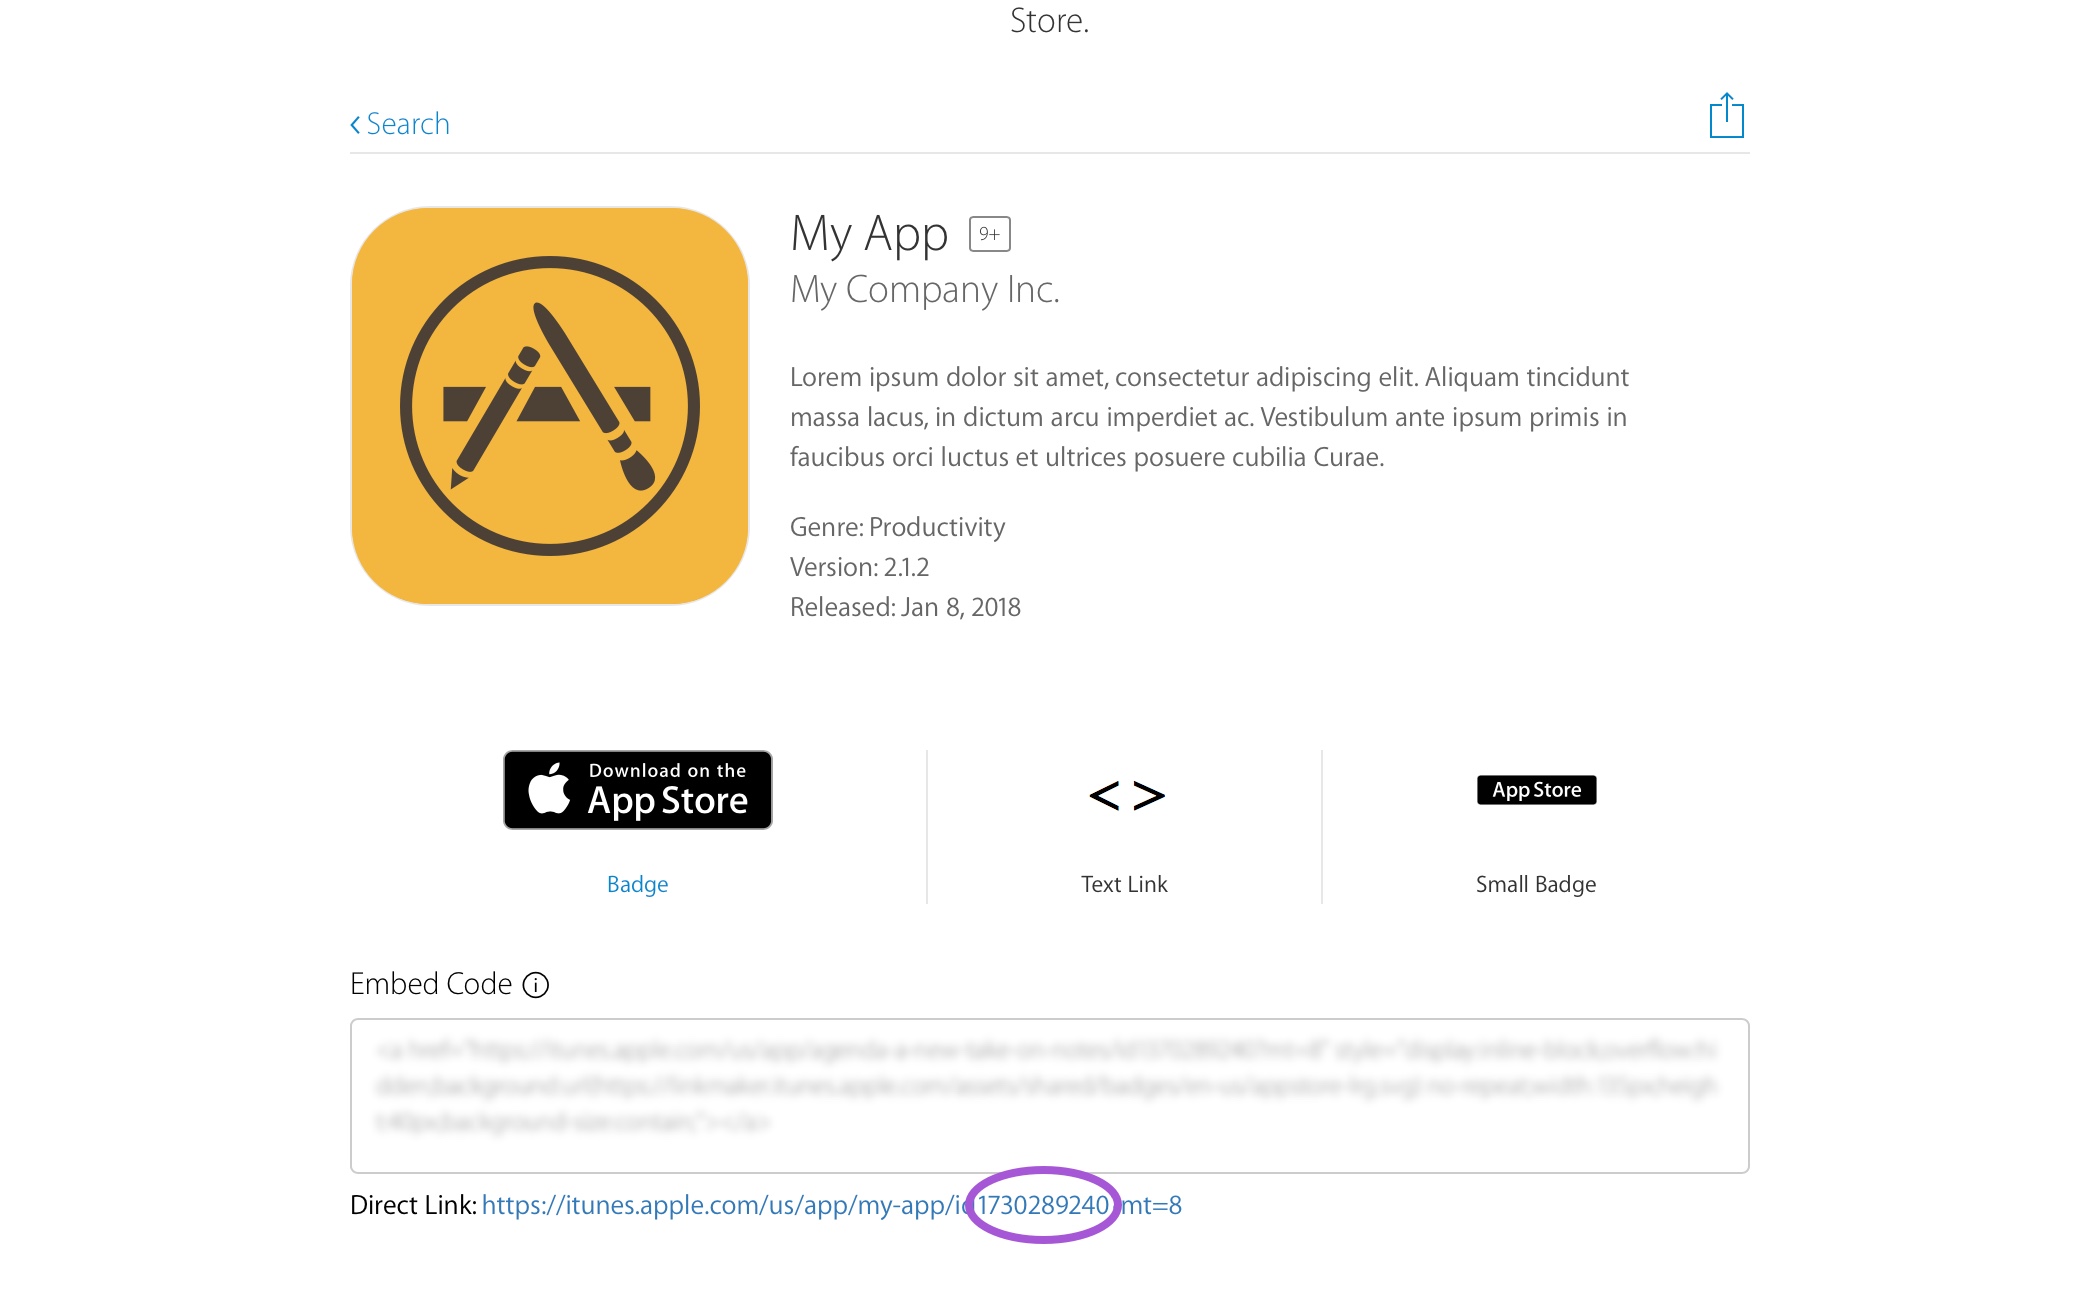
In the results, click on your app and you will see a “Direct Link” on the bottom of the page. Your App Store ID is the nine-digit number in between id and ?mt.
iOS Settings
Visit the iOS Settings page of the Rover Settings app. Beside the “Universal Links” heading, click the plus (+) icon and enter your App ID Prefix and App Store ID.
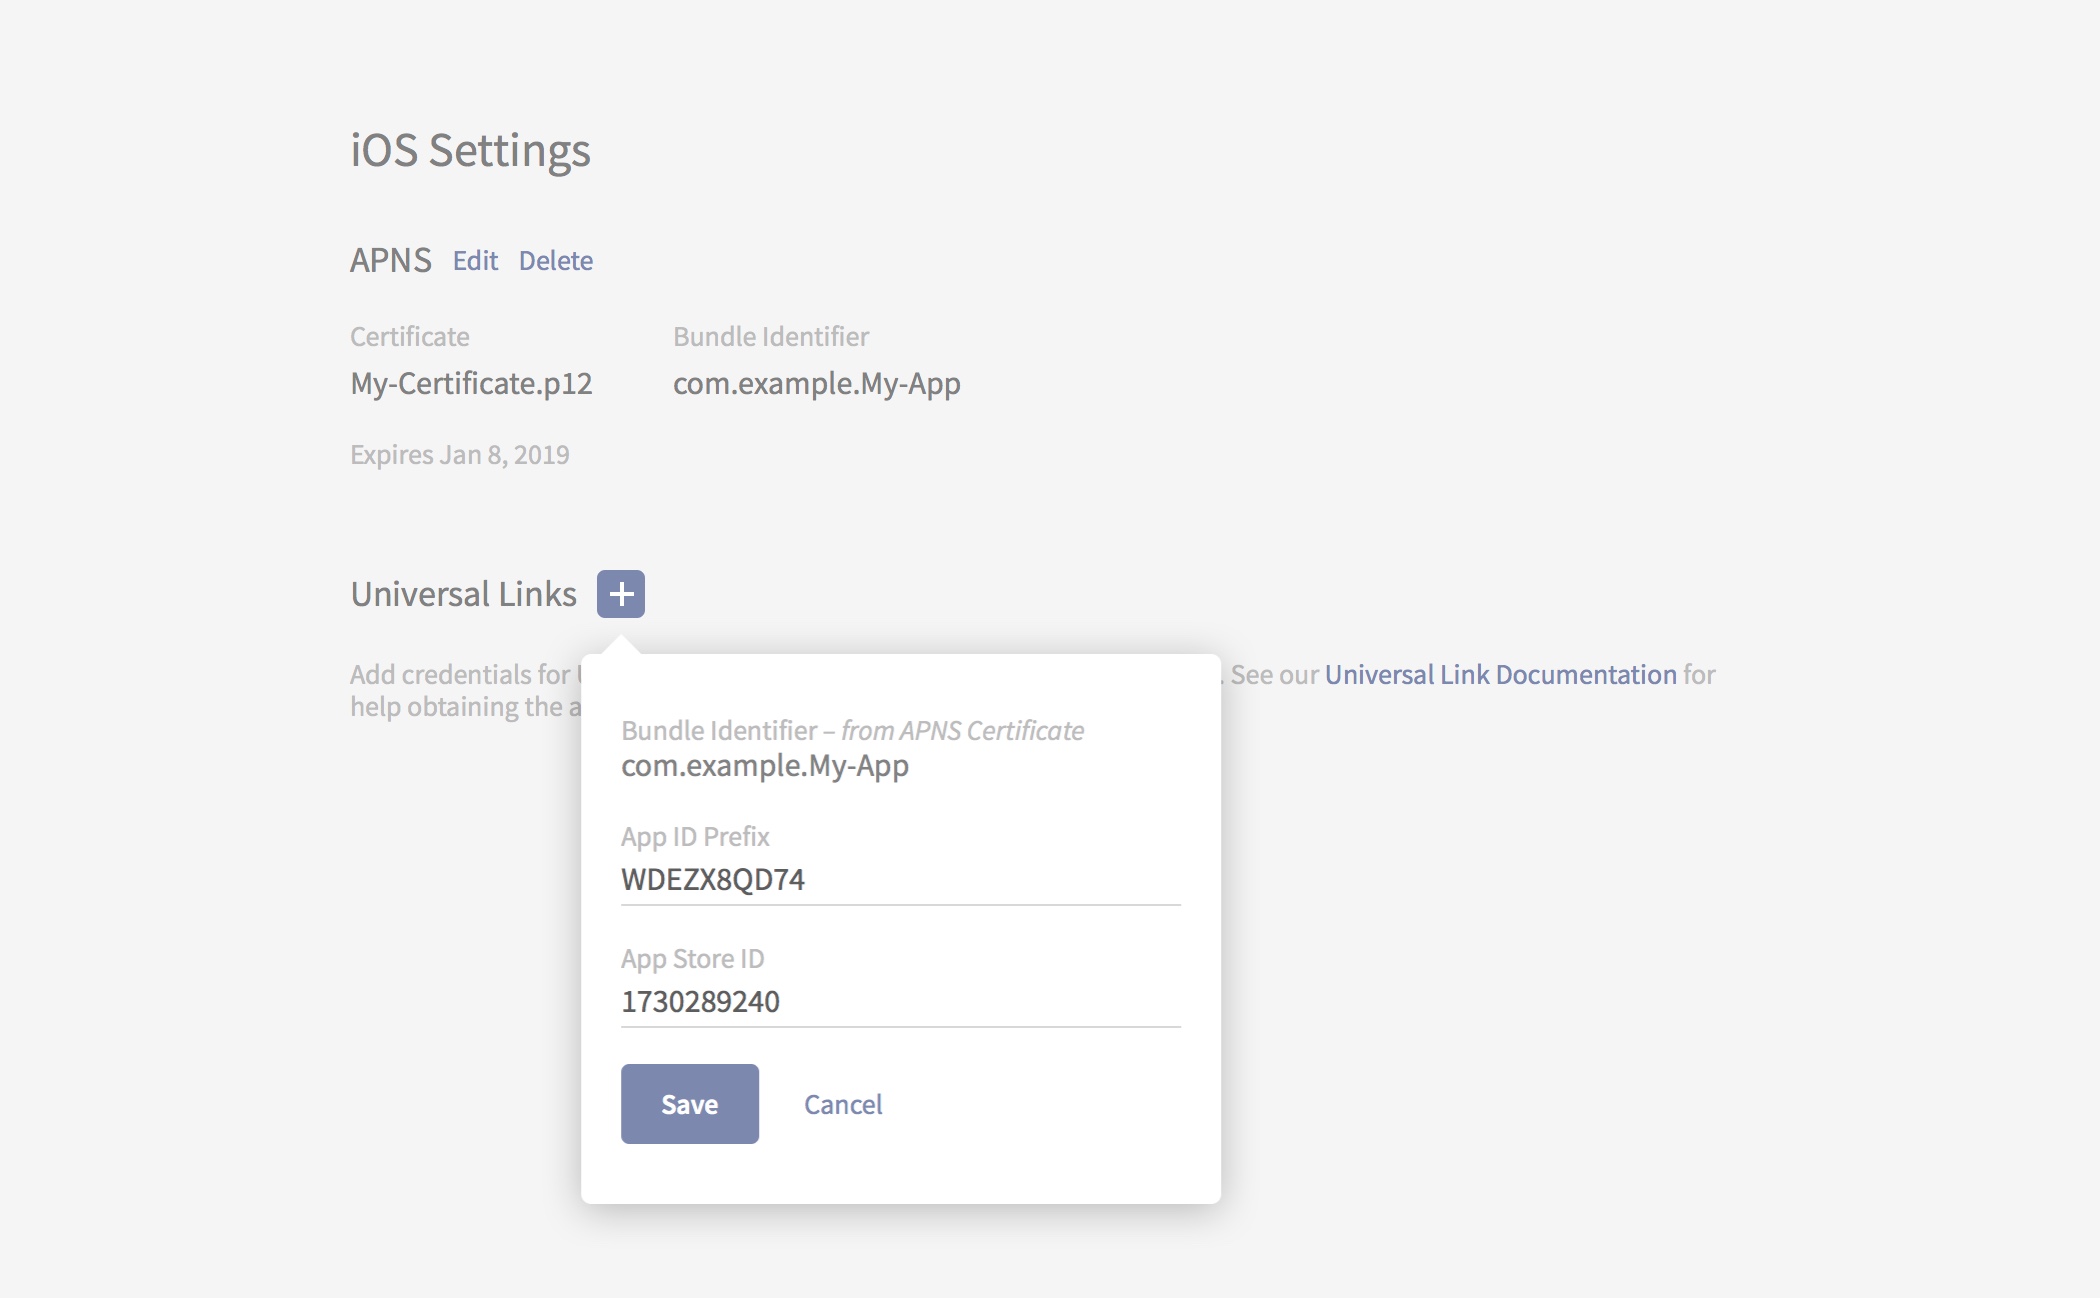
Save the form and verify the apple-app-site-association file is available in the .well-known directory of your Rover associated domain.
Example:
Handling Universal Links
When a user taps a link with a domain that is associated with your app, iOS calls the application(_:continue:restorationHandler:) method. The URL of the link that was tapped is contained within the userActivity argument. Rover’s Router service can handle the userActivity by delegating to the appropriate Rover module. In order to facilitate this, you need to resolve the Router service and call its handle(_:) method from with your app delegate’s application(_:continue:restorationHandler:) method.
func application(_ application: UIApplication, continue userActivity: NSUserActivity, restorationHandler: @escaping ([UIUserActivityRestoring]?) -> Void) -> Bool {
    return Rover.shared?.resolve(Router.self)?.handle(userActivity) ?? false
}
Required Modules
- RoverFoundation
- RoverData
- RoverUI
- RoverExperiences