Introduction
It’s recommended to perform end-to-end testing of your Rover integration after completion of the initial installation and on an ongoing basis after making any changes in your app proximate to Rover.
Rover features two web-based apps that will be used by the marketers and publishers on your team to run their campaigns, namely, the Audience and Campaigns apps. We’ll be using them here to validate that Rover is working properly end-to-end.
Make sure you’ve completed all of the prior steps in the Getting Started guide. Experiences and Location/Proximity are optional.
Inspecting HTTP traffic with Charles
Many steps in the test procedure involve validating that the Rover SDK is successfully communicating with the Rover cloud services as expected and at the right times.
As such we prescribe using the Charles HTTP proxy app, which by standing between your app and the web as an HTTP proxy allows you to inspect HTTP traffic in manner similar to tools like the Network Tab of your favourite browser’s Web Inspector.
Setup
Charles is a paid shareware application, but the trial is suitable for getting started. You can find it at https://www.charlesproxy.com.
For our purposes you do not need to set up Charles as a proxy on your local worksation, so when it prompts you to automatically do so at first run you do not need to agree.
Allow Charles in Your App’s Network Security Config
As an extra security fesature by default Android will ensure your app will not use any user-configured SSL Certificate Authorities for its outgoing HTTPS connections. To use Charles with your app, for Rover or otherwise, it’s necessary to deactivate this feature, even in your production builds because it is often prudent or necessary to perform QA using production builds.
Create the following XML resource at main/res/xml/network_security_config.xml:
<network-security-config>
    <base-config>
       <trust-anchors>
           <!-- Trust user-installed CAs in addition to system ones -->
           <certificates src="user" />
           <certificates src="system"/>
       </trust-anchors>
   </base-config>
</network-security-config>
This allows user-added CAs while the app has been built in any flavour.
Add then add the following XML attribute to the <application> element of your
app manifest.
android:networkSecurityConfig="@xml/network_security_config"
See the Android Documentation’s Network Security Configuration guide for greater details.
Set up Proxy on Device
Ensure your device is on the same network, or can otherwise reach the machine running Charles. Once it is running, determine the local IP address of your workstation.
Then, enter your device’s Settings, select “Wi-Fi”, long press on the entry for your local Wi-Fi in the list, expand the “Advanced Options” area (or equivalent on your manufacturer’s flavour of Android) and select “Manual” for “Proxy Settings”.
Then, enter your workstation’s local IP and the port 8888, which is what
Charles listens on by default.
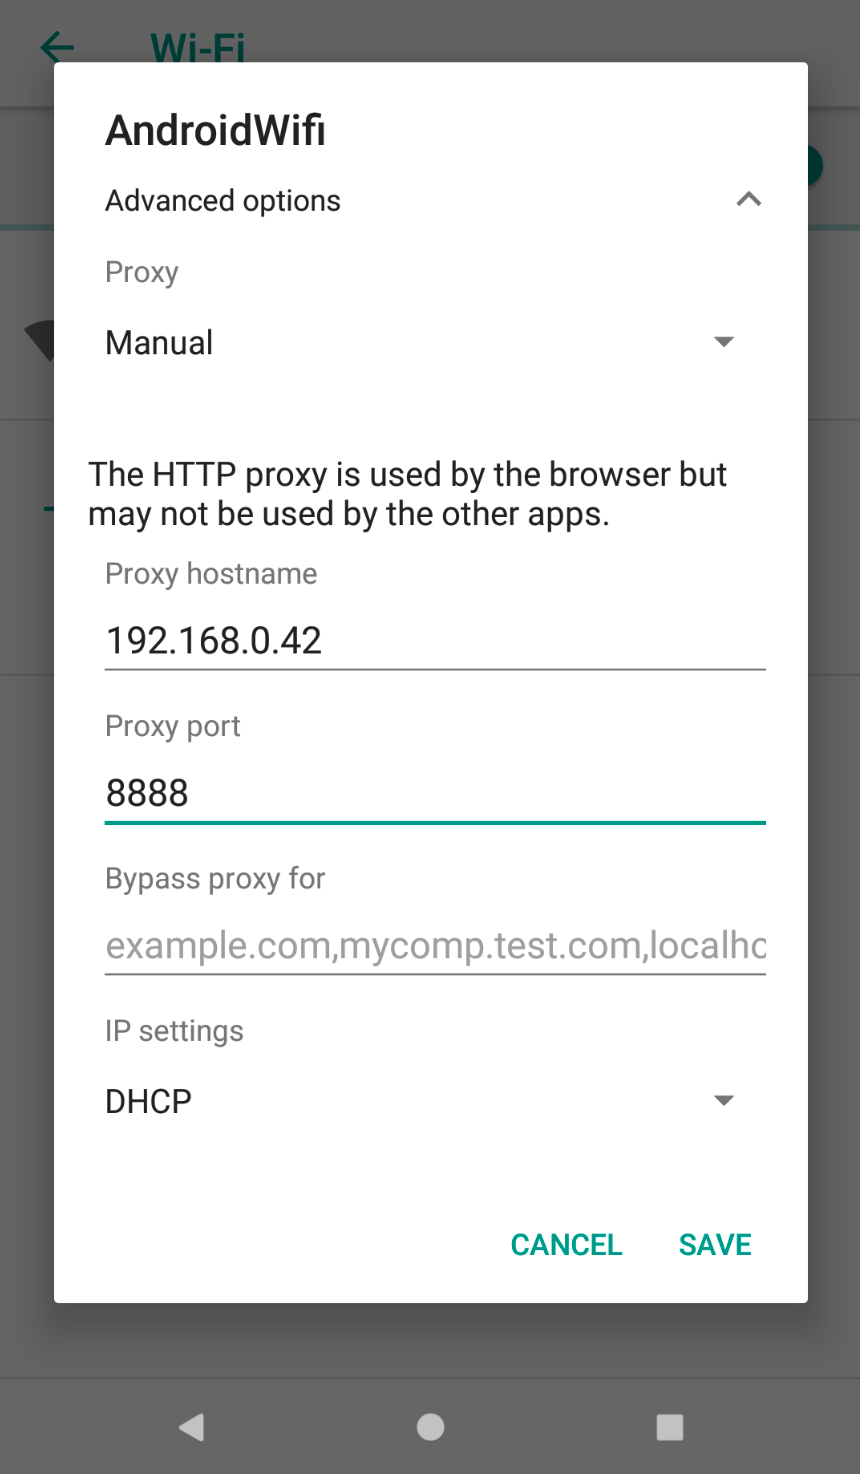
Charles will prompt you to allow connections coming from the device on the first connect request made by anything running on the device.
Trust Charles CA on Device
Then, the next step is to configure HTTPS proxying such that Charles will be appear to peer into the otherwise encrypted conversation the Rover SDK will have with the Rover web API.
Visit http://chls.pro/ssl on the device. You will be
prompted to install a Certificate Authority.
After doing so, you will need to explicitly mark it as trusted in your Trust Settings.
Navigate back to Settings, select “General”, select “About”, and select “Certificate Trust Settings” all the way down at the bottom. Ensure the switch for your newly installed Charles CA is enabled.
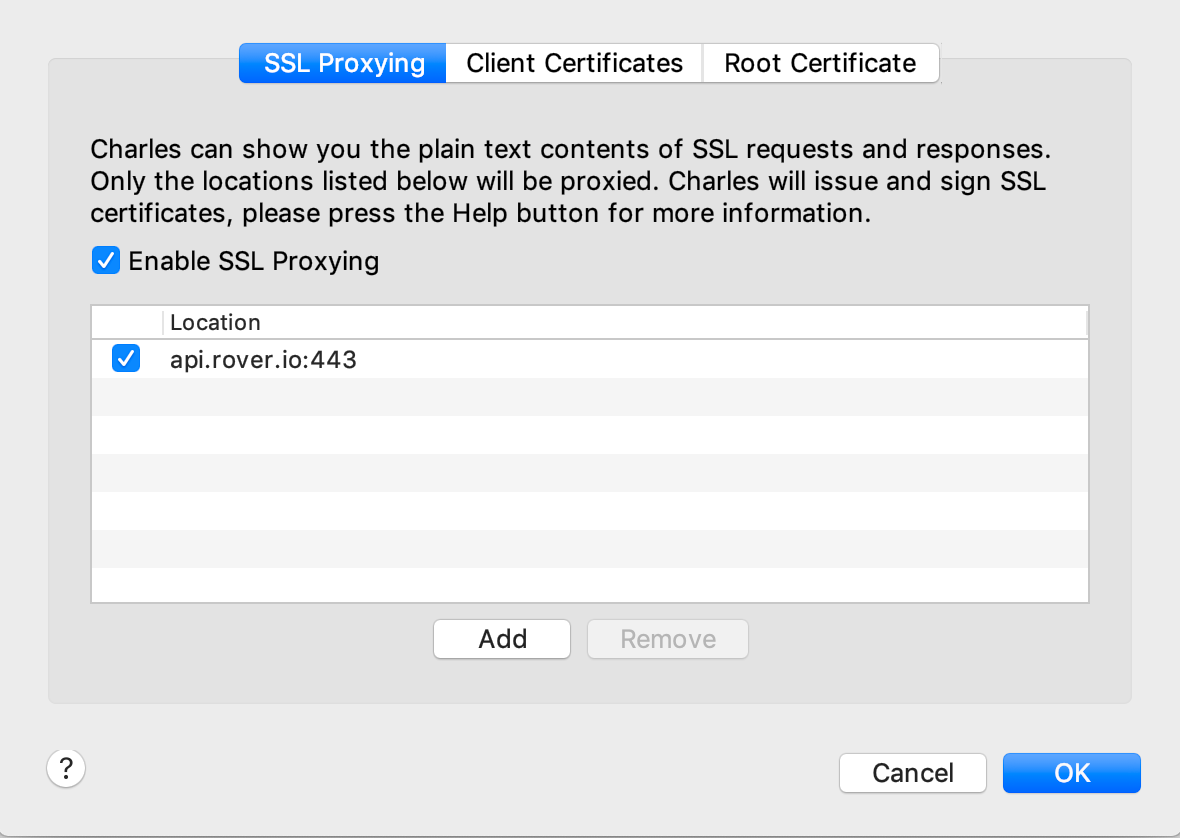
Enable SSL Proxying
Charles injects itself as a man-in-the-middle only for those HTTPS (SSL/TLS) connections that you configure it to do so for.
In Charles, under the Proxy menu, select “SSL Proxying Settings”. Add
api.rover.io with port 443 in Charles.
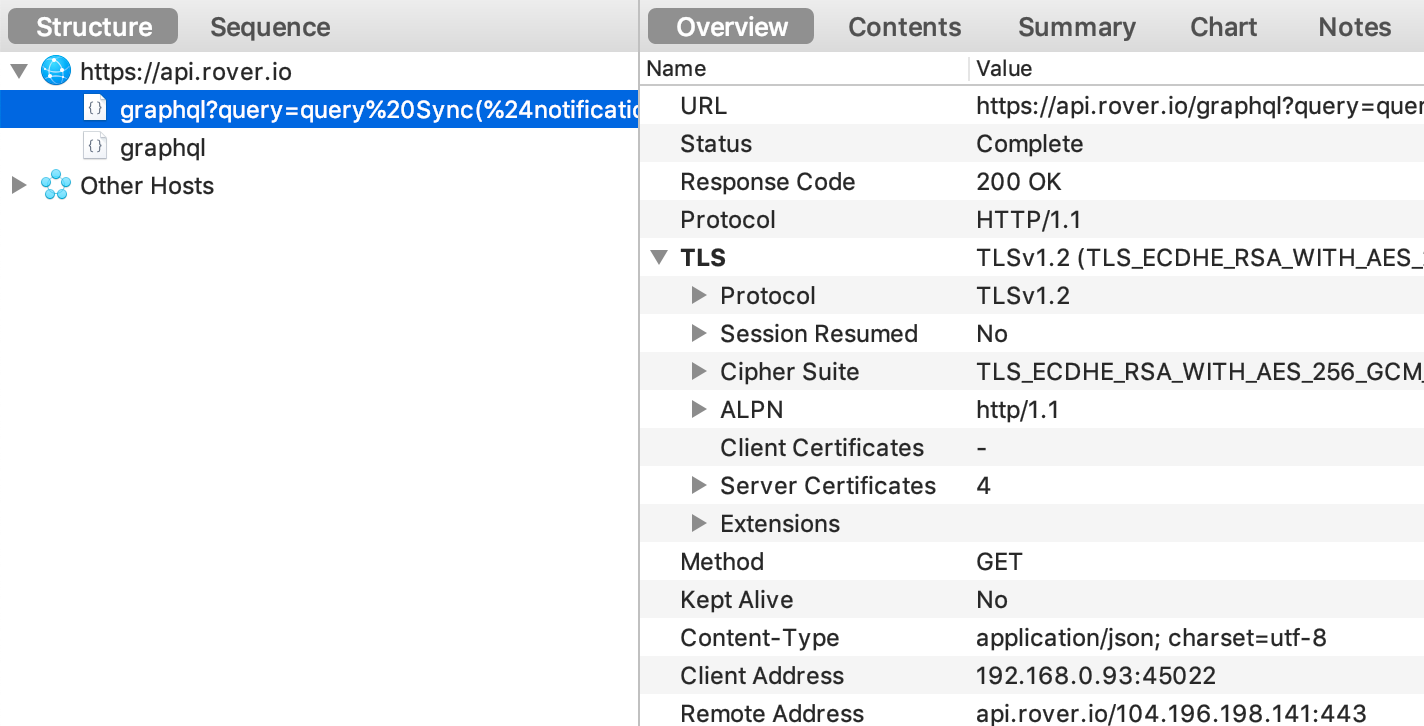
See Traffic Flowing
Launch your app on the test device, and you should presently see a request to the Rover API get captured:
Test Push with Rover Campaigns
Much of the Rover SDK’s user-facing behaviour is mostly triggered by pushes powered through Rover Campaigns.
Thus, to execute the test steps associated with Push Notifications in the test plan, you will need to create and use a test Campaign.
Within the app, visit the settings deep link (rv-my-app://presentSettings, with the appropriate deep link scheme for your app), and turn on the Test Device switch and leave the app.
Visit https://app.rover.io/campaigns on your desktop.
Press “New Campaign”, and select “Scheduled Notification”. Fill out the Notification section, but you may (and it is recommended to) leave the Delivery section blank to avoid sending the Campaign to live devices. Send the push by using the “Send Test” button below. If your device does not appear in the list of test devices, try refreshing the page.